


Revamping Old Garden Pots & Making Your Own DIY Chalk Paint.
I've been sitting on posting these garden pots for a while. I just haven't found the time to sit down to talk about them with you. They are now part of
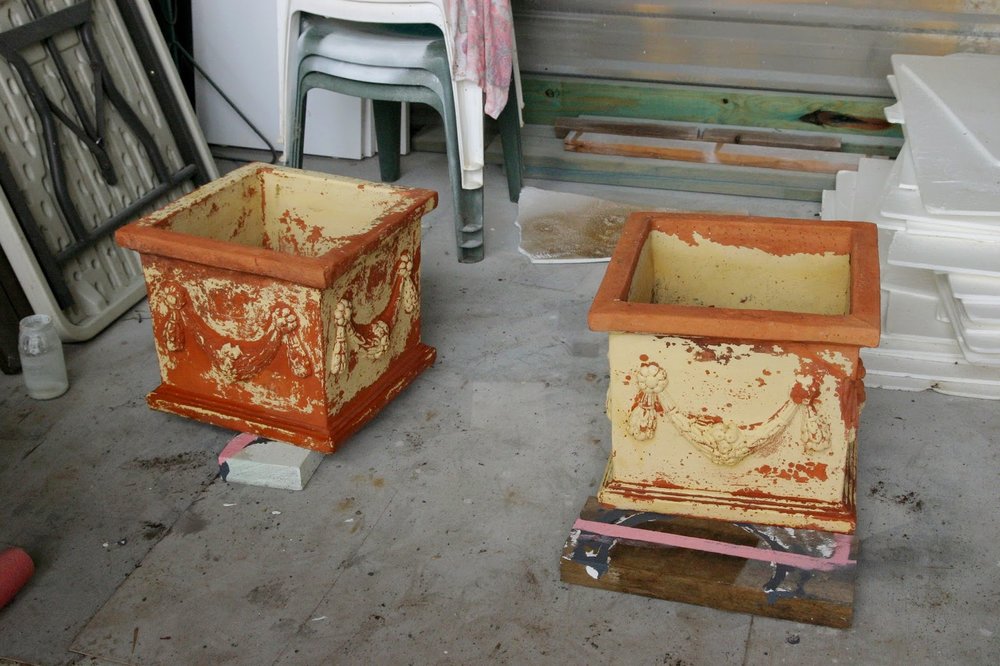
and I really had to share the transformation of them. We had another set of pots we were going to use to flank the entrance of the fire pit area but they just didn't go with the rustic theme we were going for. They were to modern for the space. Thankfully as I was about to paint the other pots hubby brought these babies home from... guess where.... the dump! Yep another man's trash is most definitely another man's treasure in our house. They were a little chipped and battered which made them even more perfect for the space. So they cost us nothing to get and with a $5 pot of sample paint these babies were transformed into something pretty special with minimal effort. Now that is my kind of project. All in all this took me a couple of hours to complete and let dry overnight.
The technique I have used to do these pots up with could be used on any type of unsealed terracotta pot. You just need to make sure the surface is clean and any flaking paint, dirt etc has been thoroughly removed. I gave these pots a thorough clean with a water pressure cleaner. This helped remove the existing flaking paint from the pots and the built up grime and cobwebs that were hiding in the nooks and crannies. I let them dry completely in the sun for an hour or so.
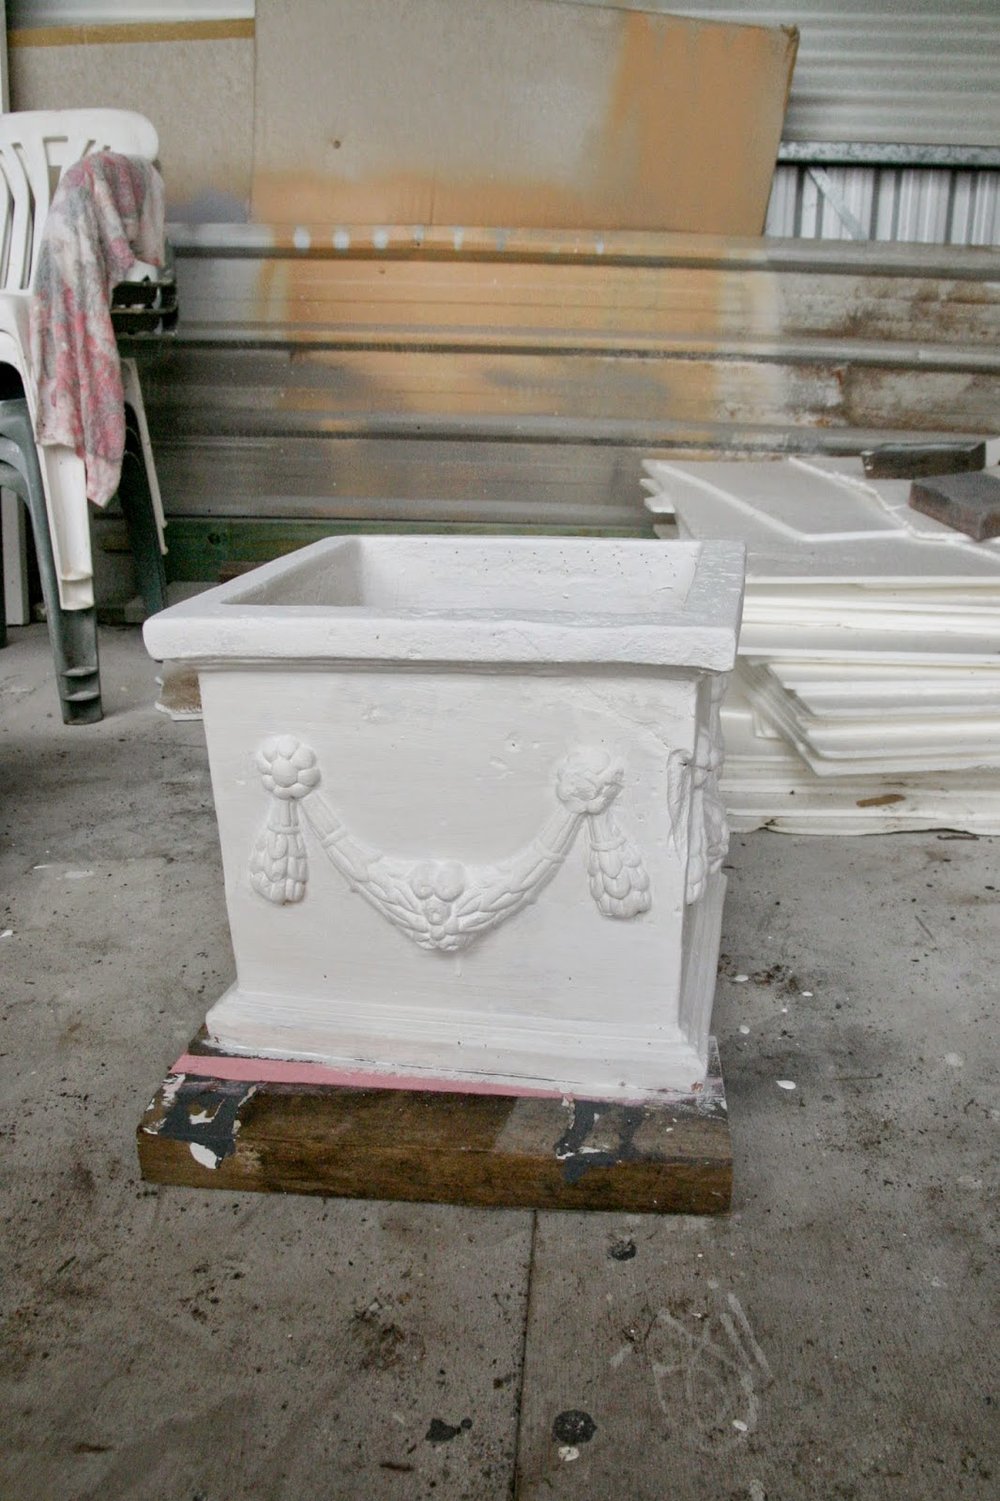
I gave the pots a base coat of a plain white primer to give it a even colour surface to start on. This isn't necessary but I like to start with a plain surface when painting. Now to the exciting bit.... making your own chalk paint. Not chalk board paint but the coveted chalk paint that has been all the rage in the past few years for DIY projects. There are heaps of recipes all over the interweb for making your own chalk paint so I am probably regurgitating one of the many that are out there. I know this one works and it doesn't require heaps of ingredients. Only two are required - paint of your choice (preferable acrylic paint) and
I picked up some calcium carbonate powder off a friend who had a large quantity but it's easily
.
How To Make Your Own Chalk Paint:
To make your own chalk paint you simply mix
1 part calcium carbonate powder
to
2 parts acrylic paint.
There is a technique to mixing the powder and the paint together so that you get all the lumps out. Simply add the powder into a plastic container. Add in a little paint and mix to form a thick paste. Continue to add a little more paint and continue to mix the powder into the paint. Continue this in small increments so that the powder paste is slowly mixed into the paint. Give it a good stir at the end to combine thoroughly.
It will be thicker consistency but should be still pourable however if you find though it is too thick when you are painting your chosen object just add a dash of water to make it a little runnier. I would recommend using a foam roller to apply this but I did use a paint brush on the pots as they are so many crevices to paint. It did leave some slight brush marks on the pots but it gave it more rustic appeal. Apparently this paint should adhere to most surfaces i.e wood, ceramic, glass, metal etc. I have not used it on metal or glass however apparently this is quite possible. Let me know if you do and how it goes.
I did two coats of my homemade chalk paint on the pots to get a good coverage of the grey in all the crevices. I let the paint dry for about an hour or so (it was a hot day) so that it was completely dry before applying the next coat. It does dry a lot quicker than normal acrylic paint so when applying keep that in mind. You mind need to rinse your brush mid way through applying to avoid it caking at the end of your brush. I then let it dry overnight to harden up completely. At this point if you are wanting the shabby look you would give the edges of your piece a light sand with 120 grit sandpaper to create the
you are after.
Alternatively you can use lime powder to age your pots like I used in my post
.
We placed it in our chosen spot in the firepit area and planted up some Japanese Box plants in them. I have vision on making some clipped sphere shapes out of these when they grow a bit bigger. Now I just have to be a little bit patient and wait for them to grow!


