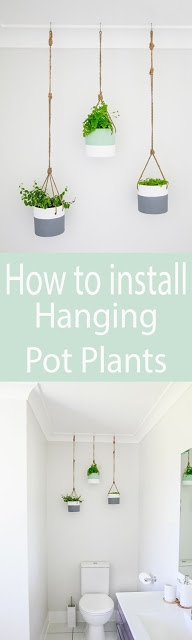
How To Install A Hanging Pot Feature

I have our hanging pot plant tutorial for you today, and I am beyond excited to share this with you. It's been a while coming since I posted our
more than three months ago. If you told me a year ago that I would fall in love with hanging pot plants, I probably would have screwed my nose up at you and thought you a little crazy. I’ve come a long way from letting one innocent indoor plant into my life, and now the obsession is out of control. Can you tell? This is probably the fourth or fifth plant-related project I’ve posted on the blog in the last six months. I just can’t get enough of them. I can’t promise this will be the last one either. I’m in love.
A couple of months ago I showed you my Bathroom transformation post and in it I revealed one of our briefs for the bathroom – A
dd an interesting feature or artwork
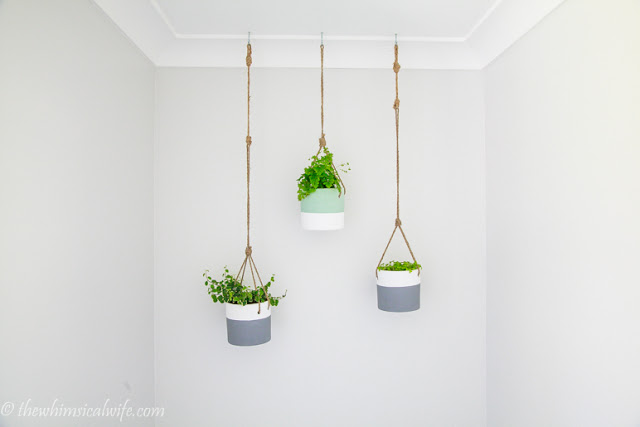
. These hanging pots turned out to be our attractive feature for the bathroom area, and I am oh so in love with them. As I mentioned in the previous bathroom post the area we chose to add the hanging plants to be above the toilet area. This area was tucked away in the corner of the bathroom and was a bare cavern, dark and uninteresting. We brightened the wall colour up with a new lick of Dulux Casper White, and the space was ready for the addition of our unique feature.

I will let you in on a little secret before I go onto how we installed our hanging plant feature. We actually planned to make our own floating timber shelves for the space above the toilet. I had planned and researched the entire shelving project, we went to our local hardware store and bought all the materials required to make them. We cut the pieces out, stained them and let the pieces dry. The staining process didn’t go so well – that was my fault!! Then the pieces of timber bowed and were not square and as we were trying to piece the shelf together the finish was not up to our standard. In short it looked dodgy and really quite amateur and I would say it was a “Pinterest Fail” project. So we ditched the project in the final stages of its conception. It was a little heart breaking to say the least and I had to totally rethink what we were going to do in this space now that we were no longer going to put floating shelves here.
It took me a couple of days to sit back and rethink my plan of attack and create a new vision for the space. I scoured Pinterest for different decorative ideas used in bathrooms and finally settled on a hanging plant installation. I then had to find a cost-effective hanging pot solutions that did not cost the earth. I researched some online hanging pot options but with a price tag of over $60-$80 a pot I knew that was not in our budget. So with no real idea of what I was going to use we made a trip to our local Bunnings to see what we could find. As luck would have it, we came across these cool two-tone hanging planters. I may have done a little jig in the pot aisle upon discovering these pots. They came in at $14.95 a pot which suited our budget much better. We went to the garden section and chose some plants to fill the pots. I went with some well-loved favourites such as the maidenhair fern, ficus frosty and a new addition to my indoor plant collection an electric fern. It was time to get to the bathroom and hang these babies up.
I want to show you how to install a feature of hanging pot’s in your home with a few simple steps. It isn’t super hard and only requires a few different materials to hang them.
So what you will need is:
- 3 x 10kg plaster board anchor screws* (We chose to use this as we had no stud work to screw into)
- 3 x metal hanging hooks (8-10kg weight)
- 3 x hanging pots
- 3 x plants of your choice
Step 1: Pot up your plants into your chosen hanging pots using a good quality potting mix. I tend to add a handful of medium sized rocks to the bottom of the pot to help with drainage.
Step 2: Measure out the spacing of where the pots will be hanging from and mark with a pencil.

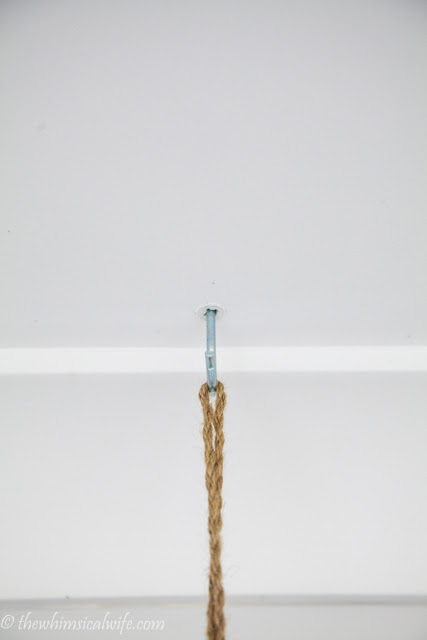
Step 3: Now insert the plaster board anchor screw into the marked spot in your plaster by tapping the spade end of the screw with a hammer. Once it has pierced into the plasterboard, use a large Phillips head screwdriver to screw it into the plasterboard. Your plug is now ready to receive the metal hook.
Step 4: Screw the metal hook into the plasterboard anchor plug. It is important to get the correct weight for these hooks. Otherwise, you might hear a crash & bang at all hours of the night. God forbid you were sitting on the toilet, and this happened! Ha. So
always
make sure you get the correctly weighted hook to take the load you intend on placing onto it.
Step 5: To add extra fail safes we glued the rope knots on the pots to make sure they didn't accidently come loose one day. I don't particularly want a pot crashing on my head while I'm on the throne.

Step 6: Attach the hanging planters onto the hooks and position it to your liking. We went with a staggered pattern for the planters to allow each plant make their own statement.
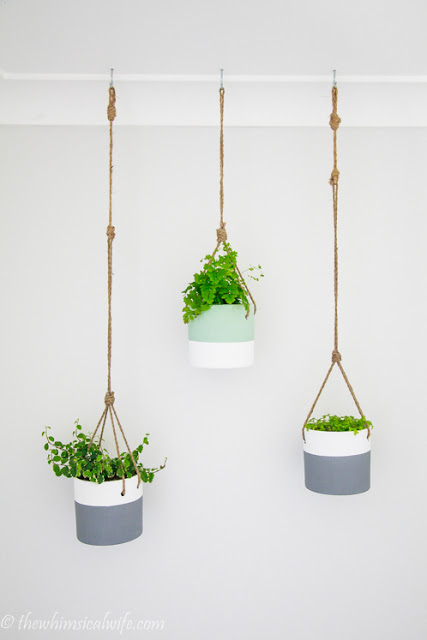

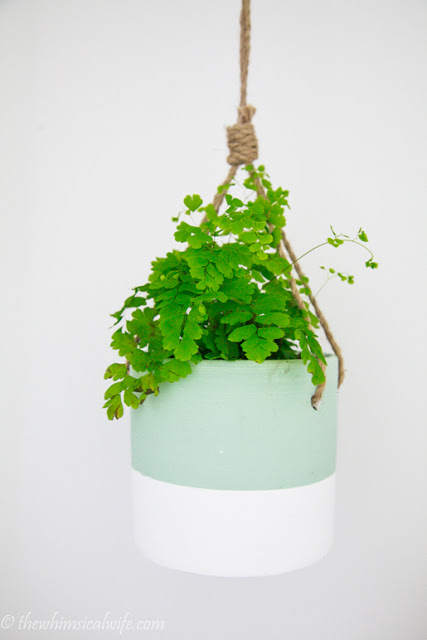

I love the finished result and three months on I still adore it!! Now sadly we lost the electric fern while we were away on holidays. Sadly it does take a little bit of care and attention to make sure these plants get the right amount of water. I am not the greenest of thumbs and have lost a few plants to either over or under watering. The maidenhair fern is suffering a bit in the summer heat at the moment but apparently it has
Lazuras
qualities, so it keeps rising from the dead or so Mr Burke's Backyard says. We will see. If you have a hanging pot installation I would love to see it. Pop on over to my
or visit me on
to share your beautiful green installations. Happy hanging everyone.