
Quick & Easy DIY Pine Branch Christmas Tree
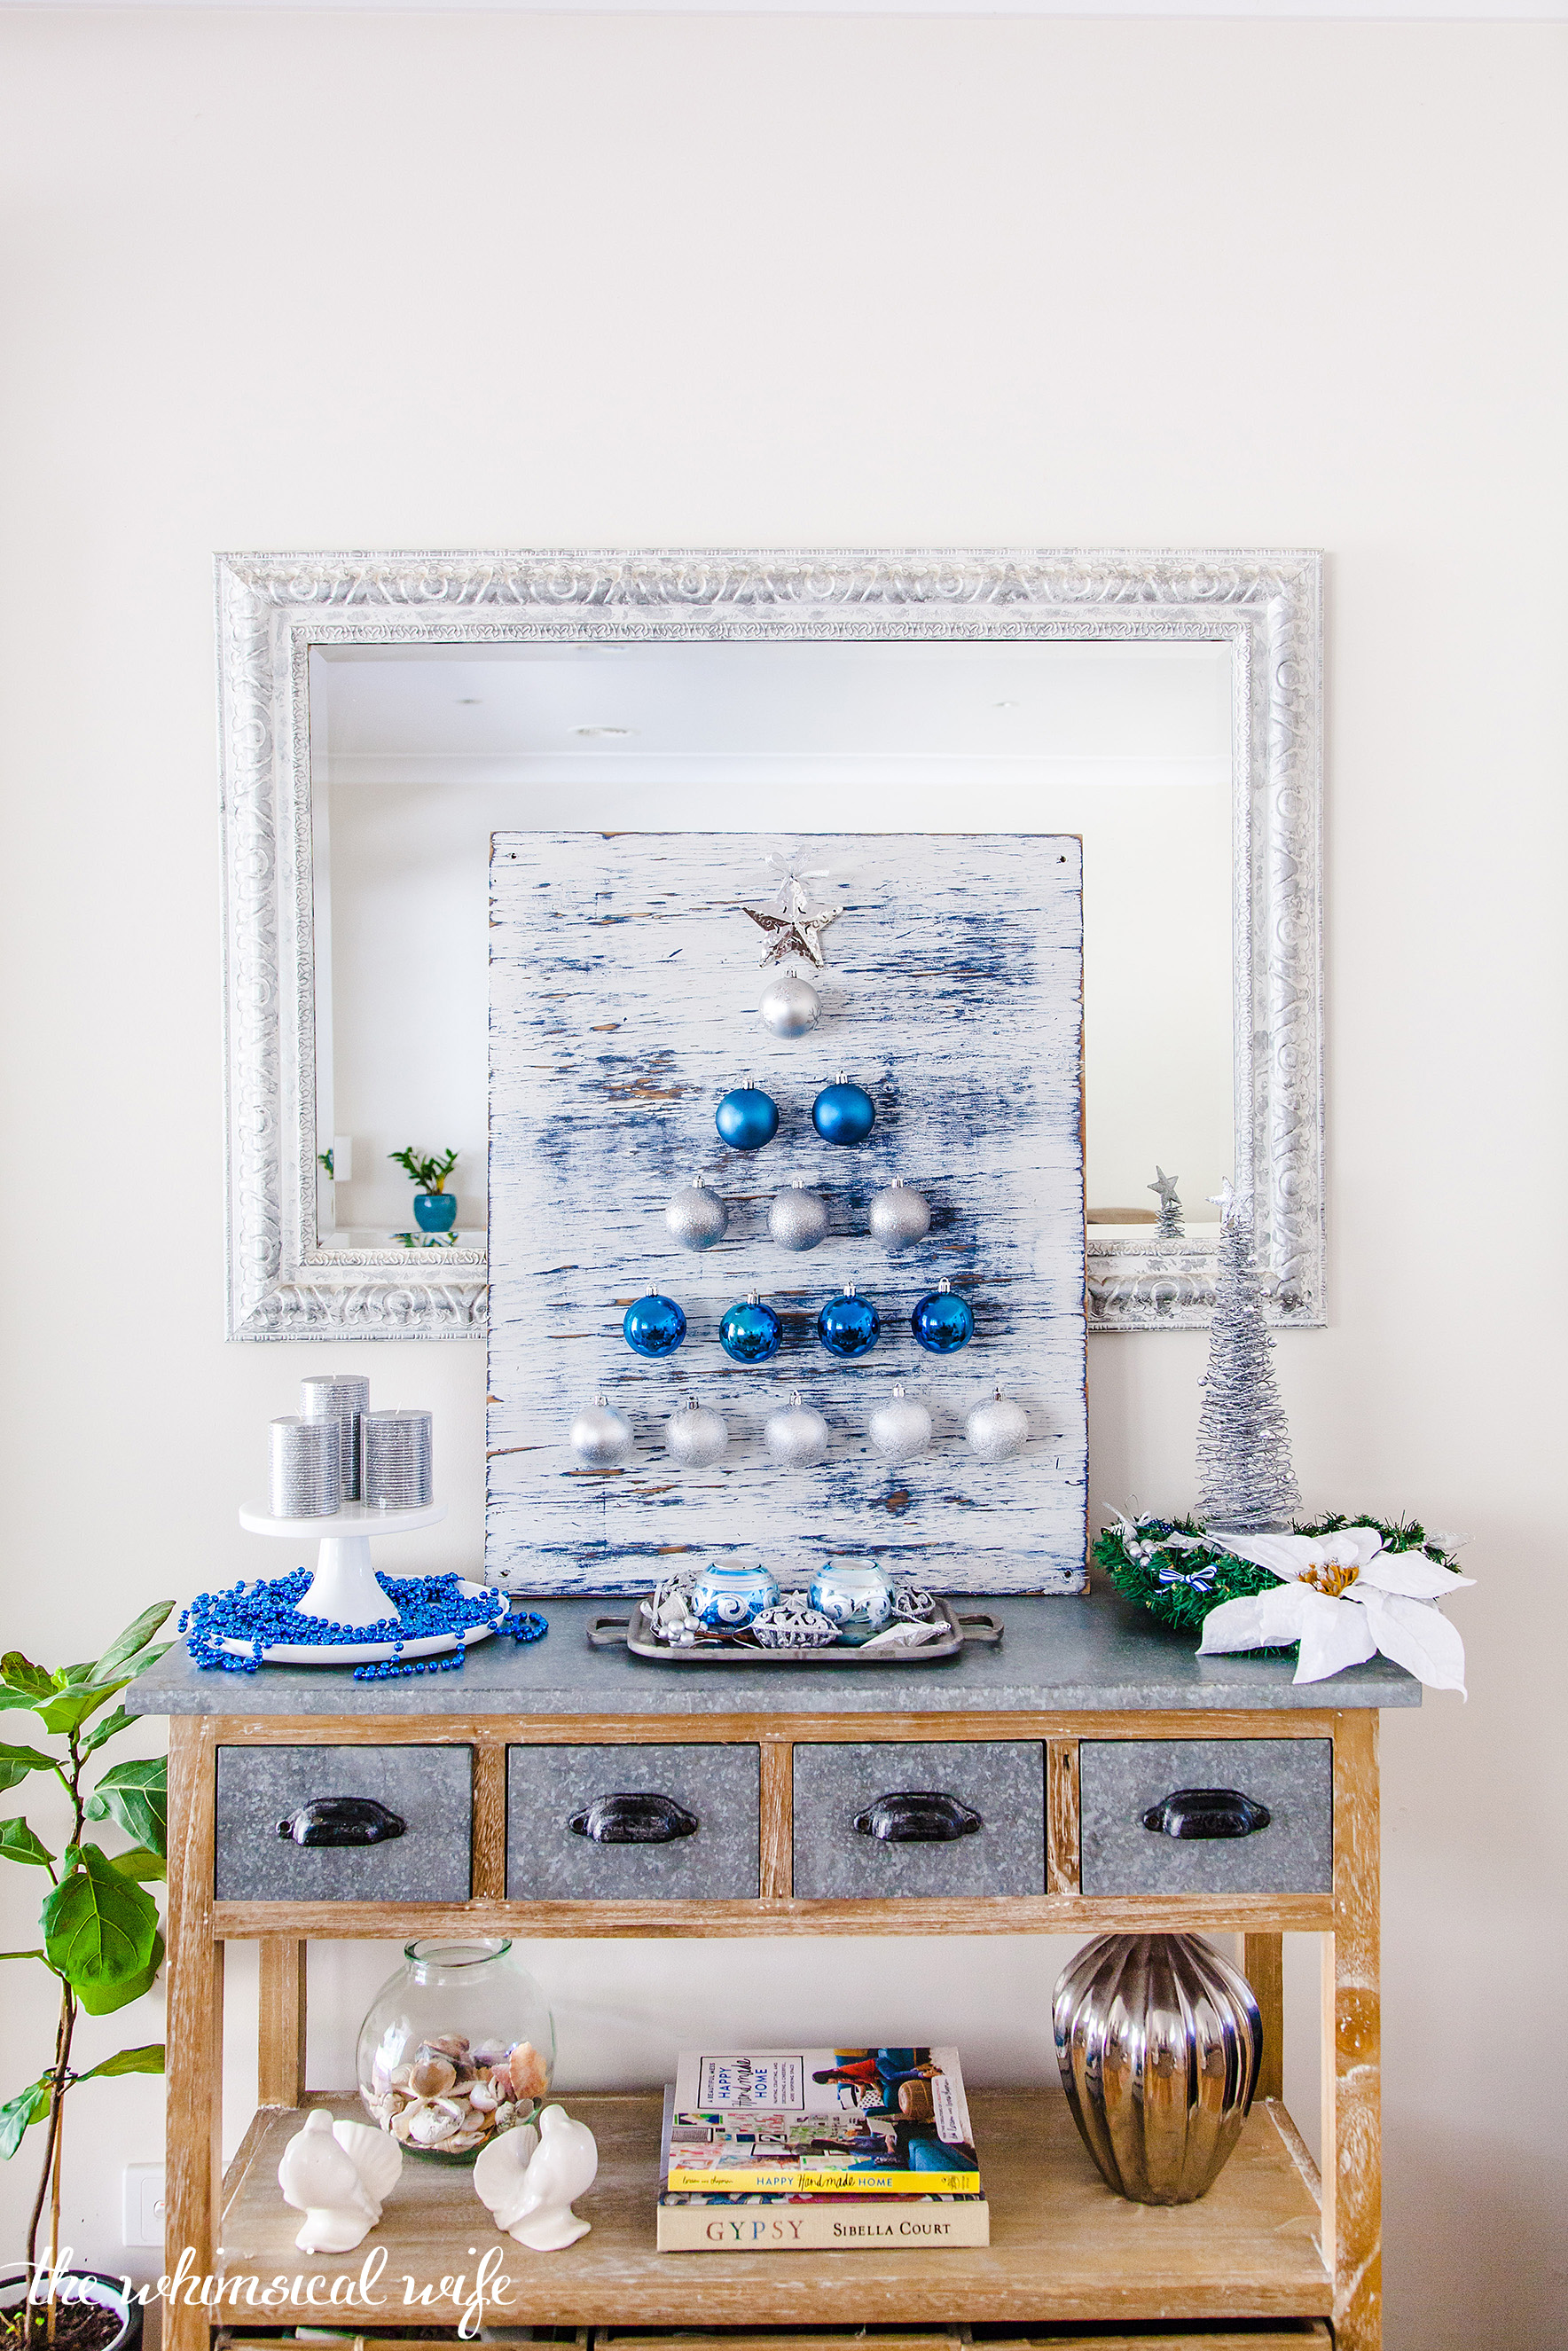
Hey, guys how was your weekend? We had a fairly quiet weekend here as the weather was pretty dreary and rainy and we had a few family events to go to which chewed up most of the weekend. It's that time of year where everything seems to go in fast forward and it seems there is never enough hours in the day. So much to do it seems. This year I have put together a couple of Christmas Tree inspired projects for those who don't have the room to host a large tree in the space they live or are looking at something a little different in the Christmas Tree department. I didn't want to post anything on the blog too Christmasy until December hit because if you are like me and cringe at anything Christmas related before then.


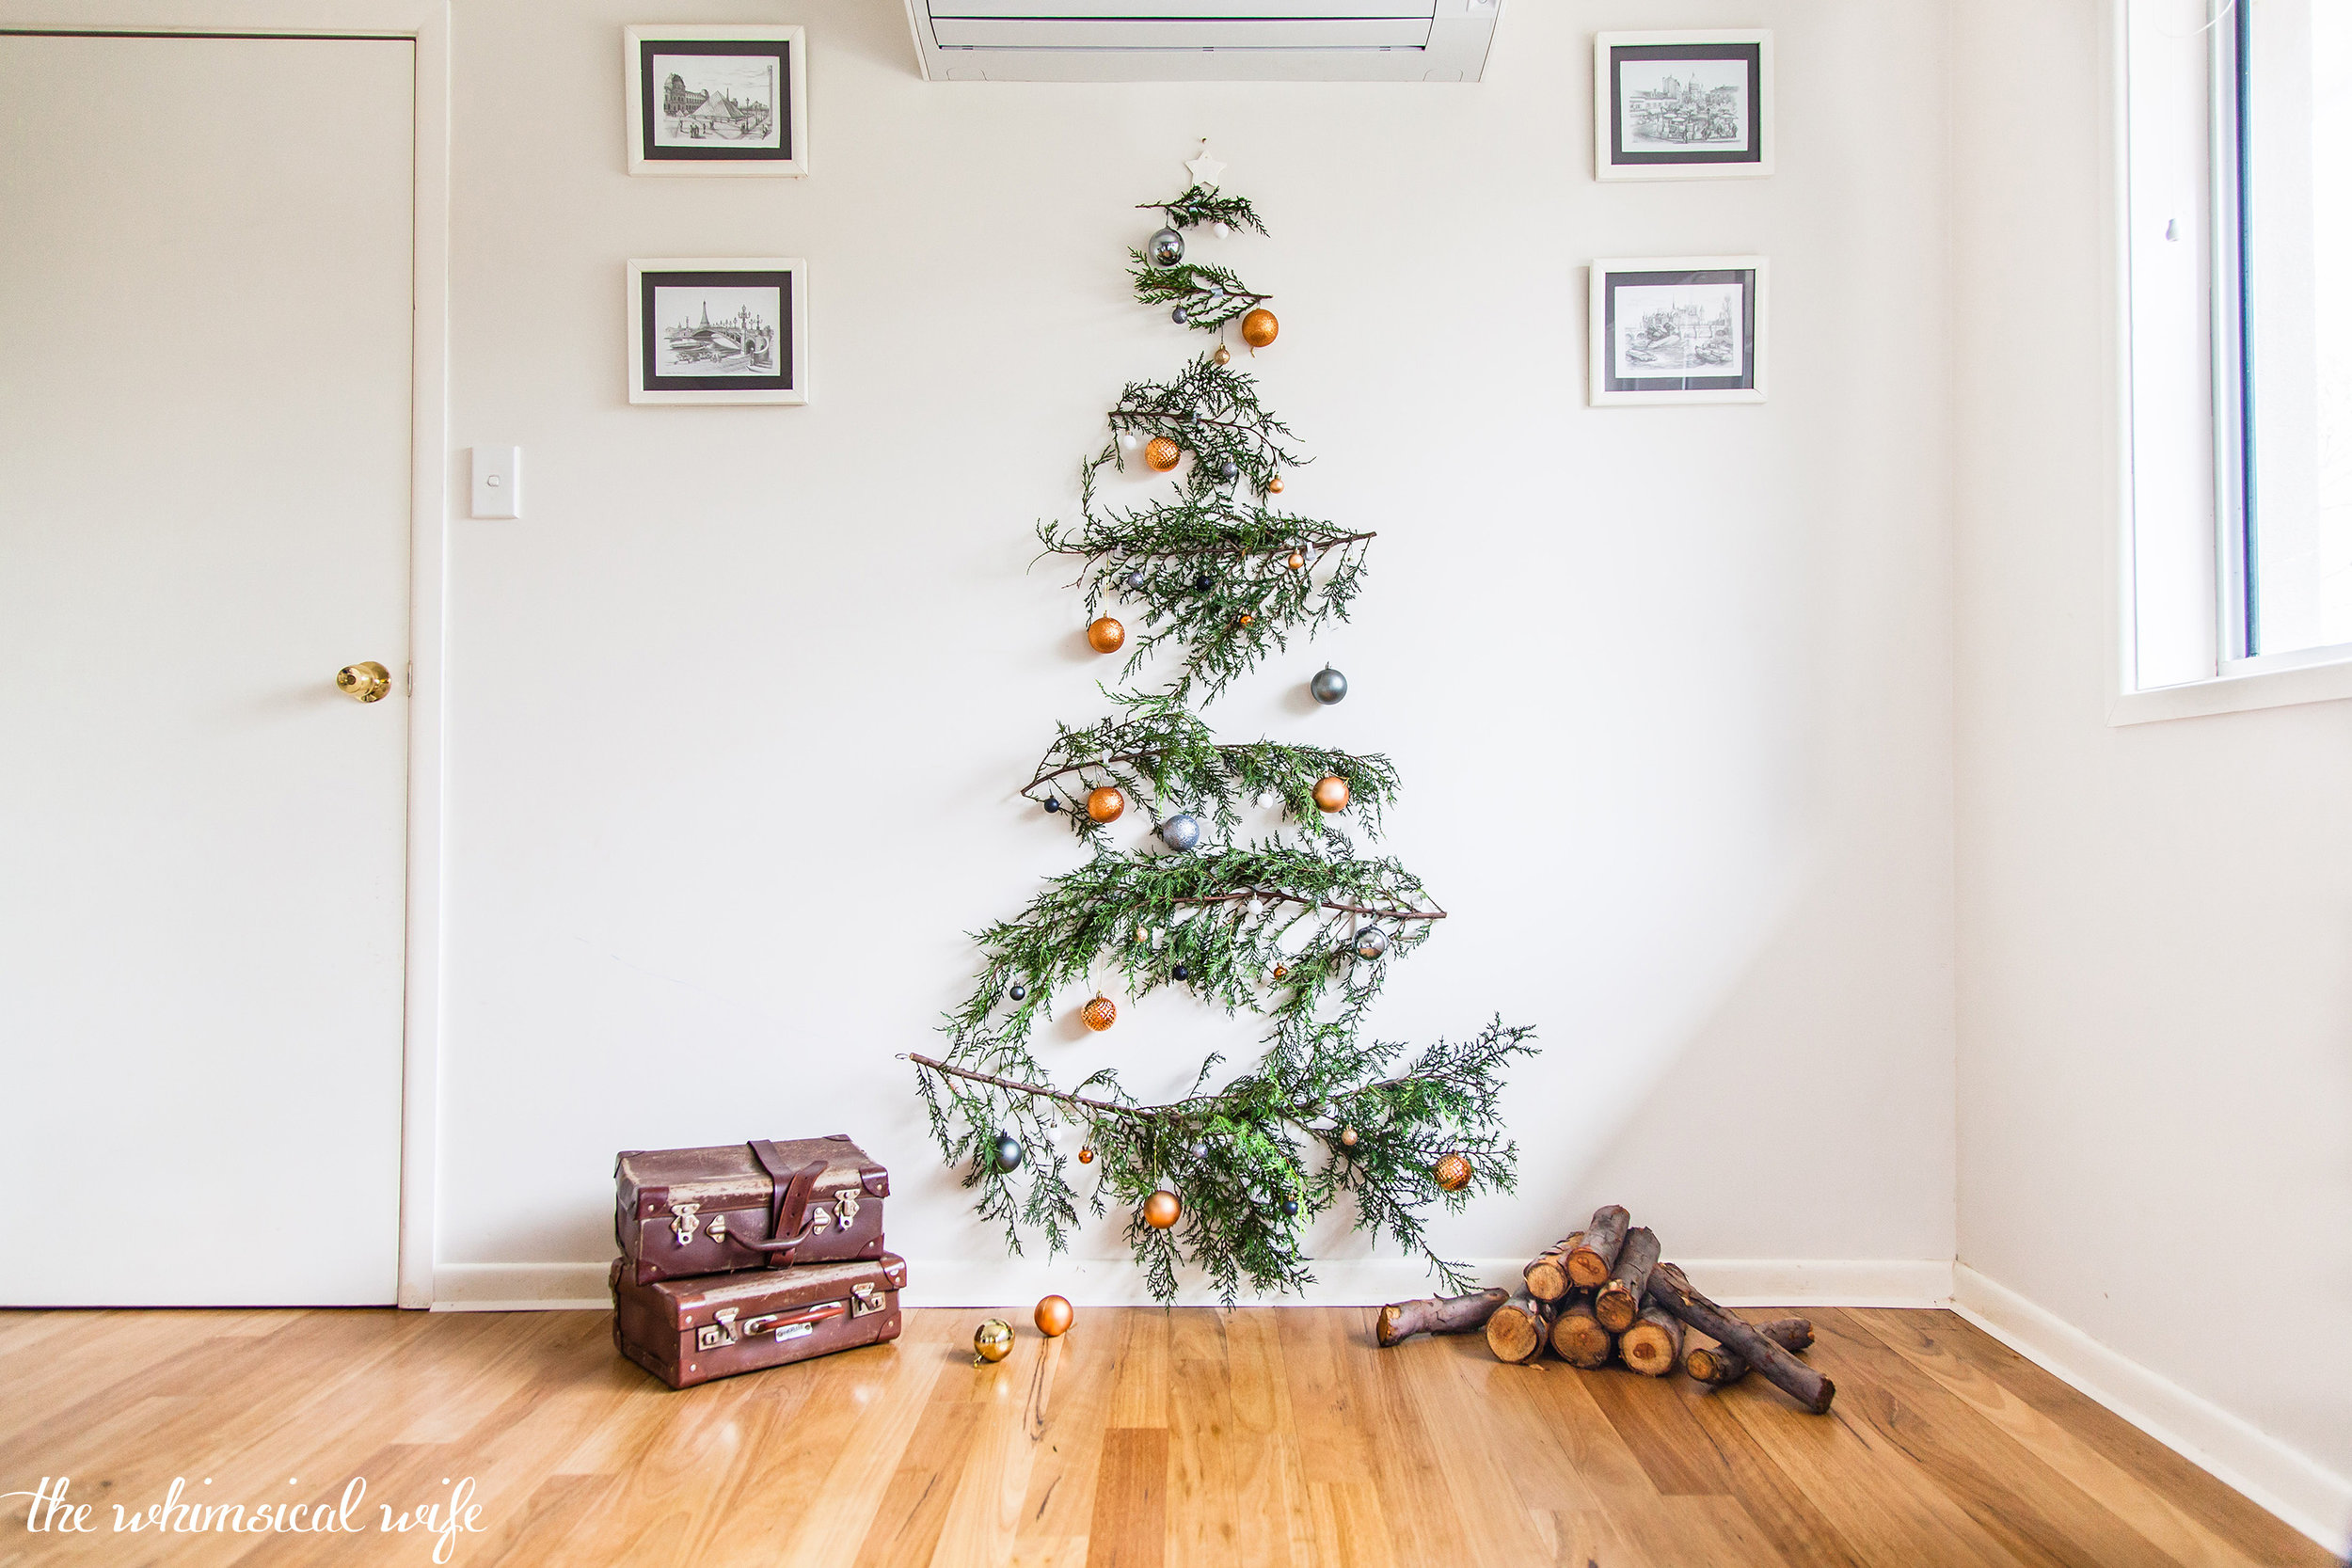
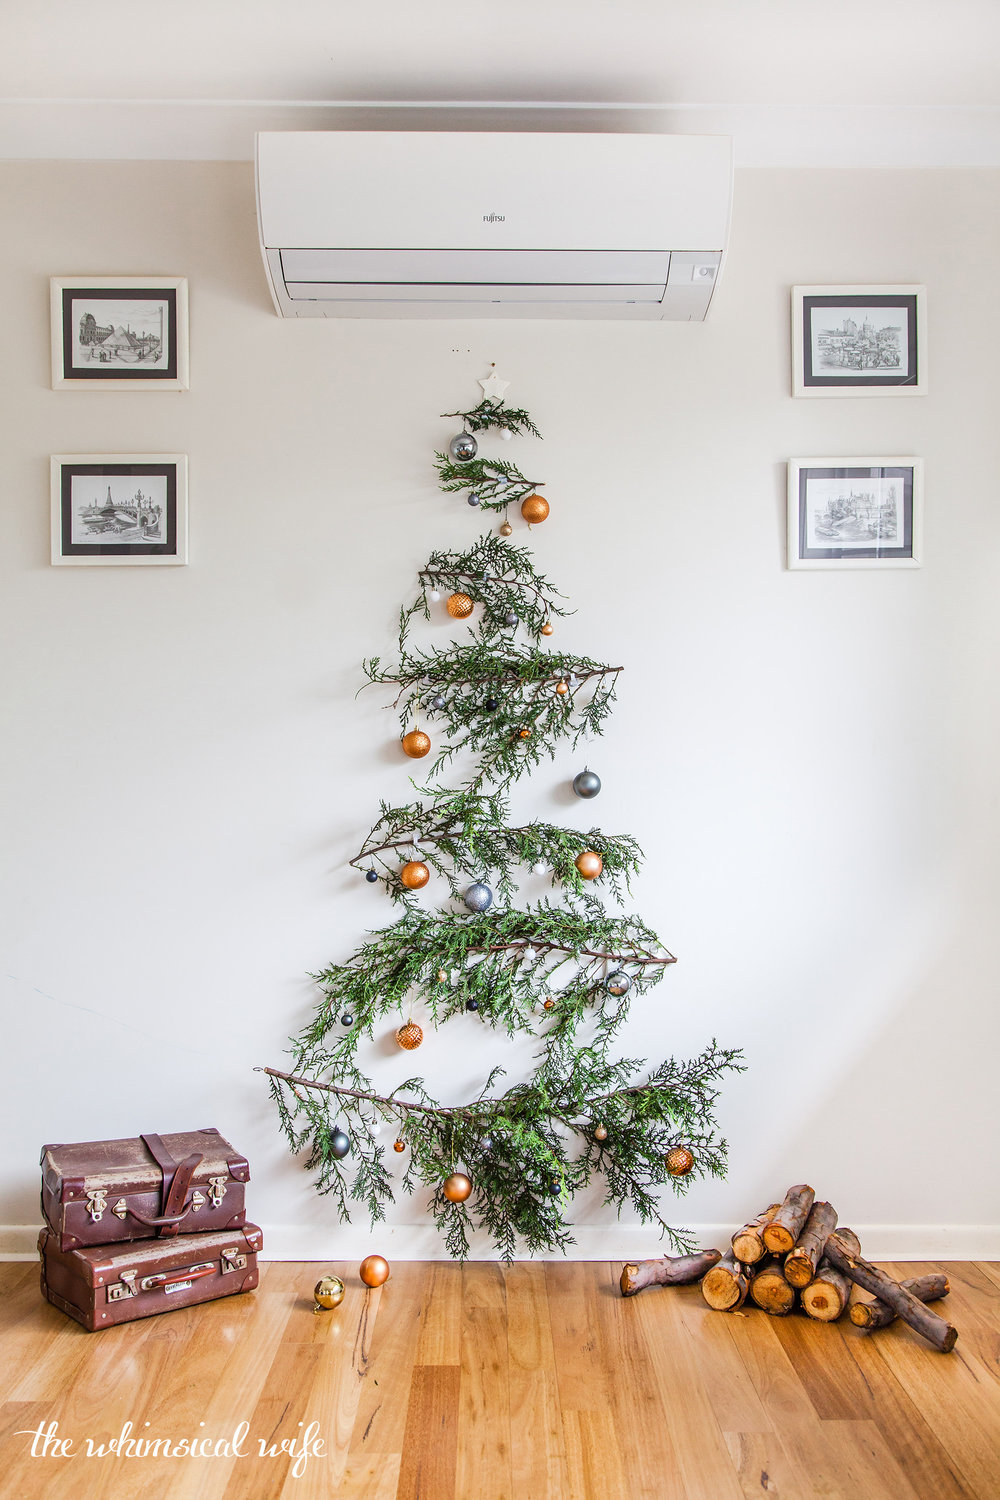
My quick and easy DIY pine branch Christmas tree was one of my favourite projects I come up with and knew I wanted to post it first. I was really happy with the way it turned out. This project was inspired by those that are struggling with lack of space but still want the feel of a real Christmas tree. It is really easy to put together and if you can snag some pine branches you are in business. You don't a heap of things to create this. Just the pine branches, some stick on cable organisers and your chosen ornaments to decorate with. Have I got your attention then let's jump right into the project shall I?
Materials:
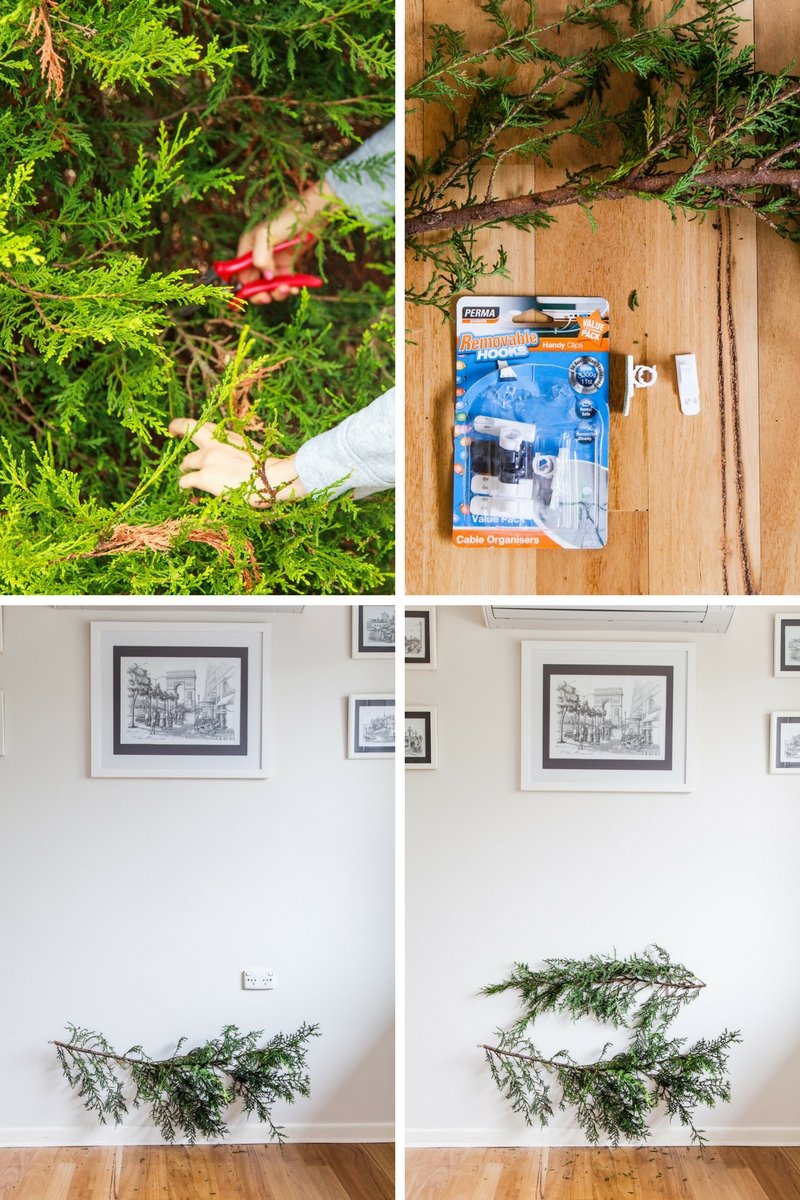
- 7 x lengths conifer pine branches
- 13 x removable cable organisers clips
- Ornament hooks
- Christmas Decorations
Step 1: Once you have collected your conifer pine branches cut them into varying lengths so that it creates a staggered triangle shape in the shape of a Christmas tree.
Step 2: Using two of the removable cable organiser clips attach them at each end of the longest branch around the stem of the branch. Remove the backing tape and stick to the wall pressing firmly into place on the lower part of the wall.
Step 3: Repeat this process with each piece of pine branch evenly spacing the branches up the wall until you place the last branch into place.


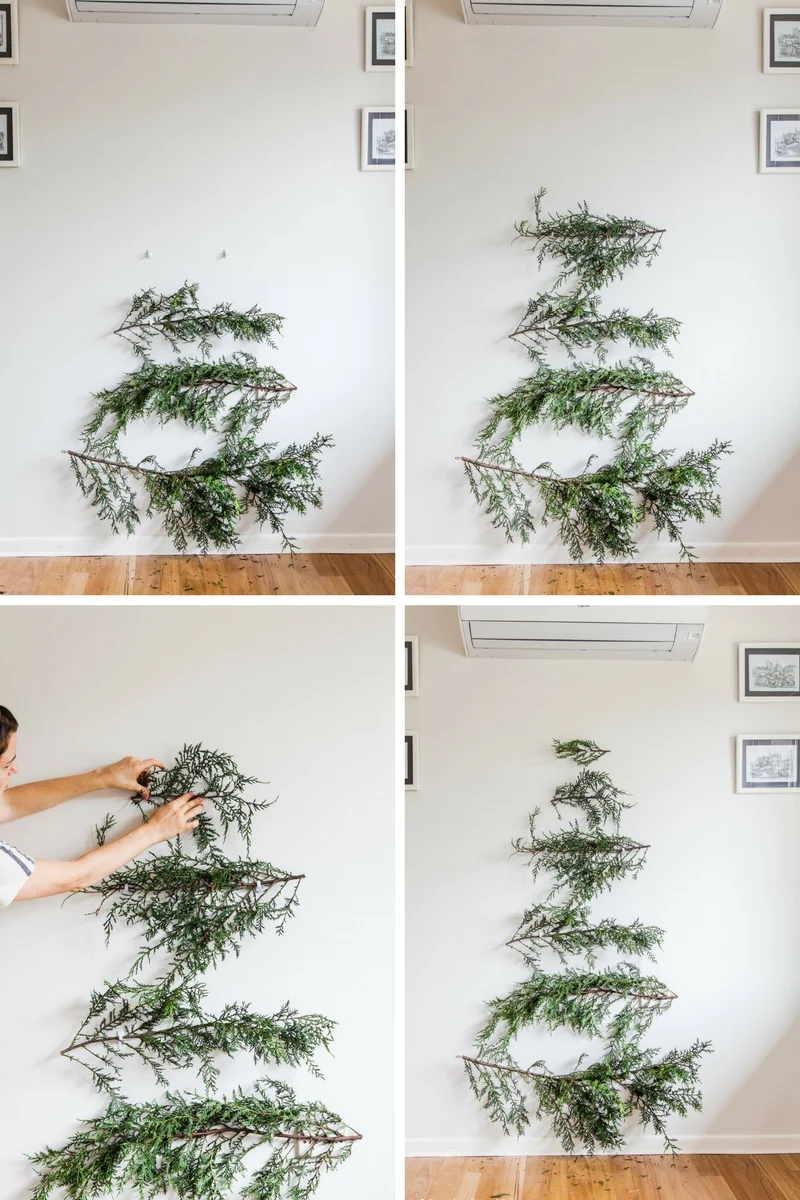
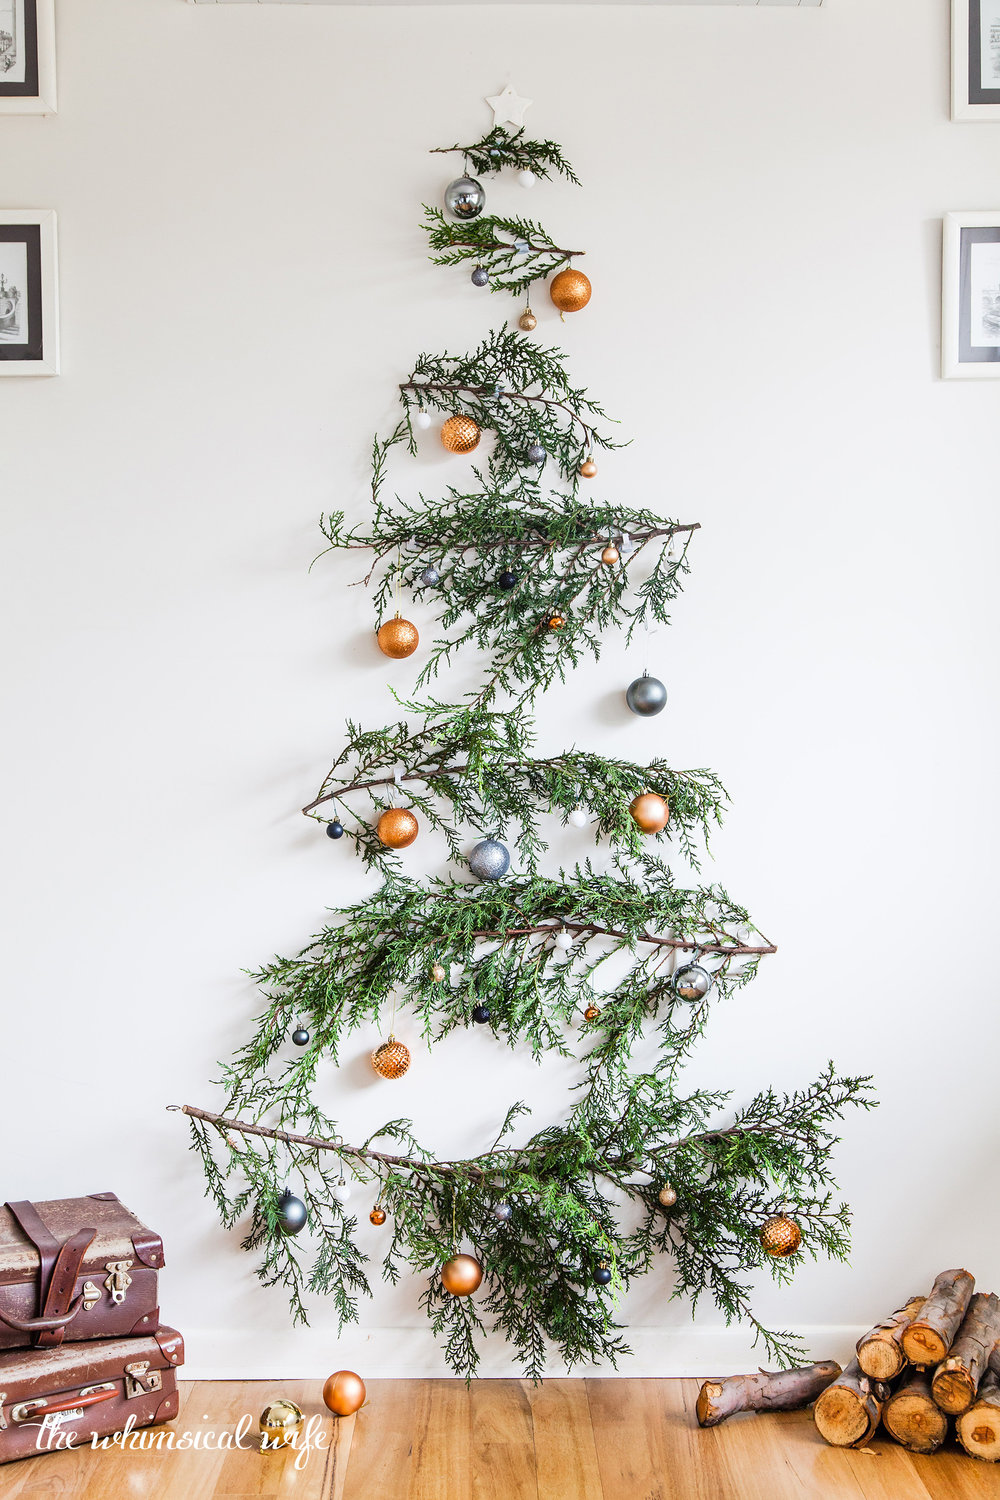
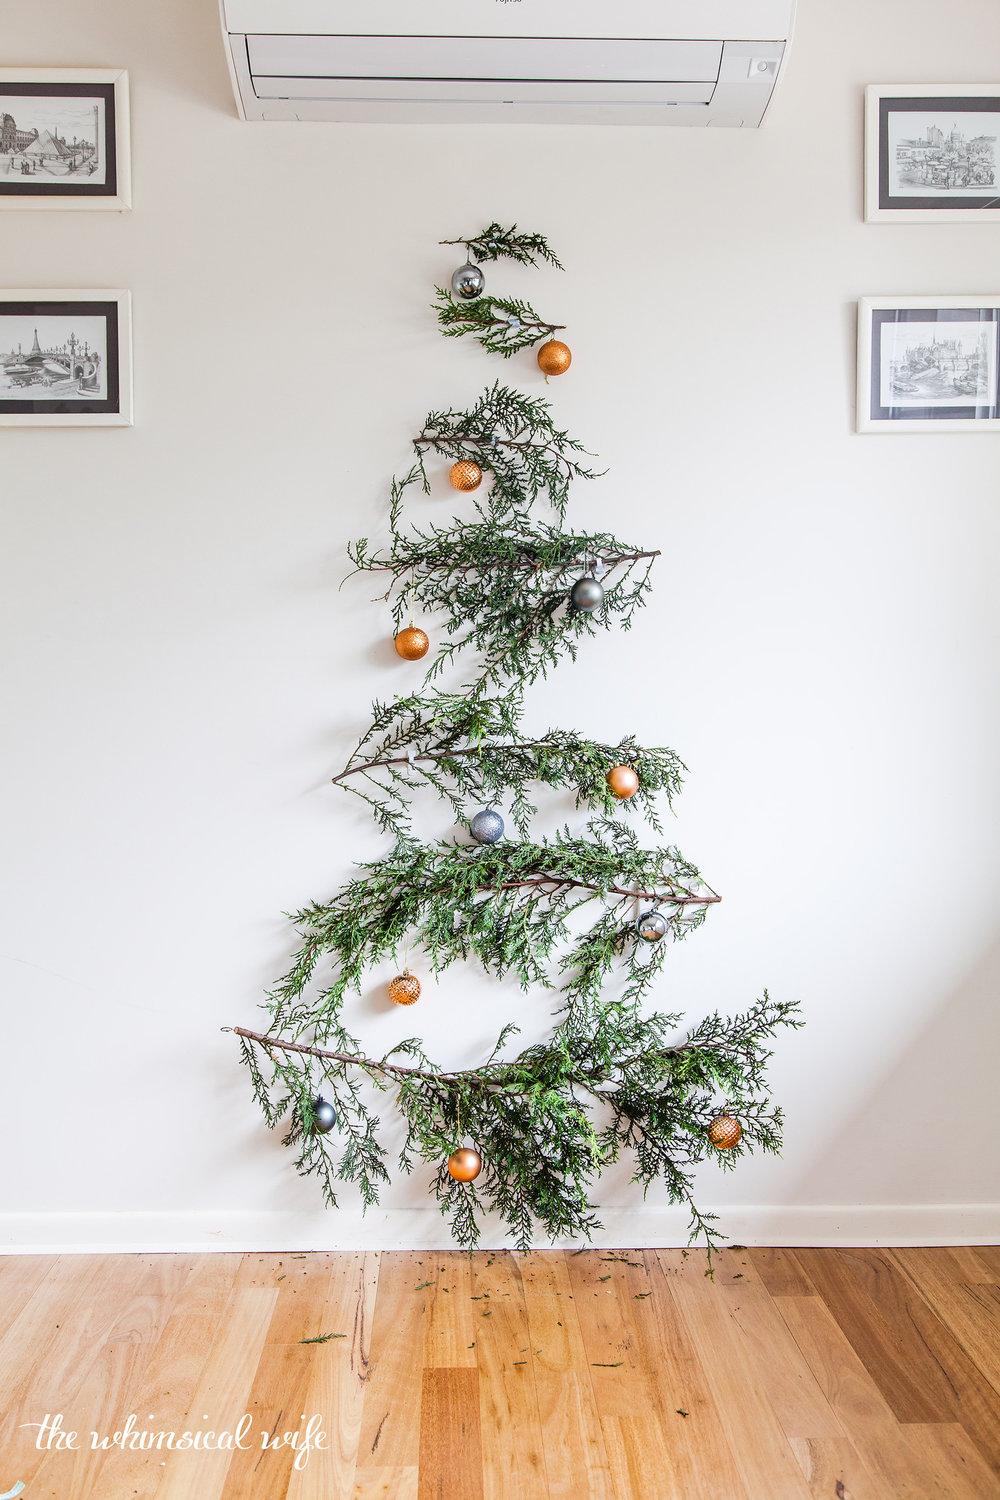
Step 4: Next start hanging the decorations evenly spaced along the branches using the decoration hooks to hang over the branches. Less is more with this style so keeping to a simple colour scheme and only two or three different types of baubles will keep the look simple yet elegant. You can add string fairy lights if you wish but I opted for more of a simple look.
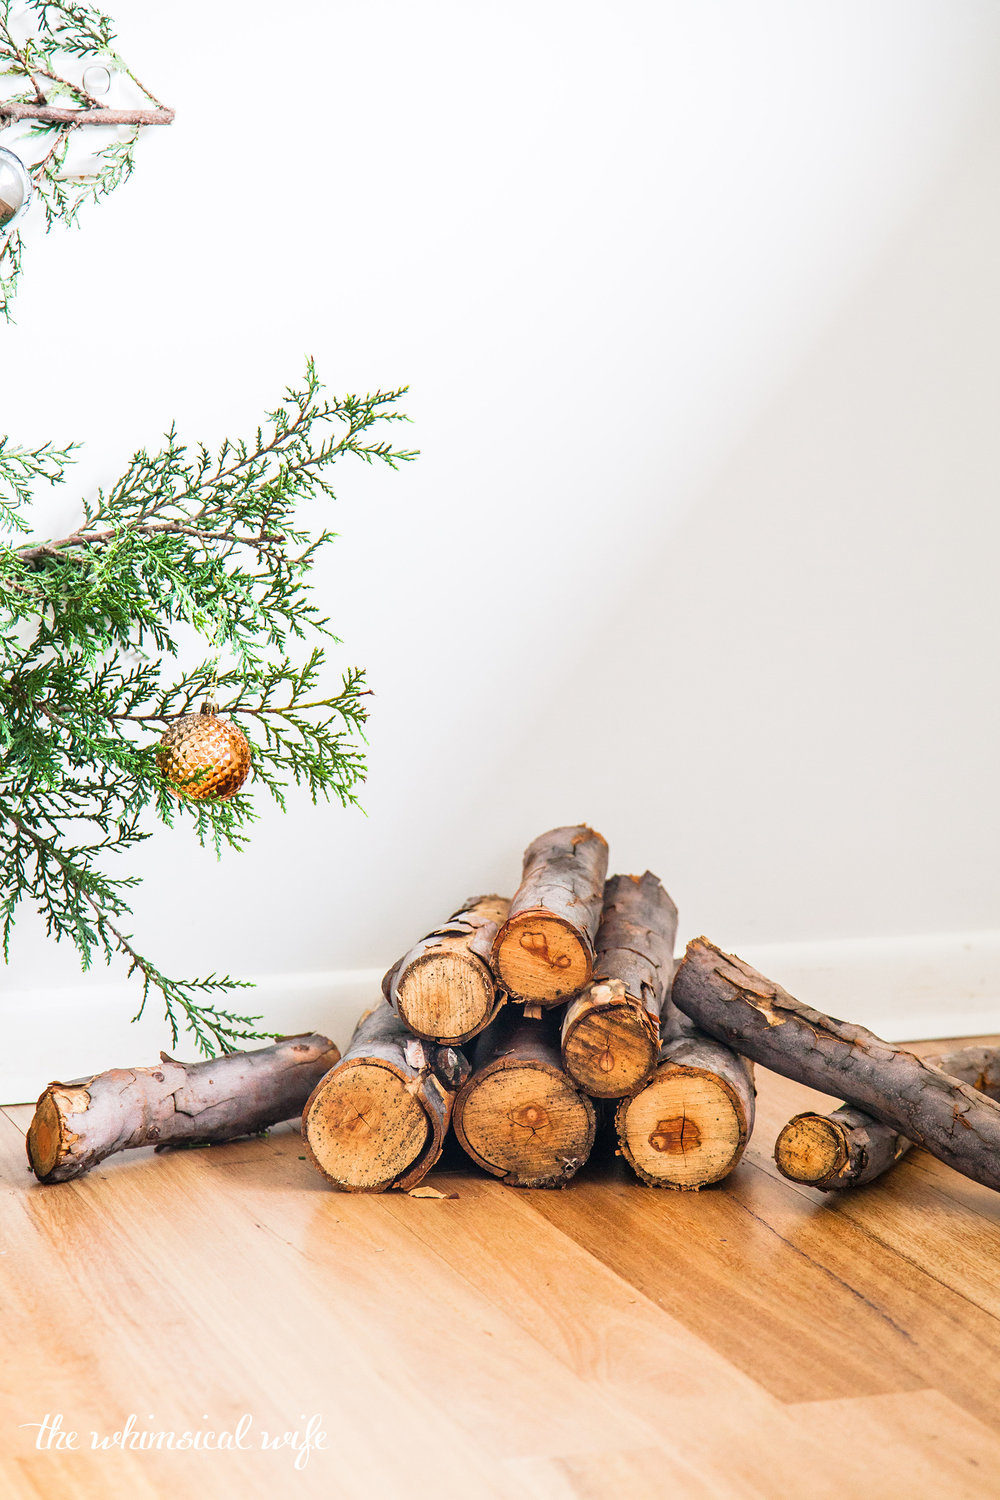
Step 5: Add any other elements you would like around the base of the wall to create a nice Christmas vignette. I.e old suitcases, wooden logs etc. Co-ordinate your gift wrapping to suit the tree to create more decoative appeal.
Step 6: Lightly mist the branches every day to help them last longer. This tree is probably best made a week or two out before Christmas as the branches will die quickly leaving you with a mess to clean up.


This would be a great project to do with the kids as it is really simple and straightforward without too much fuss involved. I do recommend getting the vacuum cleaner out afterwards as there are a fair bit of pine needles around after hanging the branches up. Keep an eye out on the blog this week for the next Christmas Tree inspired project coming! What's your Christmas tree theme this year?


Digital discoveries
- Casino En Ligne
- Casino Non Aams
- Slots Not On Gamstop
- Slots Not On Gamstop
- Crypto Casino
- Sites De Paris Sportifs Autorisés En Belgique
- Site De Paris Sportif Belgique
- Meilleur Site De Casino En Ligne Belgique
- Migliori Siti Casino Online
- Casino Non Aams Sicuri
- Casino Online Non Aams
- Crazy Time Live Bonus
- Meilleur Site De Paris Sportif International
- Nouveau Casino En Ligne
- Ufc Paris Sportif
- 稼げるカジノ アプリ
- カジノ バカラ カジノ
- Meilleur Casino En Ligne 2026
- Site De Paris Sportifs
- Tout Nouveau Casino En Ligne
- Casino En Ligne Français
- Casino En Ligne France Légal
- Scommesse In Crypto
- Crypto Scommesse
- Casino Avec Bonus Sans Depot
- คาสิโนคริปโตได้เงินจริง
- Casino Bonus Sans Depot
- Miglior Casino Online Non Aams
- Casino En Ligne France Légal
- Siti Scommesse Non Aams
- Casino Online Non Aams 2026
- Nuovi Casino Italia
- Quel Est Le Meilleur Site De Casino En Ligne En France ?
- 무료슬롯 사이트
- 익명 카지노
- Meilleur Casino En Ligne France
- Nouveaux Casinos En Ligne
- Casino En Ligne
- Meilleur Casino En Ligne
- Nuovi Casino Italiani
- Casinò Non Aams
- Meilleur Casino En Ligne
- Casino En Ligne
- Casino En Ligne France
- Nouveaux Casino En Ligne
- Casino Francais En Ligne
- Migliori Casino Online Italia