
How To Revamp & Reupholster A Bamboo Cane Chair + Video
Yay, I've finally got furniture revamp project to share with you today. It's been a while between projects. The last one I shared with you was my Toy Oven Makeover back in January this year. This year has not been conducive to doing furniture renovations. Hello, three kids and new baby in the family.
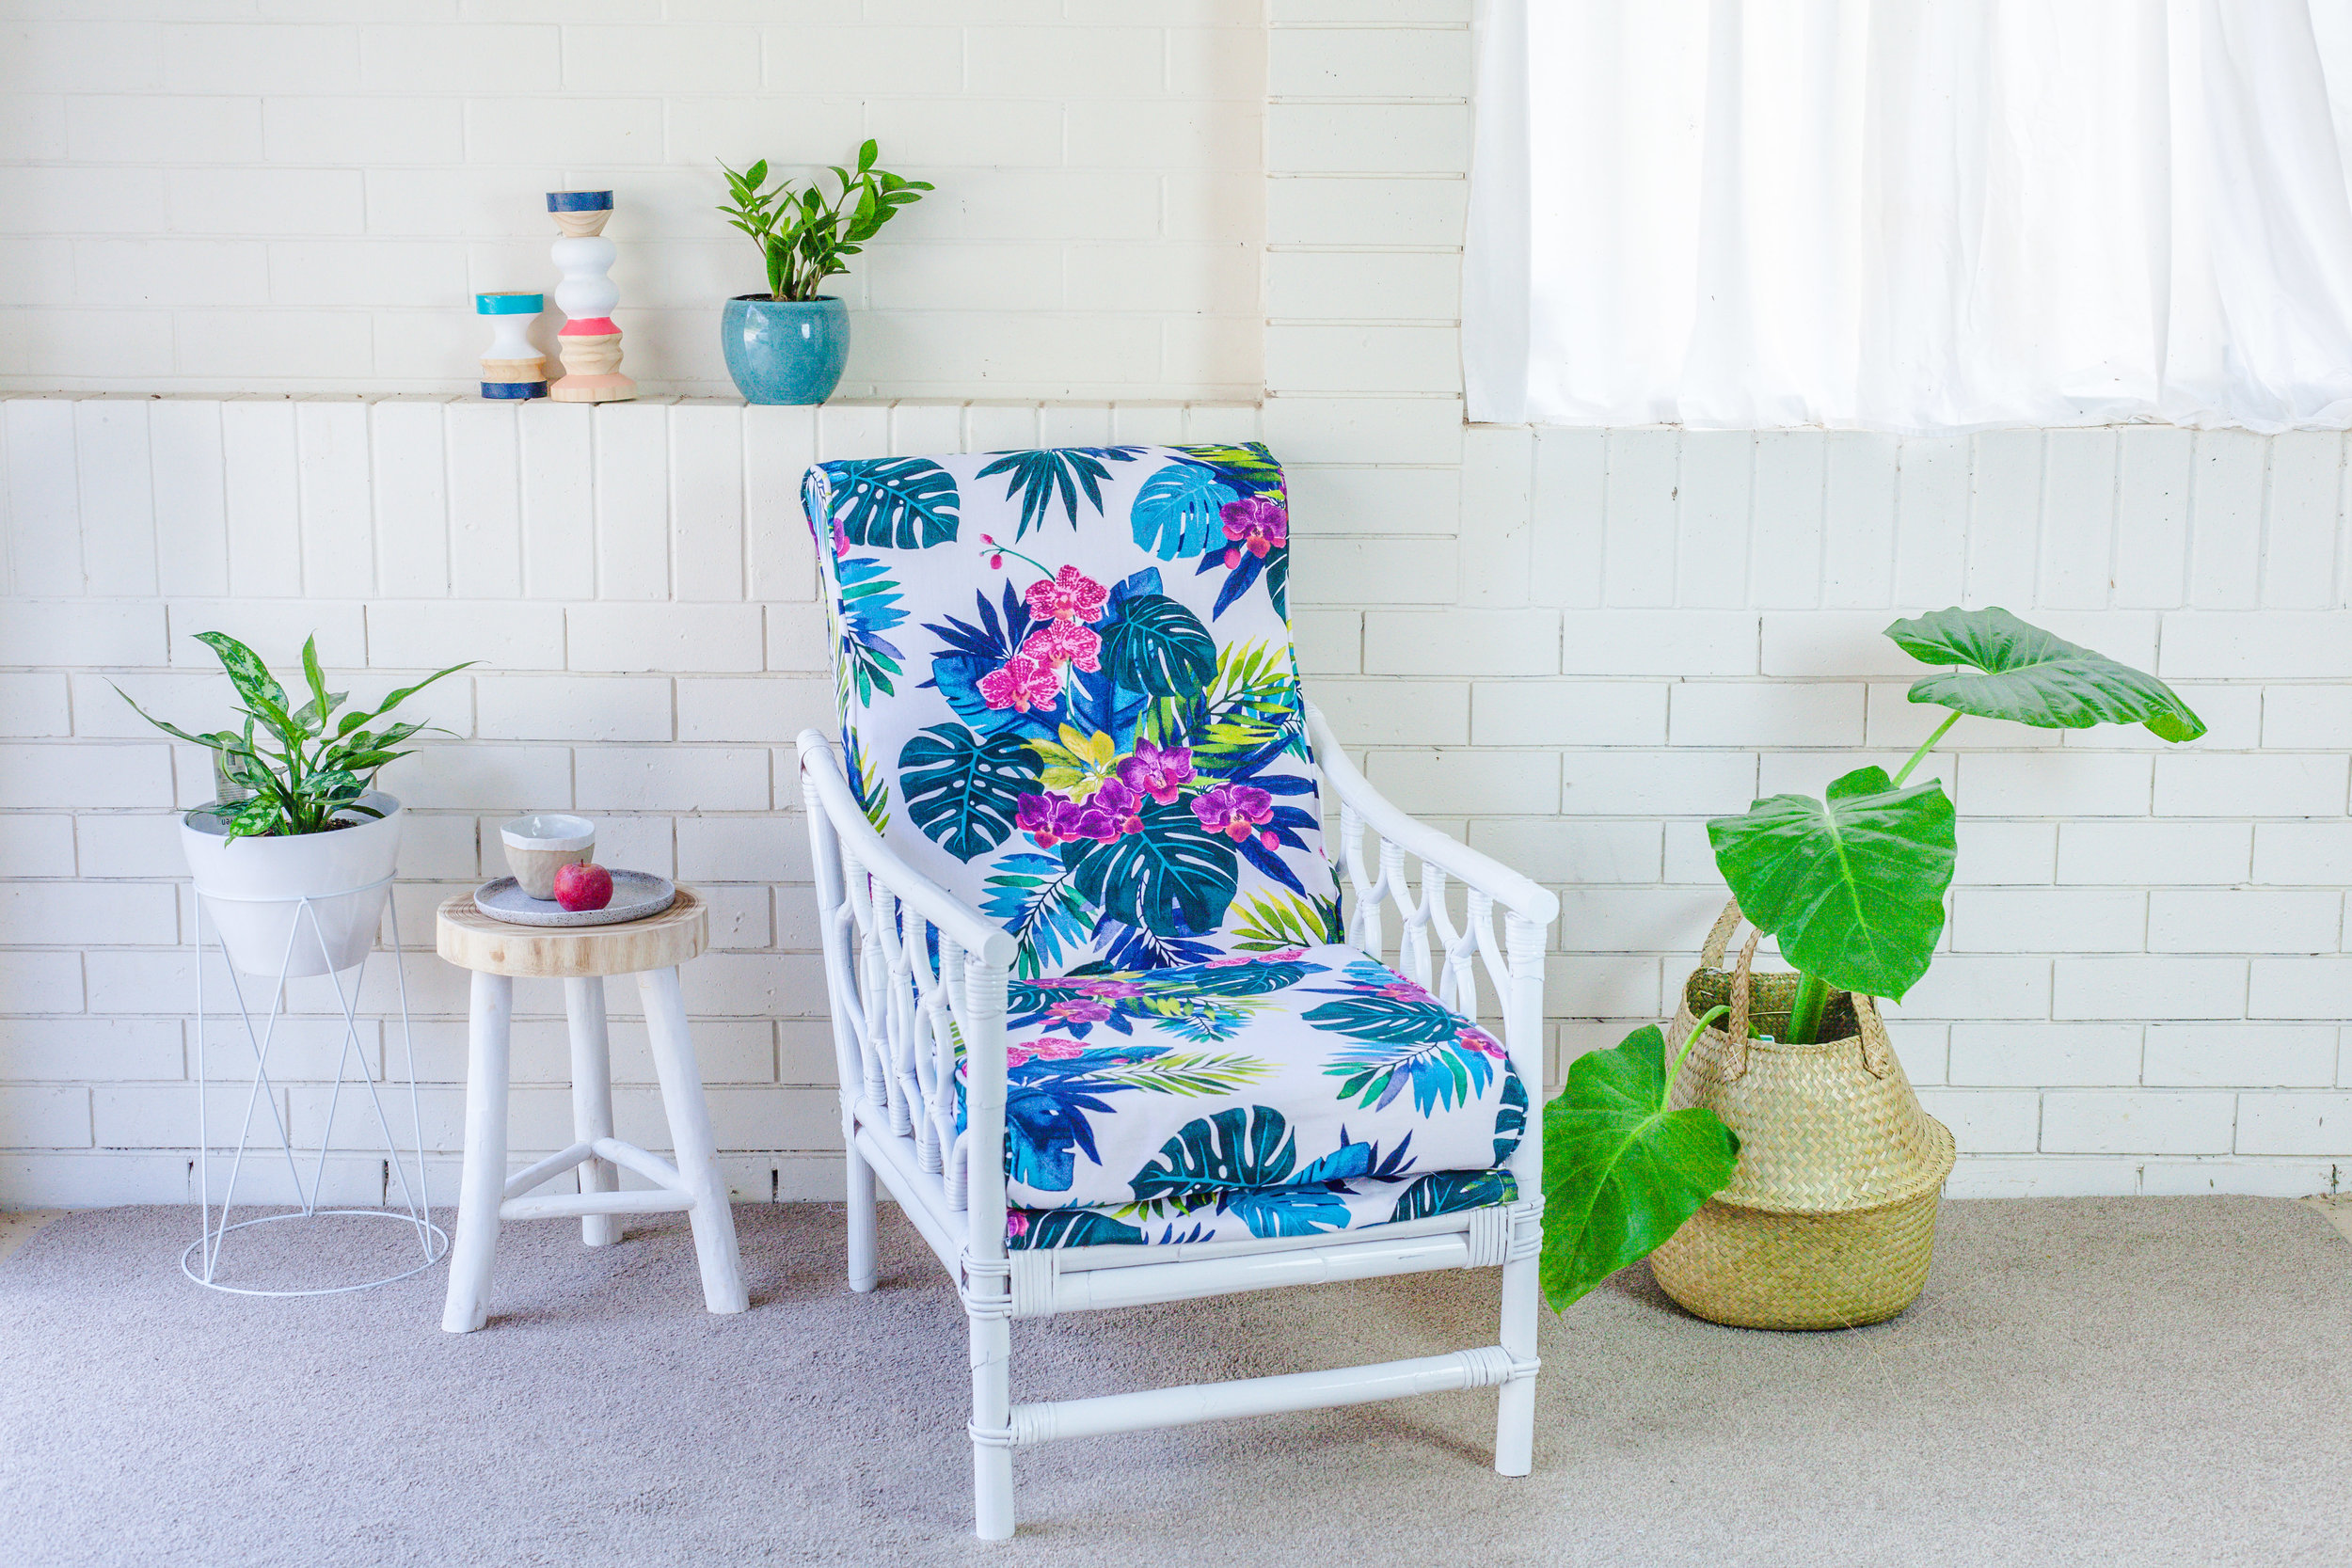
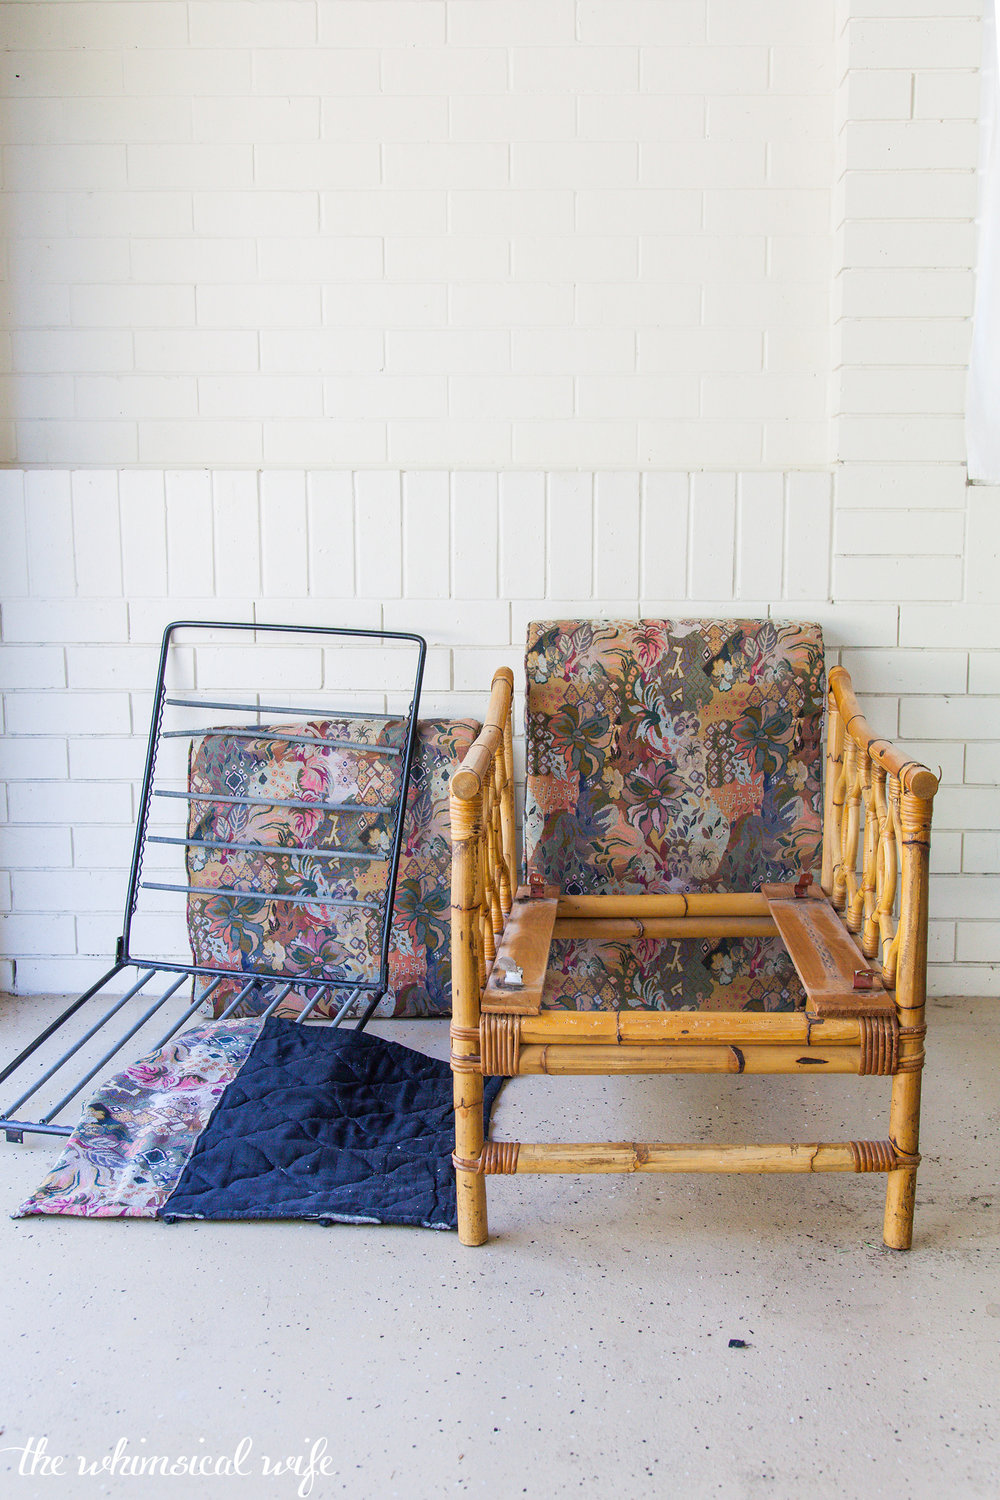
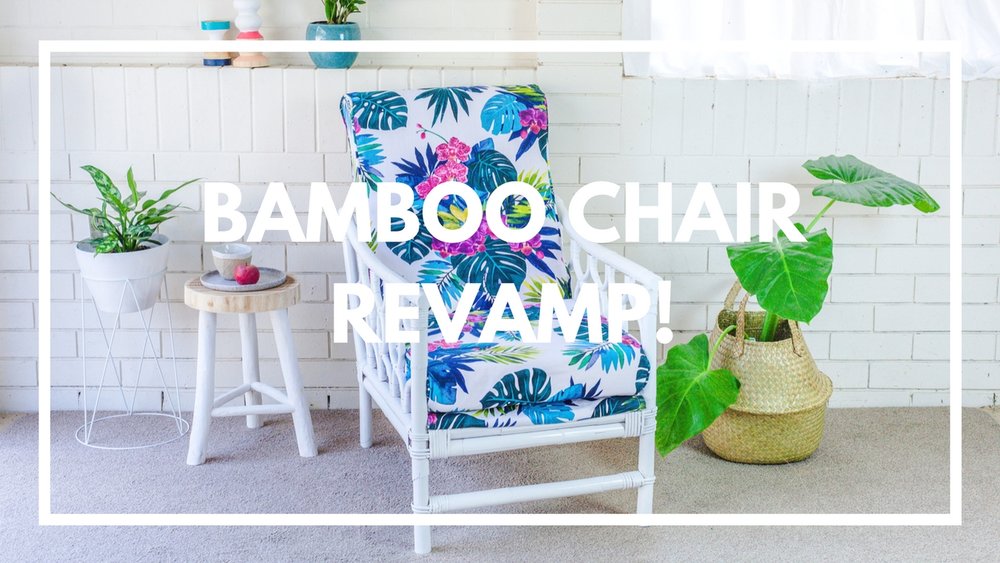
Now that bub is older, the kids can occupy themselves a little better and I am slowly carving a couple of hours out for myself during the day to do little projects for myself. I picked this old cane bamboo chair from my local op shop for a grand total of $25. Most of the pieces I do up has jumped out at me when I'm browsing. If a vision for the piece doesn't hit me in the head in the first few minutes of looking at it then I won't buy it. This chair leaped at me and I knew exactly what I wanted to do with it.
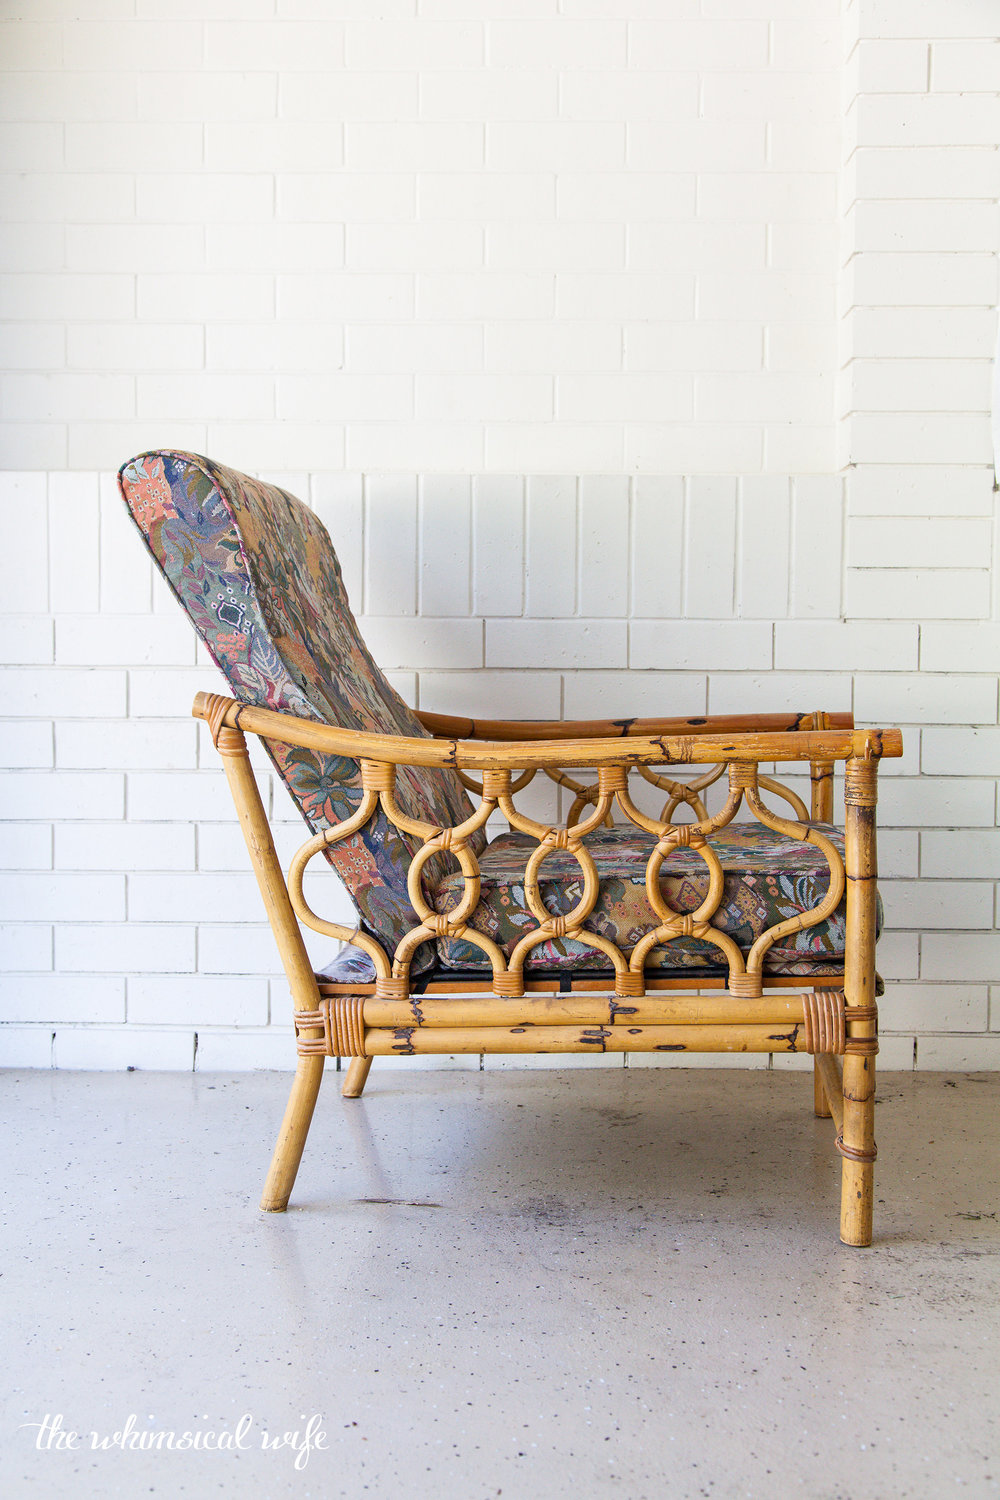

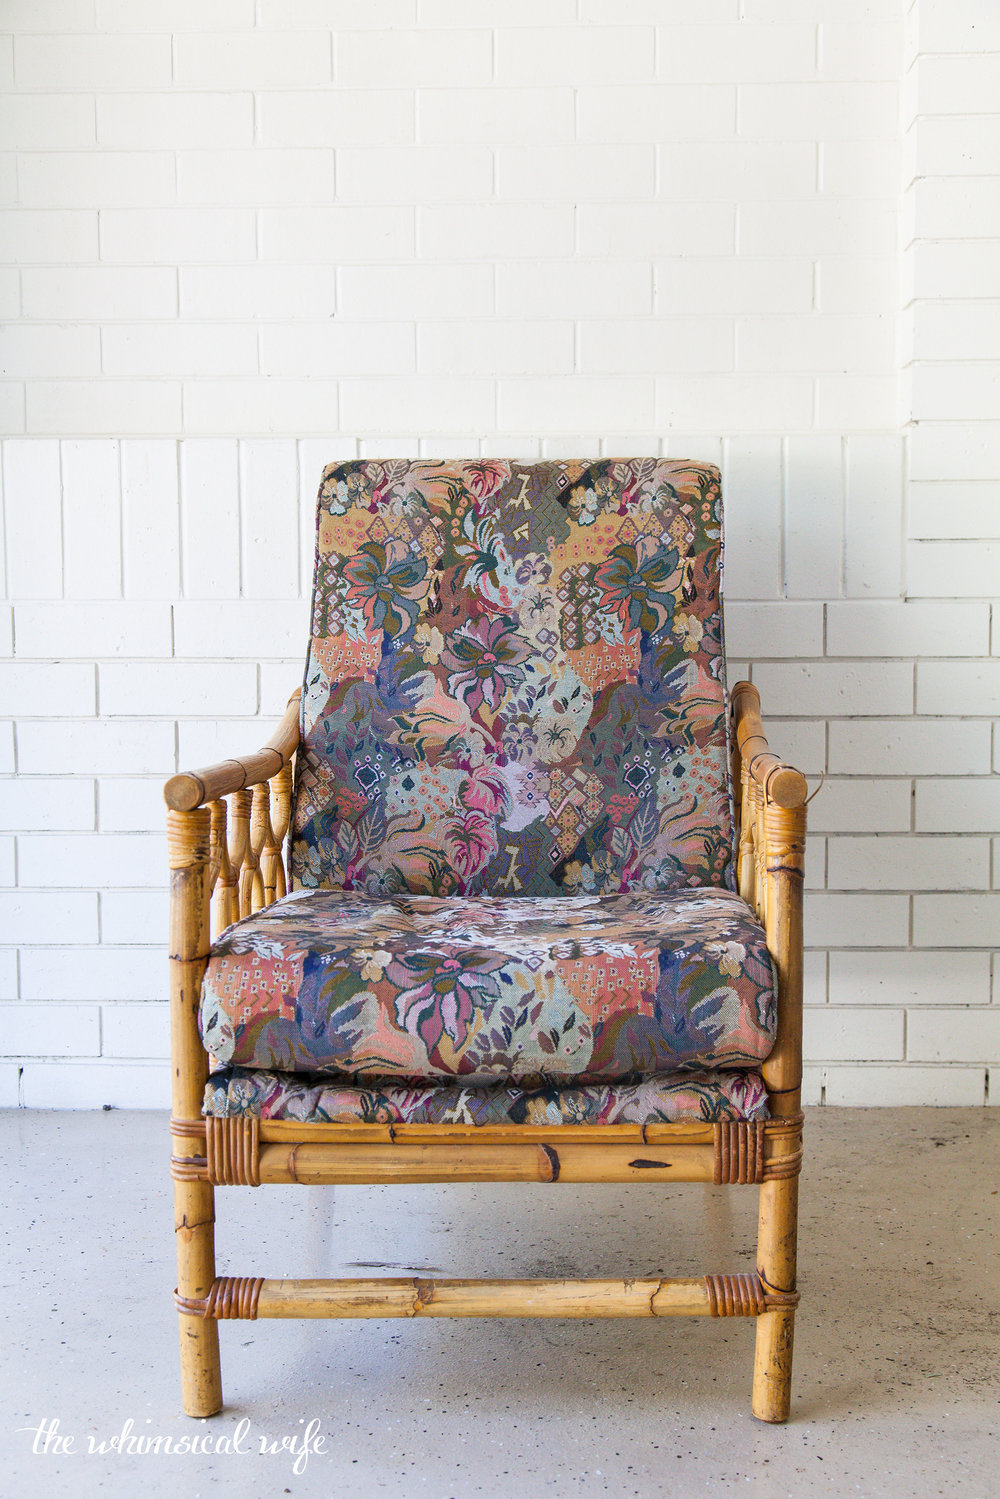

As you can see it was in a sad and sorry state with a real need for a makeover. Very drab, dirty and kinda musty smelling. That's how I feel about myself sometimes... ha! The one good thing about this chair was that the cane was in great condition. It wasn't cracked or split and the cane stripping at the joints was sturdy and wasn't about to fall apart. It just needed a little TLC to show it's true colours.
Bamboo and cane pieces of furniture have made a come back in recent years with the scandi look making a huge comeback. While this chair isn't exactly scandi I went more with a palm beach makeover with the fabric I chose. Can I say trying to find cool fabric from your local frabric store is near impossible. Honestly we need to funk up the options a bit in the upholstery fabric department.

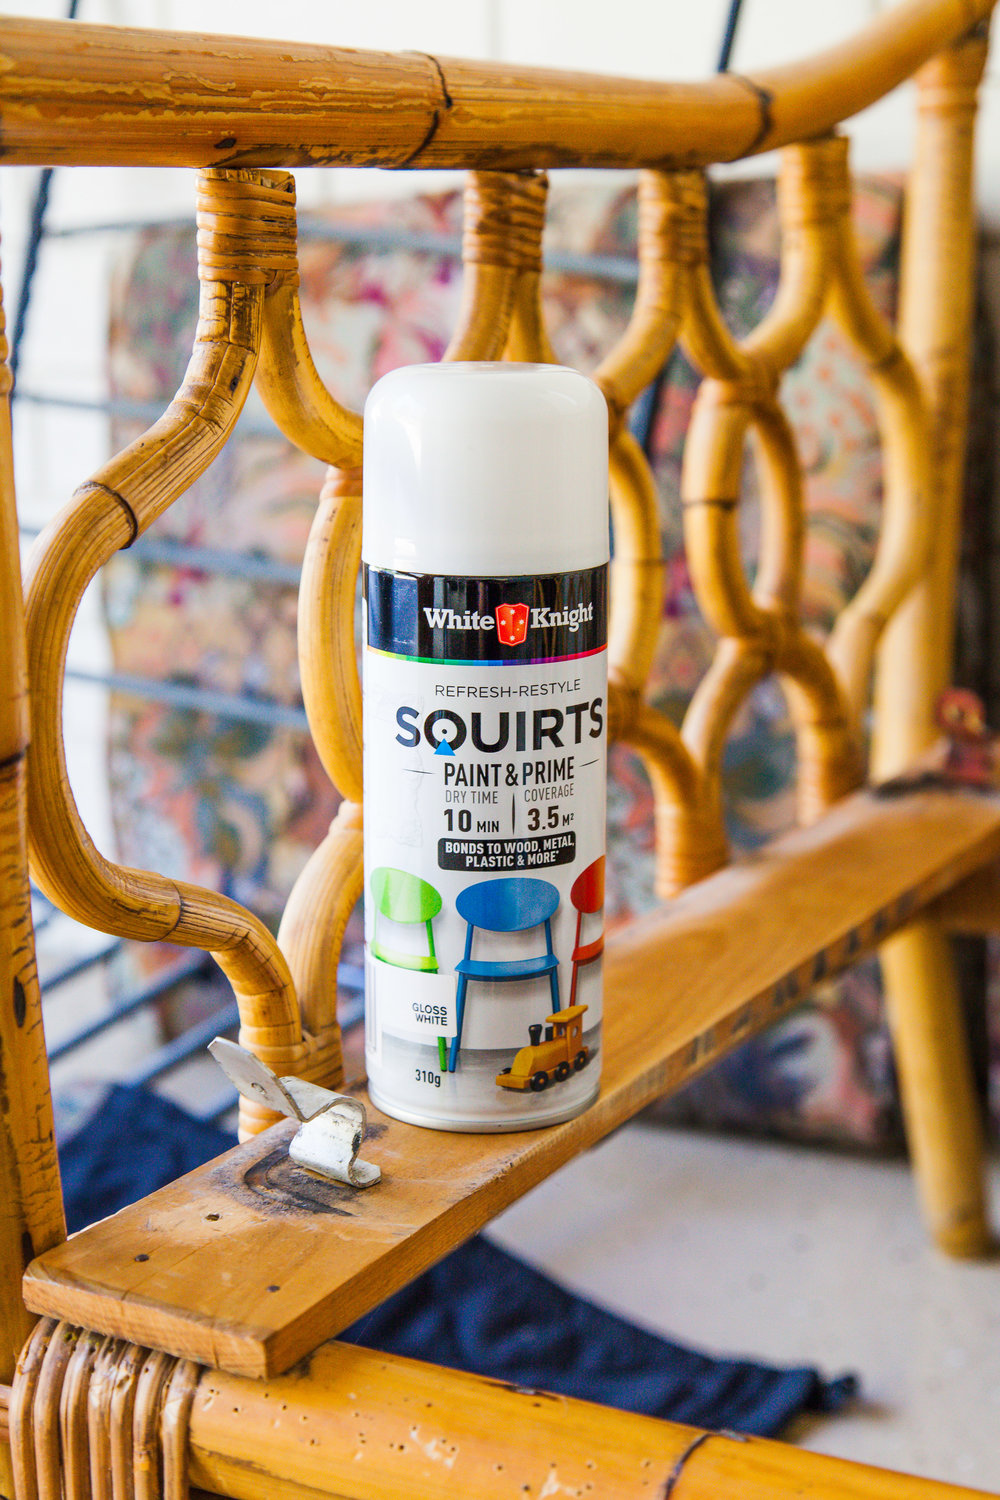
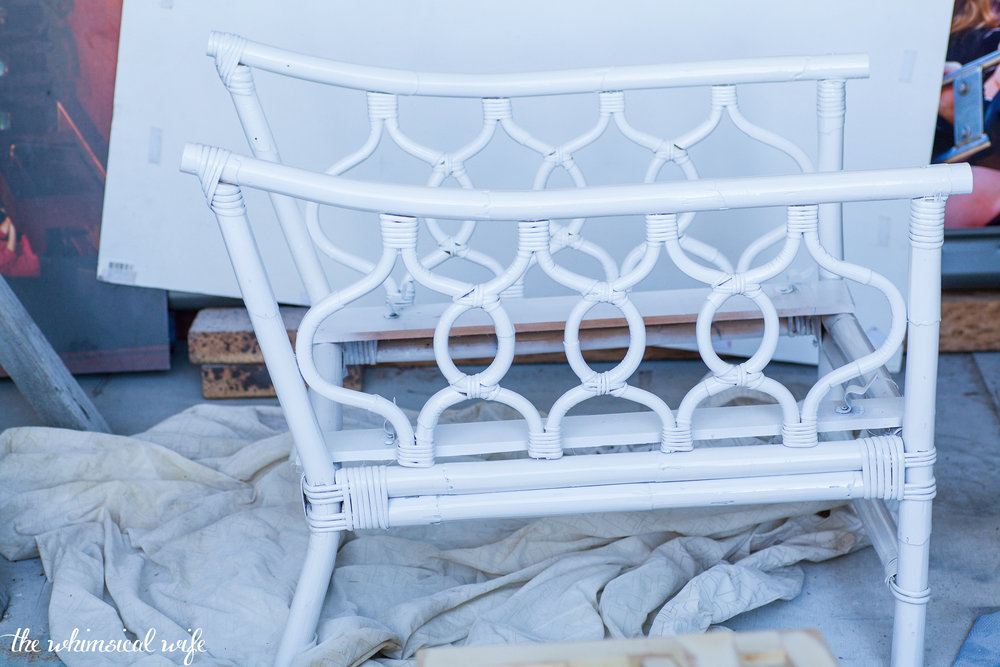
To revamp the chair I simply stripped it back to its bare bones and removed all the hardware and frame in preparation to paint it. Painting the frame was the easiest part of doing this chair up. All I had to do was give the whole chair a light sand in preparation for painting and give it a wipe over with a damp cloth. I used a high gloss enamel spray paint in white that was a paint and primer in one. This skipped the step of undercoating and it was super easy to apply to the chair. I did two coats of this paint on the chair and I think I used two cans in total on the whole chair.


After I had finished painting the chair the next step was to start reupholstering the cushions in the new fabric I had chosen. This probably was the hardest part of the whole project. That being said it is the bit of the chair that gives it the biggest bang for its buck. New upholstery made it go from ho hum to wow! So it was worth the effort. If you are wondering how to do something like this yourself then you are in luck. I have a video tutorial at the end of this post showing you the start to finish of the project.


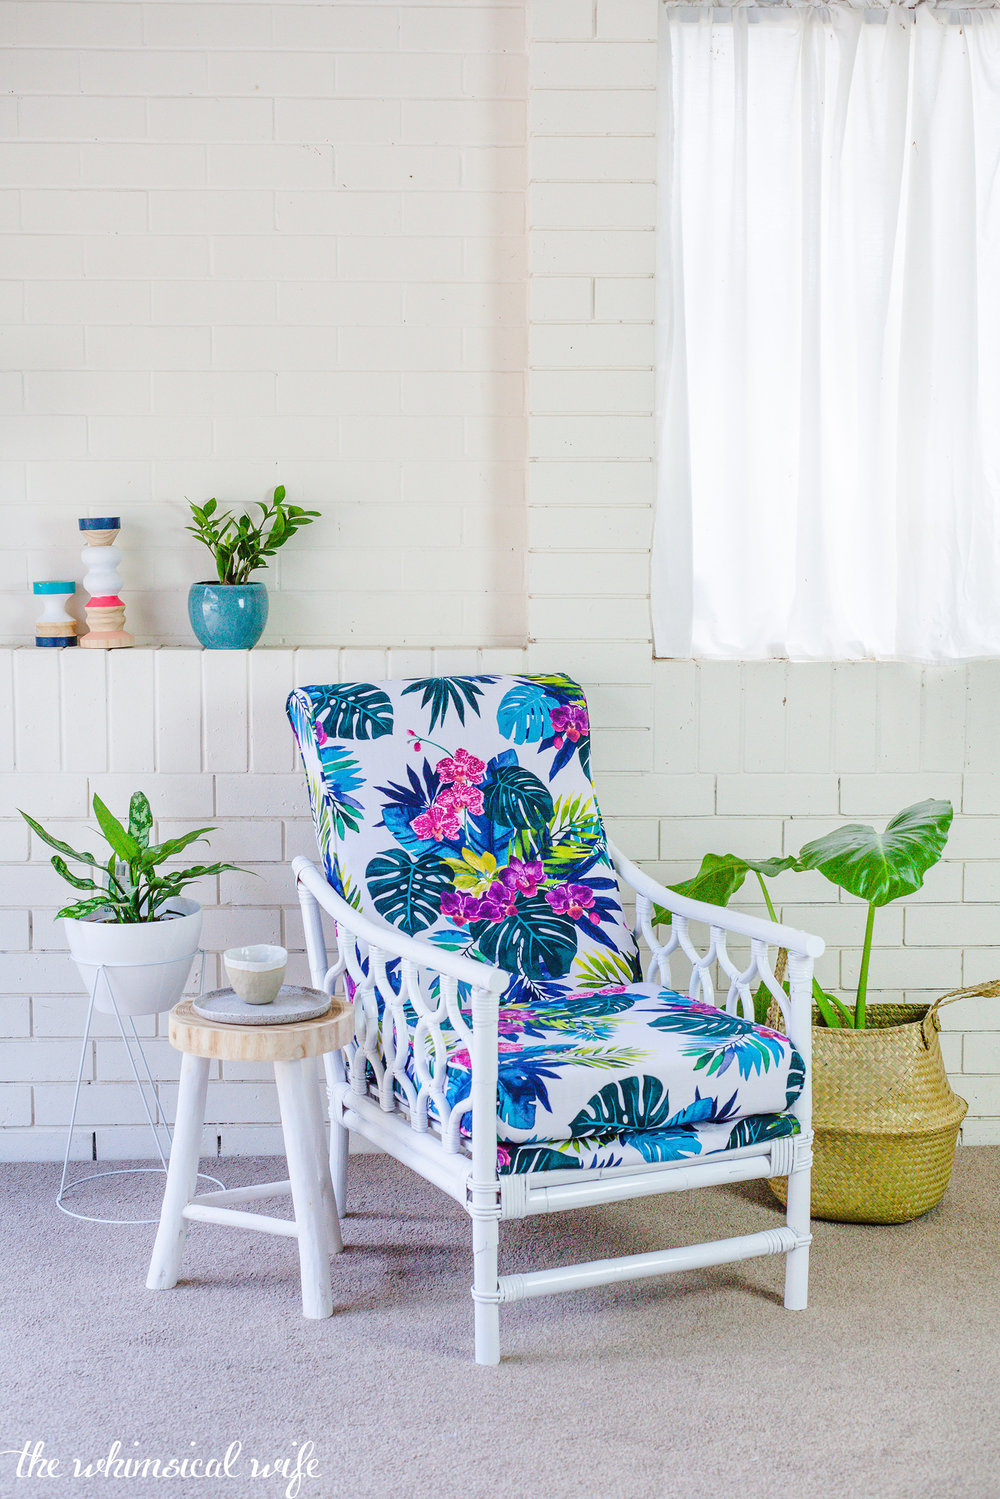

I created a tutorial video following the process that I went through to transform this chair. From start to finish you will see the transformation that the chair took. Plus I teach you how to upholster a cushion so that you can start transforming your own pieces of furniture. I hope this post inspires you to start searching the op shops for sad and ugly pieces in need of a transformation. The reward from upcycling a sad and sorry piece of furniture is thrilling. So make sure you watch my video below to some helpful hints and tips.
If you happen to give upholstering a chair a go make sure you tag me over in Facebook or Instagram so I can see your projects come to life.
Digital discoveries
- Casino En Ligne
- Casino Non Aams
- Slots Not On Gamstop
- Slots Not On Gamstop
- Crypto Casino
- Sites De Paris Sportifs Autorisés En Belgique
- Site De Paris Sportif Belgique
- Meilleur Site De Casino En Ligne Belgique
- Migliori Siti Casino Online
- Casino Non Aams Sicuri
- Casino Online Non Aams
- Crazy Time Live Bonus
- Meilleur Site De Paris Sportif International
- Nouveau Casino En Ligne
- Ufc Paris Sportif
- 稼げるカジノ アプリ
- カジノ バカラ カジノ
- Meilleur Casino En Ligne 2026
- Site De Paris Sportifs
- Tout Nouveau Casino En Ligne
- Casino En Ligne Français
- Casino En Ligne France Légal
- Scommesse In Crypto
- Crypto Scommesse
- Casino Avec Bonus Sans Depot
- คาสิโนคริปโตได้เงินจริง
- Casino Bonus Sans Depot
- Miglior Casino Online Non Aams
- Casino En Ligne France Légal
- Siti Scommesse Non Aams
- Casino Online Non Aams 2026
- Nuovi Casino Italia
- Quel Est Le Meilleur Site De Casino En Ligne En France ?
- 무료슬롯 사이트
- 익명 카지노
- Meilleur Casino En Ligne France
- Nouveaux Casinos En Ligne
- Casino En Ligne
- Meilleur Casino En Ligne
- Nuovi Casino Italiani
- Casinò Non Aams
- Meilleur Casino En Ligne
- Casino En Ligne
- Casino En Ligne France
- Nouveaux Casino En Ligne
- Casino Francais En Ligne
- Migliori Casino Online Italia