Hubby helped me do these which I am very thankful for. (I asked nicely by the way). I wasn't about to attempt to use the scary looking power saw and I don't think hubby would of let me either. Could of come away with one less finger!
First we sifted through our wood pile and pulled out a few branches that would were the right thickness for these ornaments. The wood needs to be strong and no cracking or large knots in the center of the branch. You will only find this out when you make the first slice into the branch.
Once you are happy with the insides of your branch start cutting "slices" of branch about 2 -3 cm thick, depending on the strength of your wood and your cutting skills (or husbands in my case).
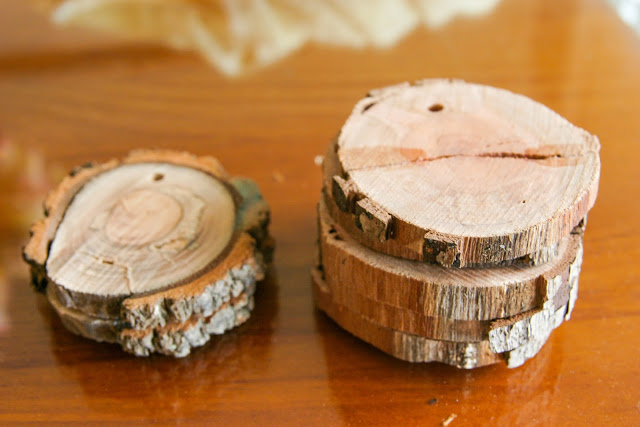
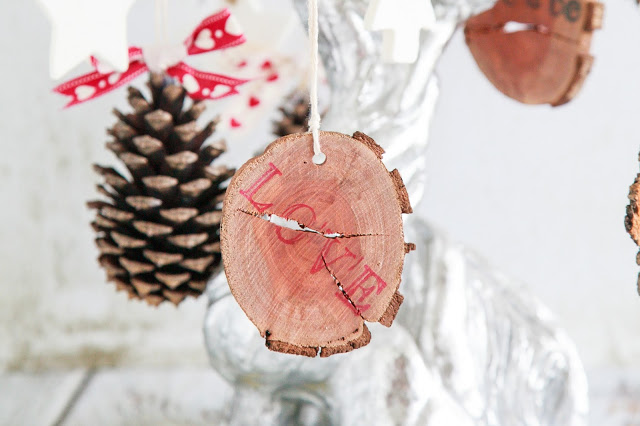
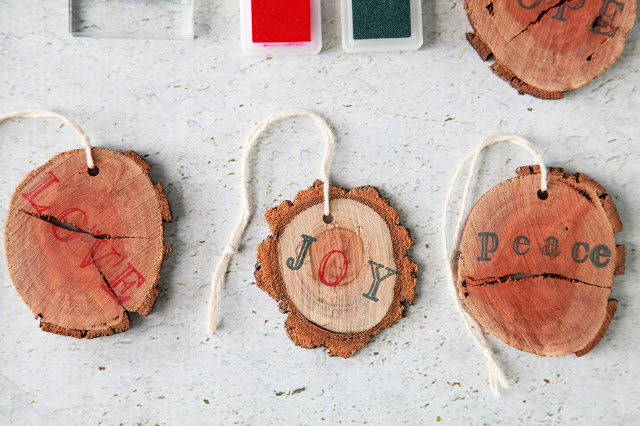
As you can see sections of the bark fell of around the outside edge of the wood during the cutting process but it still looked nice and rustic so it didn't bother me at all. Once you have cut your required amount of pieces the next step is to drill a hole in near the edge of your wood. This is to put string through to hang it from. You may need to be careful when doing this are a few pieces cracked and split when I was drilling the holes for these. If a piece breaks off simply glue it back on with wood glue.
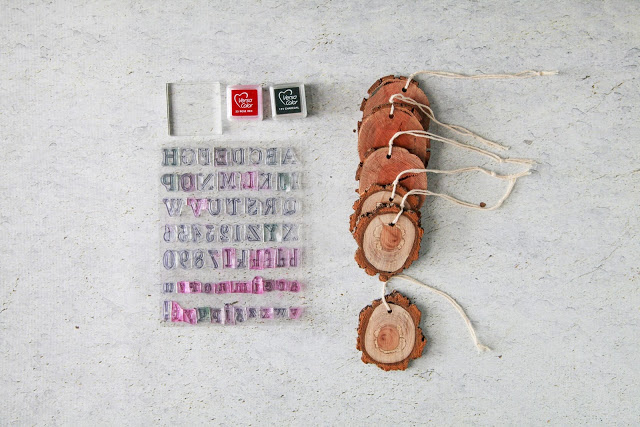
Once all the holes are drilled, thread the ornaments with your chosen string. I used cooking twine on these as I wanted the string to contrast with the wood. The jute twine I used on my White Dough Christmas Ornaments would of blended in too much.
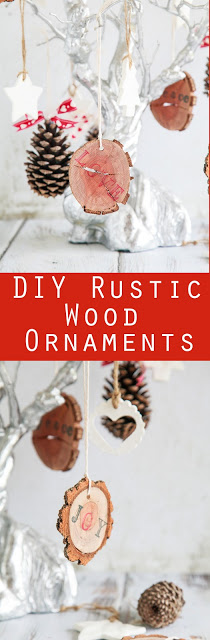
I then used my stamping kit to stamp words onto some of the slices of wood. I used words like peace, hope, love, joy and I also placed our names on some - the dog even got her own named ornament! I also left some blank to let the wood pieces shine by themselves.
To continue with the "natural" rustic theme I picked up a few pine cones that were lying around the yard and hot-glued string onto the tops of them to hang from the tree. To add a bit of Christmas colour I added a few bows to the pine cones made out of some Christmas ribbon.
These ornaments cost me nothing to make as I found all the materials in my yard or in my craft/kitchen cupboard. If the purse strings are a little tight around this time of year don't be afraid to get a little crafty and make something unique for your home.
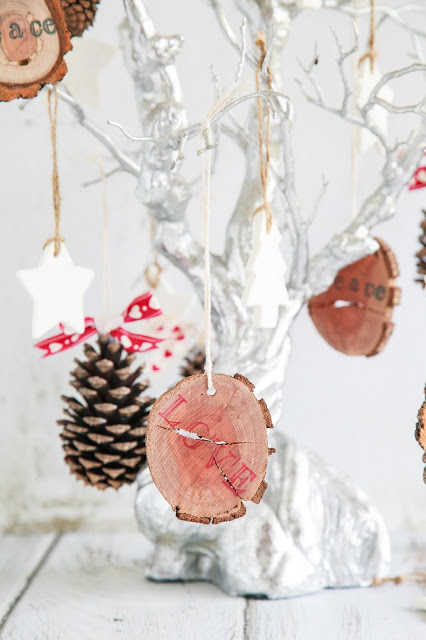
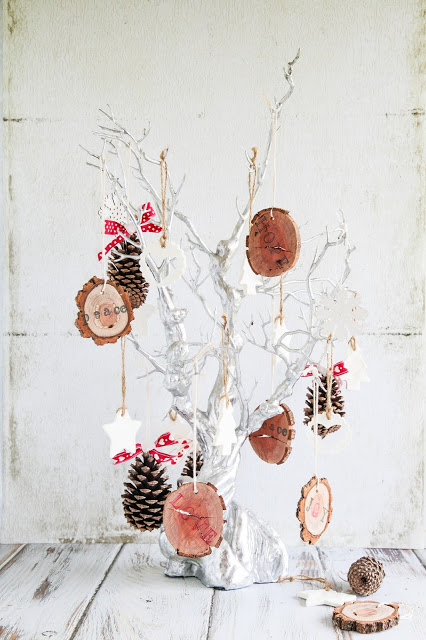
If you are tight on space and can't fit a tree in your house why not forgo a traditional Christmas Tree and create something like this decorative tree branch. This is a store bought decorative branch but if you can't find something similar why not find an interesting looking branch in your local forest area and pop it in a vase or pot. Decorate with your home made ornaments and maybe a few fairy lights and your good to go.

Okay so if you do have space for a traditional Christmas tree but need a little hand in styling your tree from start to finish here are my tips for styling a great looking Christmas Tree.
My Tips For Styling A Rustic Themed Christmas Tree:
- Place the branches onto the tree starting from the top of the tree and working your way down to the bottom - fluffing the fronds of each branch as you go so it is filled in nicely.
- Always check that your lights are working before placing them onto the tree. Replace any blown bulbs. I use two sets of lights and place them zig zag style on each side of the tree. This reduces the "new year" light tangle when you try to take the tree down.
- Forgo the tinsel in this style. It makes the tree look cheap and tacky. Sorry tinsel lovers. To add a little touch of colour to the rustic themed tree why not add red or blue bows made from some Christmas inspired ribbon.
- Place the plain ornaments on first keeping them evenly placed over the whole tree. Stand back and give the tree a once over to make sure that everything looks even.
- Place the "feature"ornaments or colourful pieces next around the front section of the tree. I don't generally hand any of my feature ornaments around the back section as they won't be seen. Keep them as the star of the show and leave them to the front.
- Add your choice of decoration to the top of the tree. I went with a home made wooden star.
- Cover the base of your tree with a old grain sack, piece of calico or a ready made tree skirt.
- Fill the base with presents. To keep in with the rustic theme cover them in brown paper or neutral themed wrapping and tied with jute twine to complete the overall look.