

I thought I would finally reveal the finished product of this Kitchen Hutch. It's been sitting in my dining room for nearly two weeks now wanting it's minute in the spotlight so I though I should give it one. Being the great blogger that I am I forgot to take a complete before photo. I thought I had one stashed away somewhere but I can't seem to find it. So this is the best one I have below.

I have been hinting and showing sneak peaks of the finished product on facebook and instagram over the past few weeks. So no more guessing of what the whole things looks like.. here it is!
Gotcha again... Hey I have to show you how I did it before I go ahead and show you what the finished product looks like. What is the fun in that. I will give you a quick run down on how I painted it because I am tired today and don't have the mental energy to go into a lot of detail. I did the usual sanding and undercoating with my favourite primer. I then painted the first of the top coats in my signature "clotted cream". This was the first stage of my design. We were going for a two tone look for the finished product

I got the original idea for this off Pinterest. You can follow my Furniture Inspiration board here if you want to see what I am pinning. This cabinet below took my breath away - I just loved the two tone effect and the rustic nature of the cabinet. I wanted to include the rustic mesh into our cabinet somehow but couldn't come up with anyway to do it. We ummed and ahhed for ages if we wanted to do it like this and if so what colour to use.

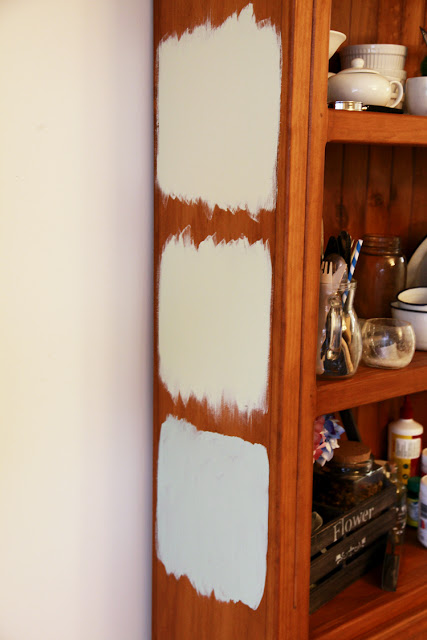
This is what the cabinet looked like for quite a while as we tested and re-tested different combinations of paint colours. We wanted a bluey-green colour for the main outside colour that wasn't too dark but wasn't too light. We couldn't end up finding one we liked so ended up mixing one ourselves from two different paint colours.
Once we had decided on our final colour it was all system go and time to newpaper up the section of the cabinet that we didn't want painted in this newly created colour. Thankfully hubby had a day off when this needed to be done and he helped me do it. It probably took us a good hour to tape off the inside of the cabinet protecting it from the next layer of paint. I then rubbed a little bit of candle wax here and there in preparation for Operation Rub Back once the top coat had dried. This helps the top coat of paint sand back to reveal the base coat underneath.

I used my trusty spray gun to give it's final coat. Things were a little dicey there as I thought I wouldn't have enough paint to finish the top coat. Thankfully we had more than enough with a little bit left over. After letting the paint dry over night it was time to do the unveiling. This is my favourite part. Once unveiled I gave her a sand to give her a little bit of character. It was under the watchful eye of husband as he didn't want it too "shabby".

TA DAH! She's all finished and put back into place. I dressed her back up and gave her some flowers to finish her look off. I'm really happy with the final colour and the combination of the cream and the greeny-blue top coat.


I cannot get enough of these roses at the moment. They are on there last flush before winter and I am trying to fill the house with them to enjoy them to the end.


As you can see in these photos the wax worked a treat. I only had to give these areas a light sand and the top coat came off no problems giving it a lovely worn look.


I would love you to pin it if you can!


blog directory