

It has been quite some time since I have shared a recipe with guys. Time is quite precious at the moment and I haven't had as much time to sit down in front of the computer to write a blog post up. This bread post has been sitting my draft folder for weeks now and I knew it was time to share it. Gosh who doesn't love freshly baked bread!
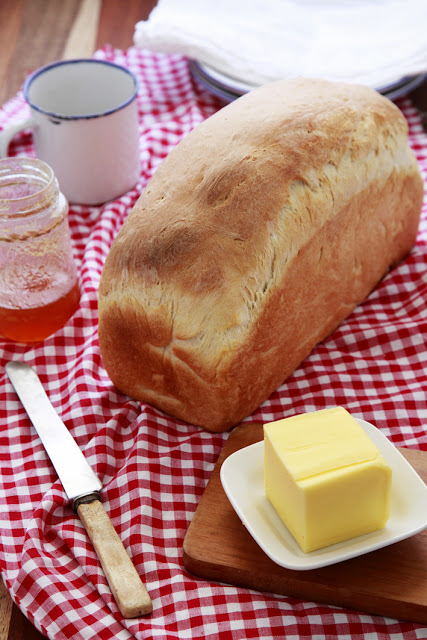
I think this is probably one of hubby's favourite things to eat warm from the oven, actually scratch that he would go for most baked goodies warm from the oven. The waft that fills the house when I bake a fresh loaf of bread is pretty enticing and when you pull it from the oven nicely browned and risen you know you have once again cooked a nice loaf of bread. Pat on the back for mum! I have started baking bread on a regular basis to substitute the brought loaves from the supermarket. It may not save us a lot of money to do it this way but I know what ingredients are going into my loaf of bread. Ingredients that I can pronounce, that are not weird chemicals, additives or overly processed ingredients. Just simple bread flour, yeast, water, a touch of sugar, salt and oil. That's it.

I feel confident and at ease feeding this to my 10 month old with out worrying about what nasties are hiding in the sandwich or toast that I have given him. It has taken me nearly over a year or so to perfect my loaf of white bread. I have had some pretty bad disasters along the way - and poor Bevan has had to put up with eating them. Thanks sweety for putting up with my rock hard, badly risen, burnt offerings. Nine times out of Ten he gets a near perfect loaf apart from the times I forget to put the timer on and burn the loaf. Working with yeast or bread can be pretty intimidating if you haven't had a lot of experience with it before. Hopefully I can guide you through the process of making a simple white loaf of bread without it being overwhelming and complex for you. Because everyone should know how make a loaf of fresh bread! (Unless you're gluten intolerant then that is another story) Hubby enjoys his fresh bread slathered with butter and vegemite or gasp toasted with a squirt of tomato sauce. I shake my head at the last one. If you want to make your own fruit loaf be sure to check out my Fruit Loaf recipe.


The first step in creating the perfect loaf is to make sure your yeast is fresh. Yeast is a living organism and it requires the right conditions and properly measured ingredients to coax it to spread through a dough and create a good loaf of bread. You need to make sure your yeast is in date and fresh. Old and out of date yeast will set you up for failure resulting in a unrisen loaf that would only be good to a bricklayer as it will be that rock hard. I go through my yeast fairly quickly but if you are unsure about the age of the yeast hiding in the back of your cupboard, throw it out and go and buy some fresh stuff to save you the heartache of slaving over your dough only for it not to rise.

The second step is to always properly measure your ingredients. Use scales, measuring cups and spoons to get the right amounts. If you wing it and try and guess amounts you may end up adding more or not enough of the ingredients to create the right ratio for a good loaf.
The third step is to always activate your yeast with lukewarm water to give your bread a better rise and to make sure your yeast is alive and working. I always do this with every loaf that I make. It is important to only add lukewarm water - about room temperature. To check if its the right temp place your finger (preferably not freezing fingers) into the water and it shouldn't feel hot and it shouldn't feel cold. If you are struggling to get the right temperature of water because its either seriously hot or cold outside I add about 50 -75 ml of boiling water to cold water to make up the 275 ml that is required.

Fourthly always make sure your knead your bread for about 5-10 minutes. This stretches the gluten strands in the flour creating a lighter and fluffier loaf. If you aren't sure about kneading dough by hand check this YouTube video out.
And last but not least always prove your bread twice to allow a proper rise and allowing the yeast to do its magic. Not sure what proofing is? Check out the definition here. For a good loaf you need to proof it twice. Once after kneading until it doubles in size and then again after punching out all the air and shaping it and placing it into your loaf tin. Once it is in your loaf tin you need to let it rise until it is 2-3 cm above the side of the tin. This could take between 45 minutes to 90 minutes depending on the temperature of the room. I always cover mine with a clean tea towell and place it in a warm, draught free spot. If your house is really cold, warm your oven for a minute and place the loaf in there to proof, before removing and preheating your oven and then placing back into bake it.
I have given instructions for either doing the loaf by hand or using your bread maker. I generally get my bread maker (from Aldi) to do the hard work of kneading and doing the first proof before transferring it to my bread tin to do the last proof before baking. You can either do the whole process by hand or let your bread maker do the whole thing for you and bake it in their as well. I like baking mine in a proper loaf tin as I get a better shaped loaf and don't have to gouge out the bottom of the bread to remove the bread maker paddles at the end of cooking. I found my bread tin in my local op shop however I am sure you could buy them online somewhere.
This is a really basic bread dough and you can play around with the add-ins such as seeds, nuts, and flavours such as honey or spices.
Homemade White Bread

by
Prep Time: 15 min + 2 hours rising
Cook Time: 30-40 minutes
Keywords: bake fall spring summer winter
Ingredients (1 large loaf)
- 600g Strong Bread Flour (**I use Lauckes Crusty White Bread Maker Mix)
- 275ml lukewarm water
- 1 tablespoon yeast, dried
- 1 tablespoon olive oil
- 2 teaspoon sugar
- 1/4 teaspoon salt
Instructions
Grease a bread tin with olive oil and set aside. Alternatively set up your bread maker under "dough" setting to knead the dough for you or under bread setting to do the whole process.
In a bowl place the dried yeast, sugar, water and oil. Set aside in a warm place for 10 – 15 min until the yeast mixture begins to froth.
In a large bowl (or bread mixer bucket) place in this order: salt and then bread flour.
Pour the frothed yeast mixture over the bread flour and mix until a dough forms.
(*Press start if you are using a bread mixer on a bread setting or alternatively you can set it on dough setting to just knead and prove it for you)
By Hand
Knead dough on a floured surface for 5 – 10 min until silky and smooth.
Turn your oven on for 40 -50 sec on high and turn off.
Place dough in an oiled bowl, place a tea towel over the top and place the bowl into the warmed oven. (*This creates a warm environment for the dough to rise) Leave in the oven for 1 – 1 ½ hours or until doubled in size.
Remove the dough from the bowl (or bread mixer tin if using dough setting) and knead on a floured surface for another 2-3 minutes to expel all the airout of the dough. Knead the dough into a long thick sausage the length of the tin you will be cooking it in.
Place the dough into the greased bread tin and place back into the oven uncovered for about an hour or until the dough has risen 2 - 3cm above the tin (This could take a little bit longer if its cold outside).
Turn the oven on to about 175 – 180 degrees, fan forced (or 200 – 205 degrees normal oven) Cook for about 30-40 min or until bread is a nice golden colours andsounds hollow when tapped on the base.
Tip the loaf onto a cooling rack immediately to cool down.
Leave bread to cool completely for a couple of hours before slicing - if you can resist.
Powered by Recipage
** I buy the Lauckes Crusty White Bread mix in 5kg bag as I make bread at least once a week and found this to be the most cost effective way of buying flour. There are other types of bread flours out there but I have found this one to get the best results for me.


blog directory