


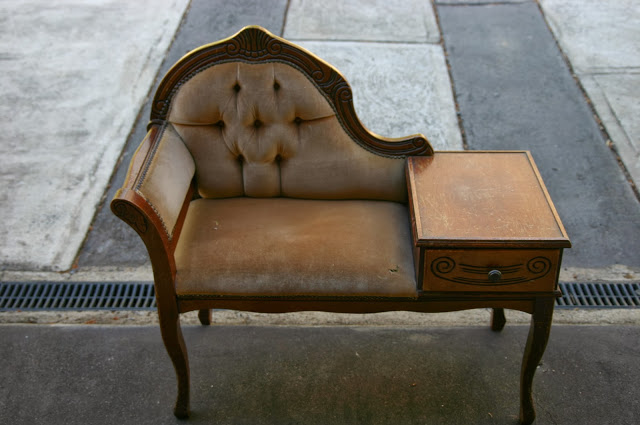
It's finished. Finally. I have been working on this chair for probably 6 months now. I started on it back in June then got side tracked on a food photography job. I found my feet and started at it again. Another food photography job distraction. This chair was for my sister. She was so patient in the process. Never pestering of asking is it done yet. I wonder if she thought I would never finish it. Sorry Jess.
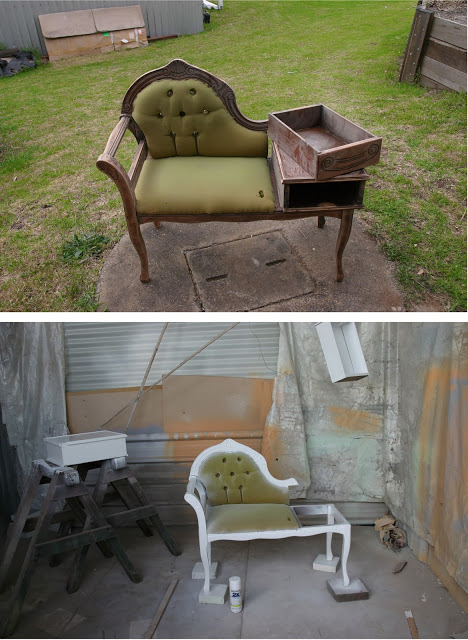
Once I got that last job out of the way I put my nose to the grind and butt into gear and spent a few days completing it. It didn't take me that long once I concentrated on it for a few days. The worst part of the job was pulling out thousands of staples to get rid of the old upholstery. It bored me to tears doing this bit. This is what the poor girl use to look like below. Terribly outdated and in need of a bit of TLC and a serious makeover. I have a soft spot of anything with Queen Anne legs such as this side table, desk and chair set and my wingback chairs that I have done up.
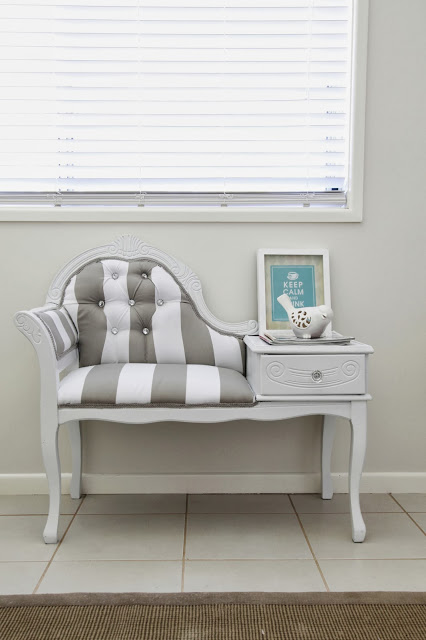
My sister has just opened her own home base Beauty studio and wanted a nice statement piece of furniture for clients to sit on and to jazz up the room a bit. Her style is classic french chic. Her vision was to add some bling to the chair by adding some diamante buttons and replacing the old drawer knob with a classy glass replacement. I was to paint it white and she bought some gorgeous grey and white strip fabric to re-upholster it in. It was a great vision now I just had to make it come to reality.

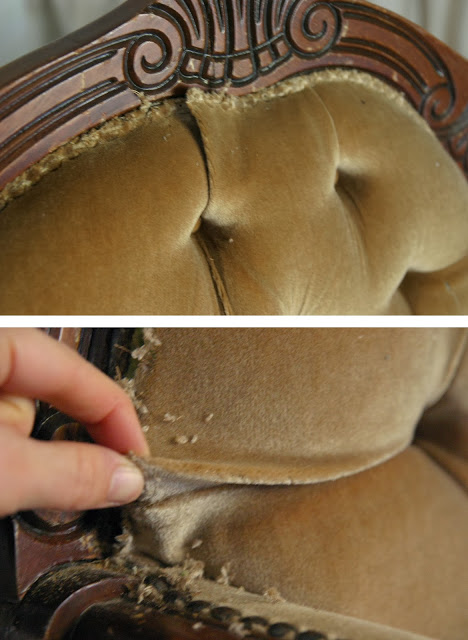
After finally pulling out the thousands of staples and the metal beaded trim that was holding the fabric in place, I got down to sanding the the whole piece down. Remember... Sanding is the most important step you will do when painting something. I can''t stress this enough. I don't want you to make the same mistake as I did with this French Chic Armchair.
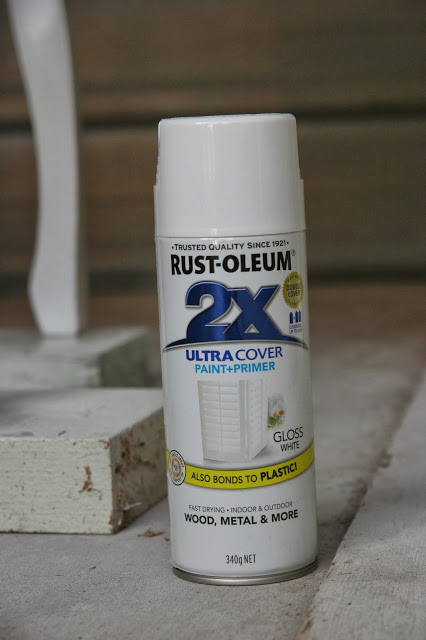
I painted it using the new Rust-Oleum 2x Ultra Cover Paint in Gloss White. The 2x Ultra Cover can paint over just about anything - glass, metal wood and even plastic. This paint delivers twice the coverage than normal paints. I only used two cans to give the entire chair two coats of paint. It is a paint and primer and one allowing you to skip the undercoating stage and go straight to painting your project. Great for impatient people like myself. It was fantastic to use, it has a 360 degree any-angle spray mechanism allowing me to spray under the chair and in the hard to reach places without having to turn the chair over or the spray to start spluttering. It dried really quickly - within 2 hours or so (depending on the weather) which allowed me to get to the next stage quicker.... Upholstering!
I was actually dreading this next stage. I have never done any deep button upholstery before and was wondering what I had volunteered myself for. I decided to take things slowly and calmly and take LOTS of photos as I pulled the chair apart. Great tip if you are doing anything like this. Get your camera out even if its on your phone and snap away. The more detail of how it came apart will help you put it all back together. Or at least give you any idea where to put the tucks and pleats like I did with this upholstery.
Another tip is to keep the pieces of material you pull off a piece such as this. I used it as the template to cut out the new material. Cut a good extra 1-2 inches around the old fabric, the excess can be trimmed later on.

I stated on the arm rest first as it seem the easiest to begin with. I used the Sika Bond Spray Fix to bond the fabric to the arm rest cushioning. I then stapled it to the chair with a staple gun. I would recommend getting a decent heavy duty staple gun if you are going to do a bit of upholstery work. Mine is not great and I wished I had a heavy duty one as the staples sometimes wouldn't punch into the wood. I either had to pull them out or hammer them in which then dented the paint. Drama.
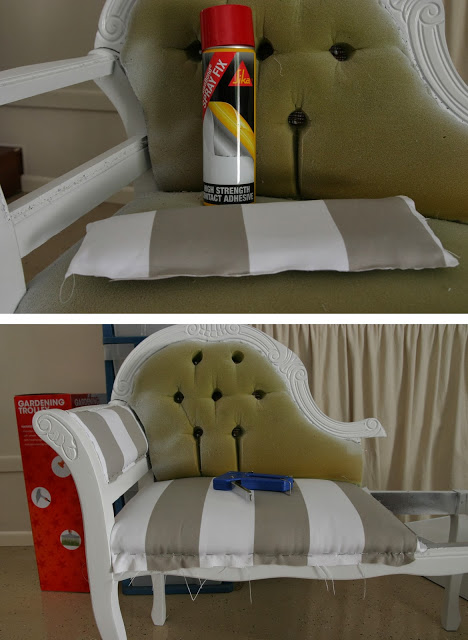
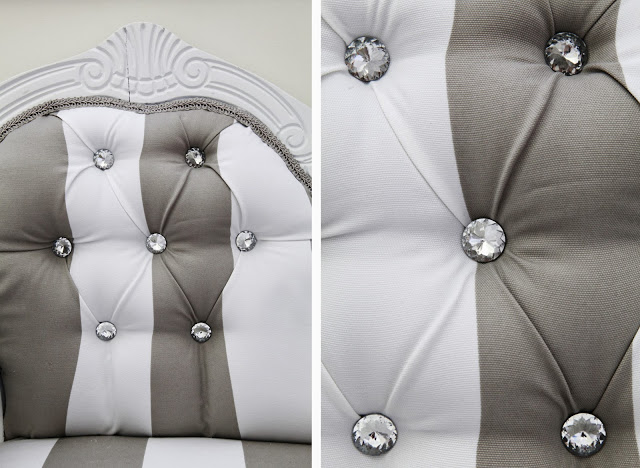
I then started on the re-upholstering the seat cushion as it was the next easiest thing to do. A million staples later it was done. I then took a deep breath and got stuck into the back of the chair. The trick was to start at the top row of buttons. Add each of those in first and add in the pleats and tucks where necessary and then go to the next row and begin the process again. It wasn't as hard as I first thought but it was a little bit more fiddly than normal upholstering. I stapled the top edge down once the first two rows of buttons were done and moved to the last row. I ordered the buttons from eBay. You can find them here.
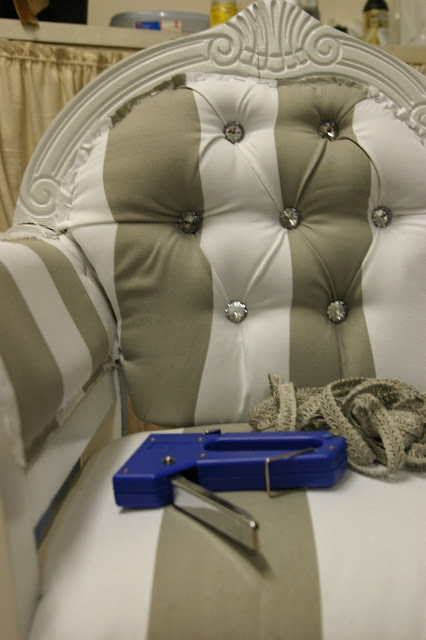
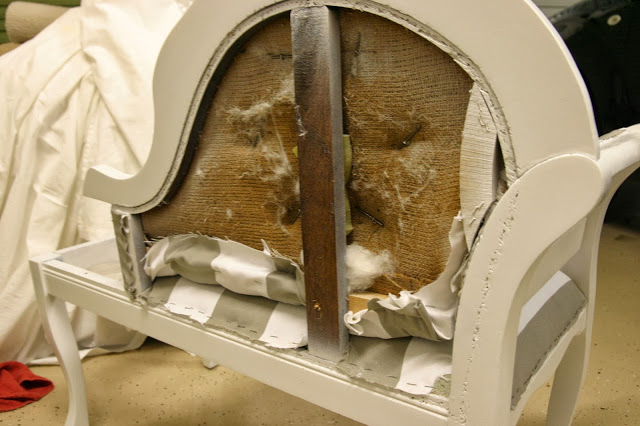
This is what the chair looks like from the back. The buttons are held on with nails slid through the hole. No sewing! I am not sure if this is normal but it sure made it a heck of a lot easier than trying to sew each button in place. The fabric is held firm at the back of the chair and I added a million staples to keep it in place. A panel of fabric and padding was then placed over the back to hide it all.
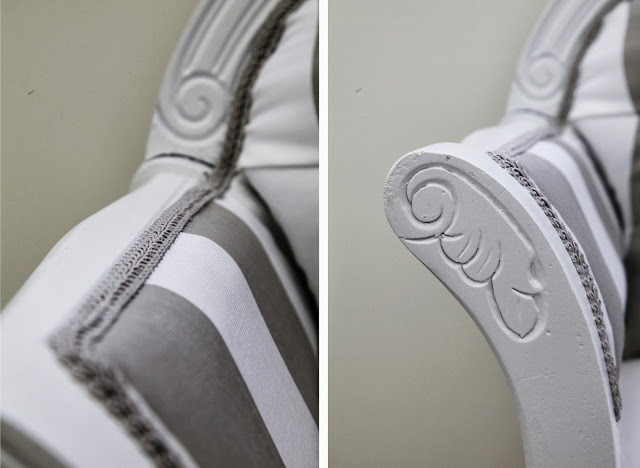
To finish off the chair I added some braided trim which I picked up from spotlight. I glued it on with a hot melt glue gun around the entire chair where the metal trim use to be. It was the icing on the cake so to speak and finished off the chair nicely.

I added the glass drawer knob and I breathed a sigh of relief. I had finished it! Yay. I picked up the knob from eBay as well. You can find it here. So sit back and scroll through the finished photos of this pretty nice chair!
I beat my deep button demons and completed my first deep button upholstery!


Food & Drink blogs