

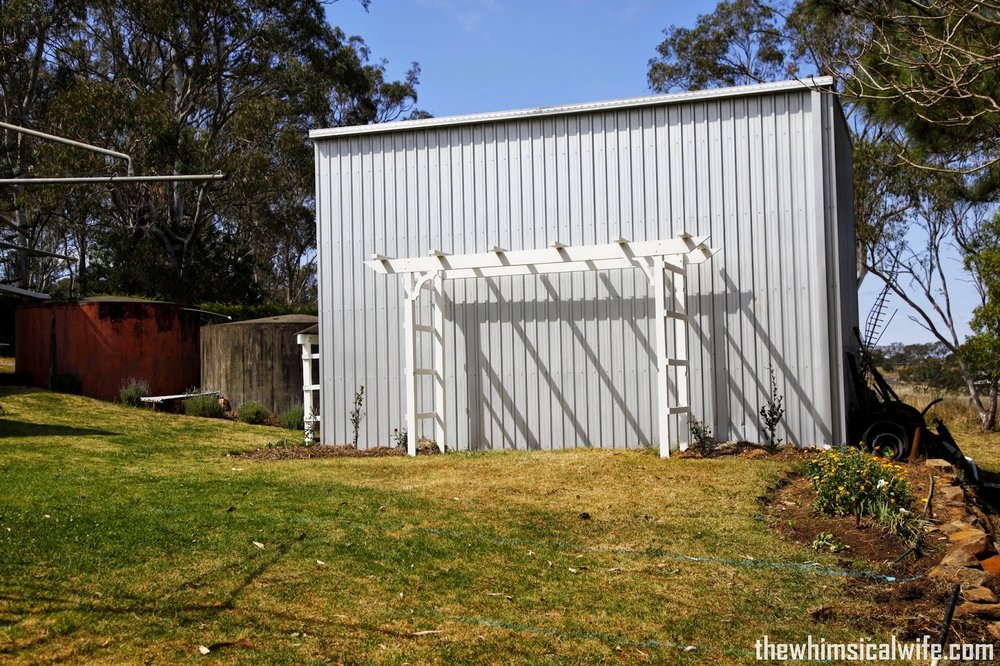
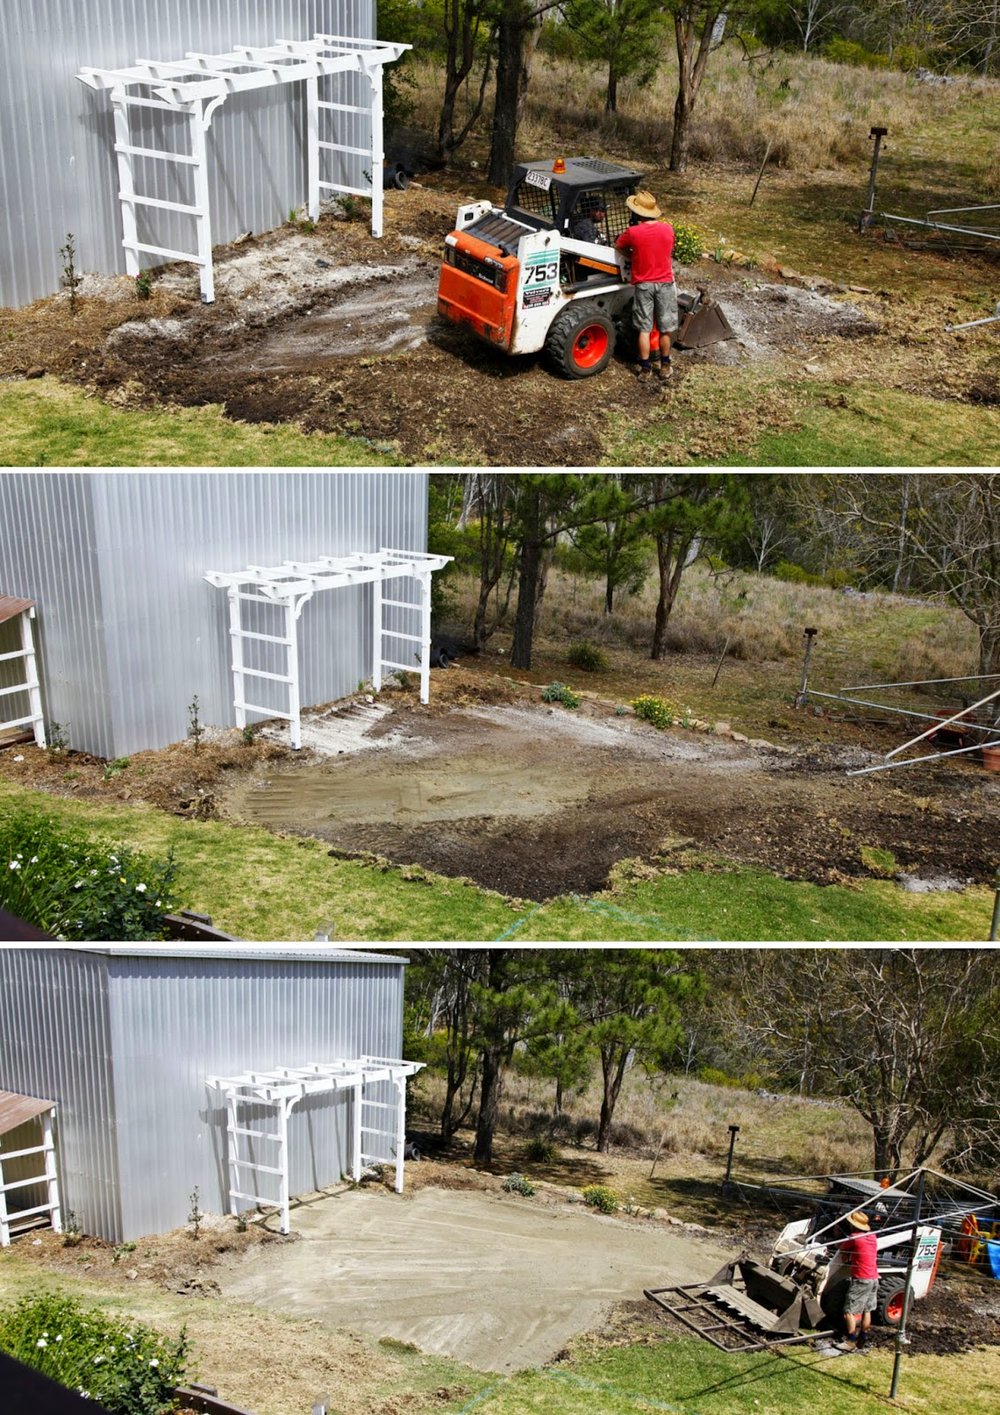
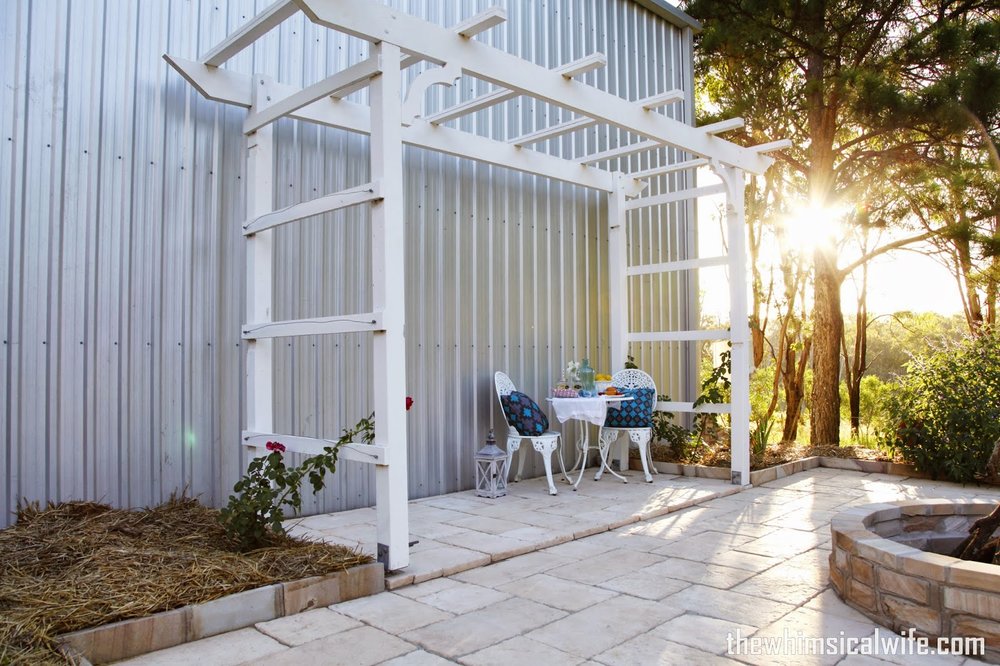
I am finally getting to share with you how we built our own fire pit area. Yay. I have been sharing sneak peeks of the process of us building it over on instagram under #projectfirepit. We started the whole process of building #projectfirepit early last year with the arbour being constructed. Being the great blogger that I am I didn't get a great before picture. The arbour was half constructed before I realised we hadn't got any starting photographs. However you can get the gist of what it looked like before. The person who owned this house before us was a metal forger and he built this extraordinarily large shed to work in. I was not such a fan of it when we bought the house and I am still not thus the beginnings of #projectfirepit. We planned this arbour and fire pit space to detract from this large metal cube sitting in the back yard and create some scale to the area and basically cover it up and draw the eye away from it.
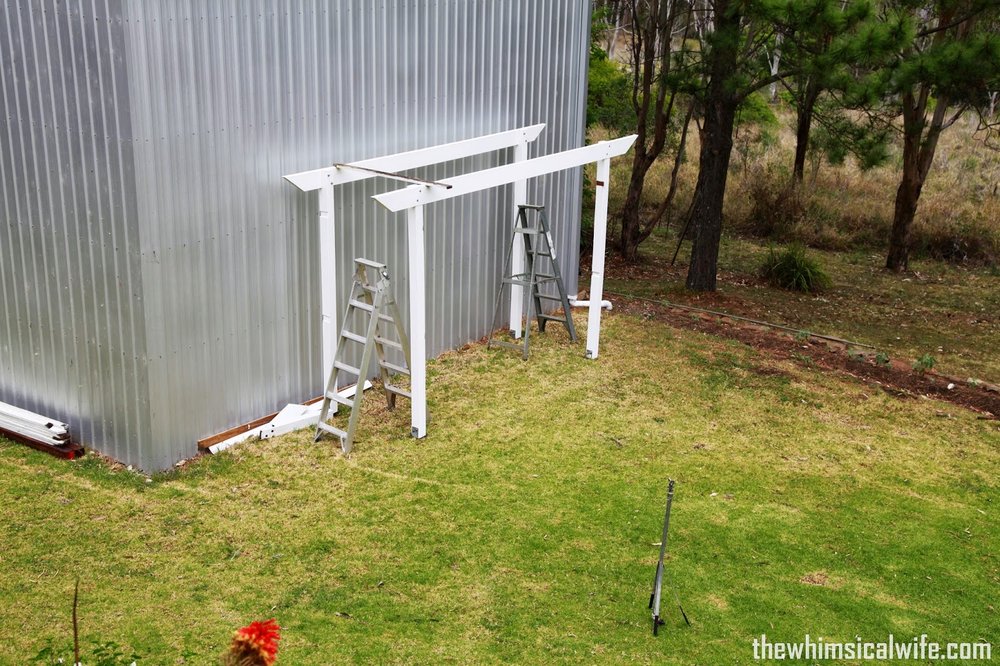
The arbour was the first part of the project which hubby built early last year using leftover timber from the pergola area we knocked down to build the deck and retaining wall at the back of the house.
...................................................................................................................................................................
Arbour Construction Details
- Four galvanised metal footings concreted into the ground.
- Main posts bolted into the metal stirrups using galvanised hex bolts.
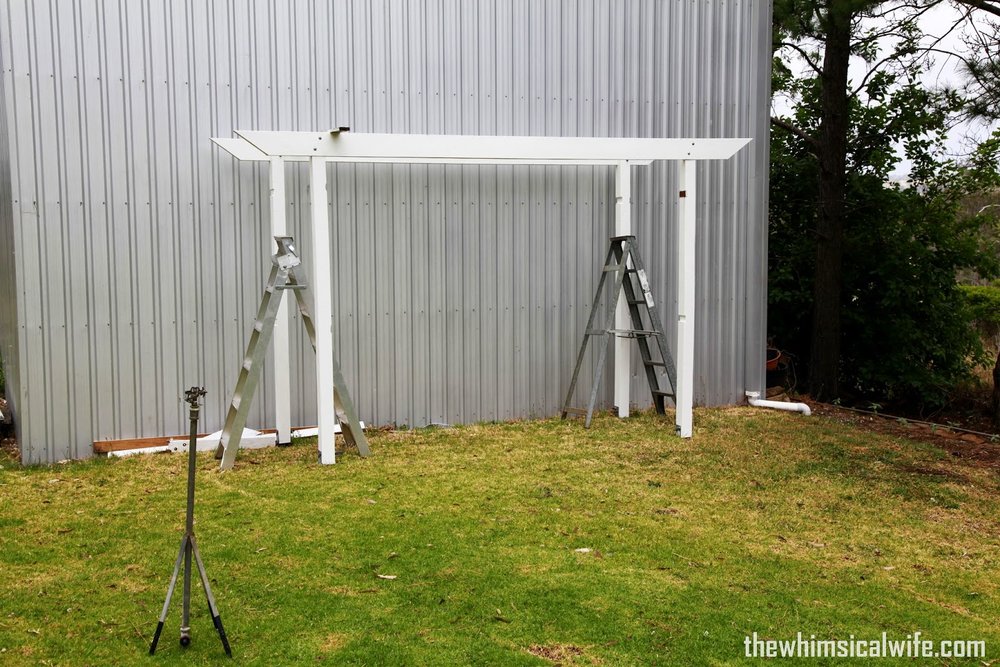
- Cross beams bolted onto main posts and the ends cut on an angle for a nicer finish.
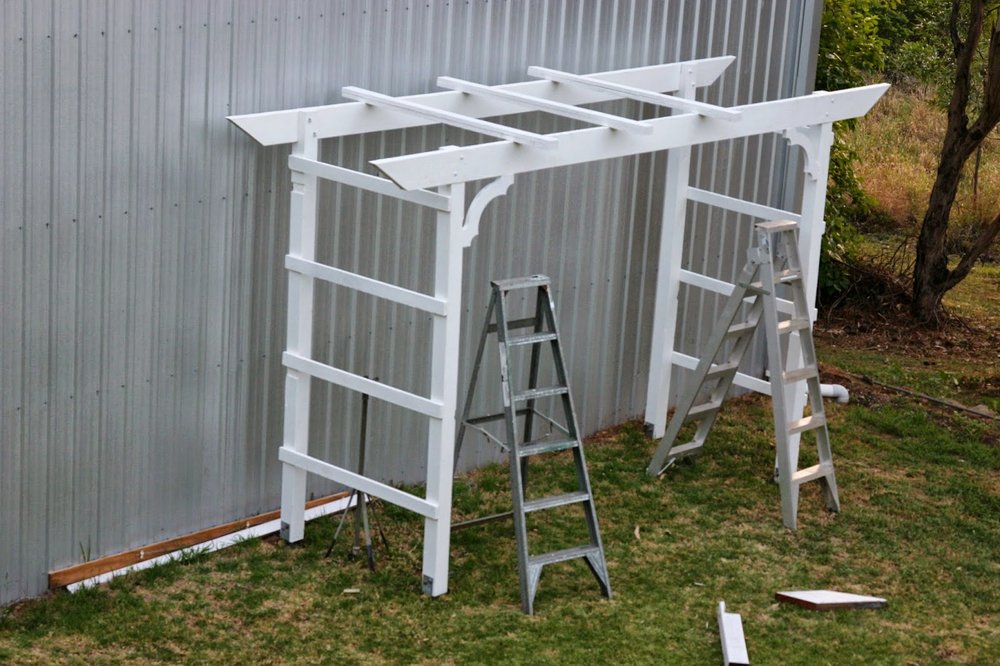
- Cross battens spaced and attached evenly across the top and sides of the arbour.
- Decorative detail added in the corners of the arbour.
- The whole arbour was painted in white exterior acrylic paint
It sat finished there for most of the year before we decided on a design for the fire pit area. The first step was to draw a plan of the space we wanted to create. I had been collecting ideas for a little while now over on my Outside Inspiration pinterest board. We wanted to create a rustic french inspired fire pit area using sandstone paving and finishes and a formal looking garden surrounding it.
The plan did evolve a little as we went along in the building process but the main idea for making a plan was to calculate the volume of materials we would need to create this space. We decided upon the finishes we wanted to use for the fire pit and paving before proceeding with the building process. We chose the Bradstone Old Town paver from Boral Pavers in Gironde. For the fire pit and garden edges we sourced some local sandstone from a quarry nearby.
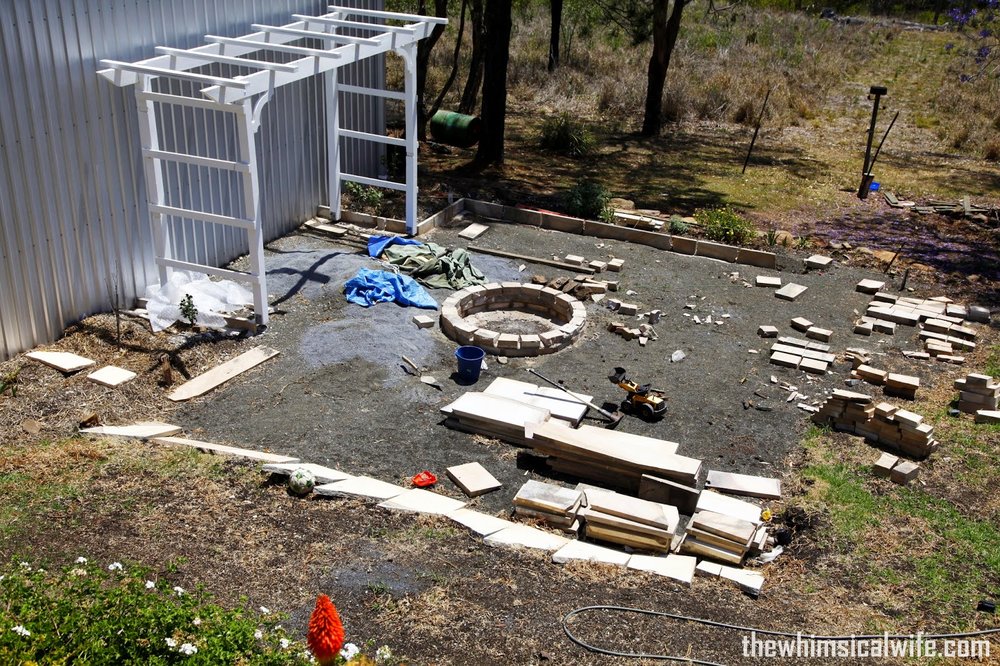
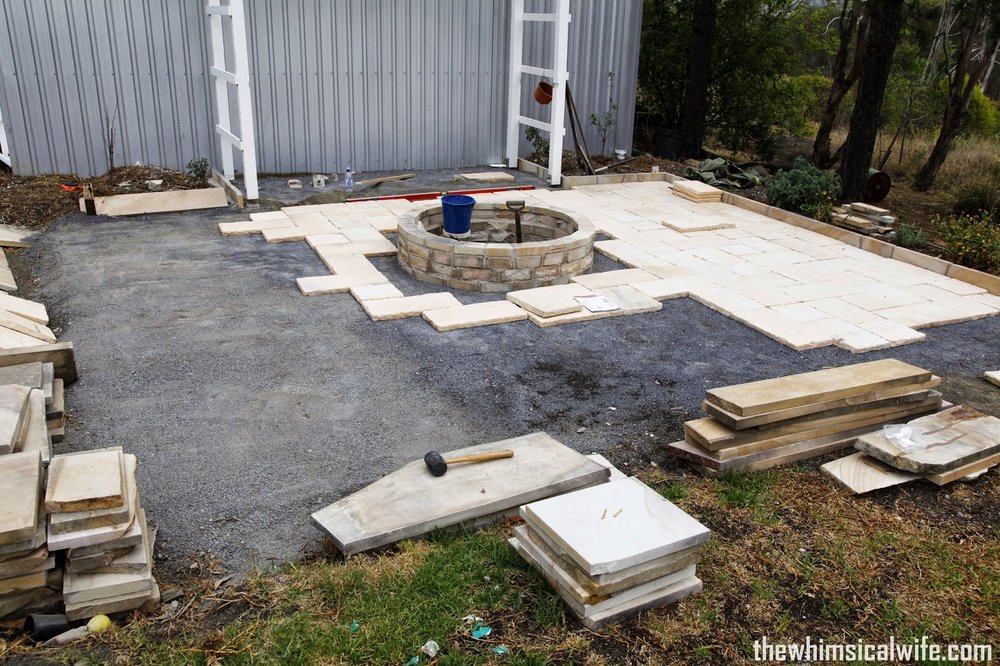
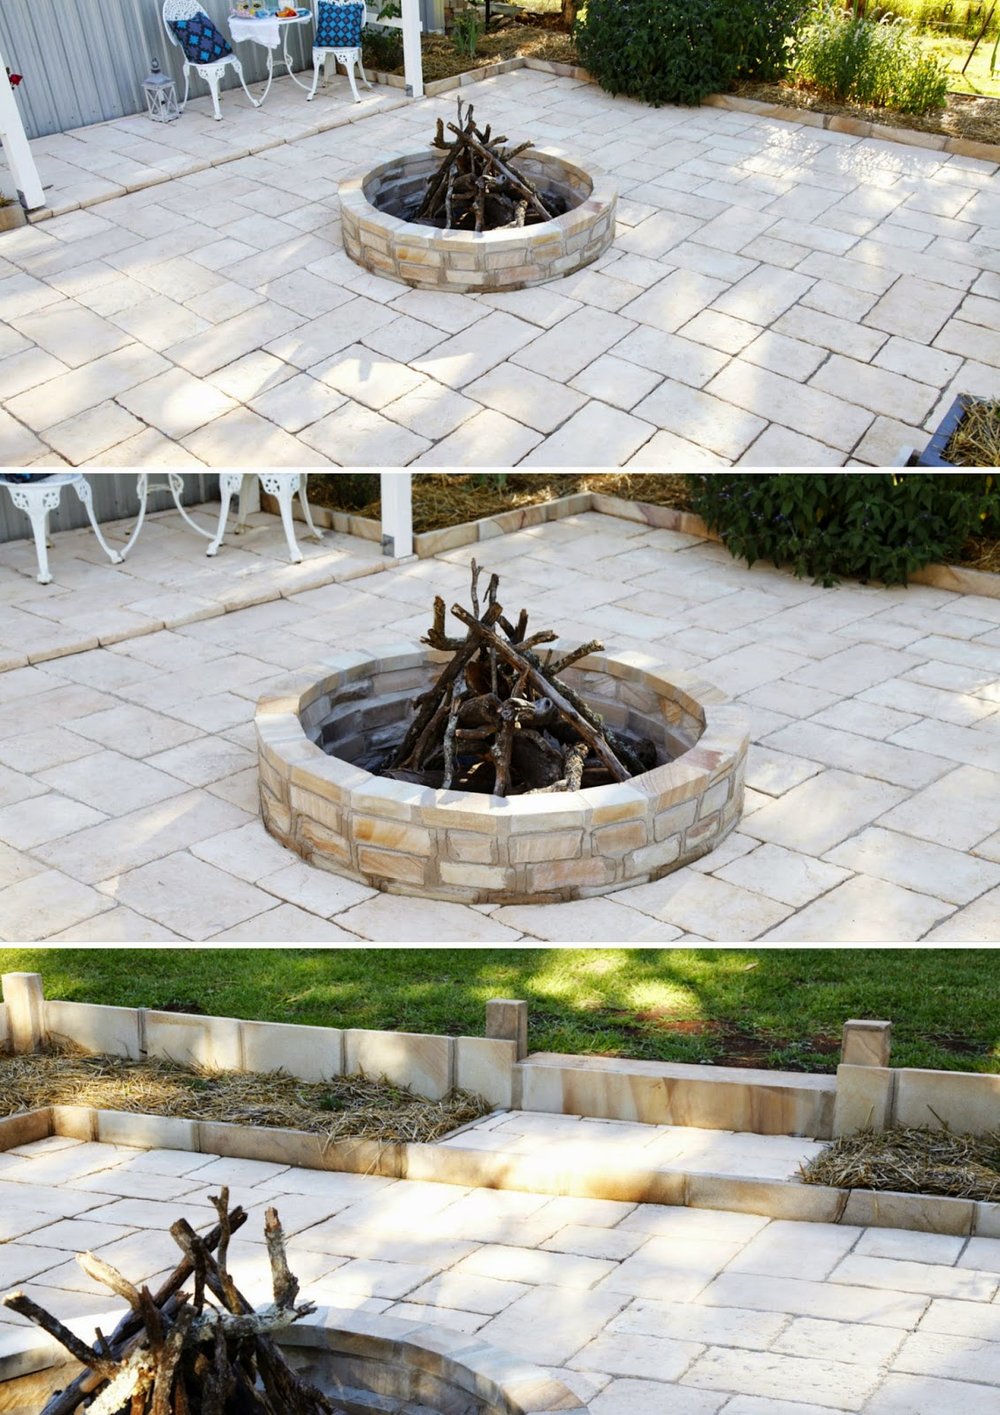
To start the construction of the fire pit Bevan set and marked out the fire pit area. He then excavated the site to a depth of 400mm. The first row of reclaimed sandstone was then laid, levelled and haunched in to stop any movement and create a sturdy foundation for the rest of the layers. He created this section a few days after Little Miss was born and wrote our names in the foundation of the fire pit. It was a cute gesture to see all of our names lined up around the inside edge of the pit. Bevan then continued each level using the reclaimed sandstone and adding cement pointing in between the bricks until the required height of the pit was reached.
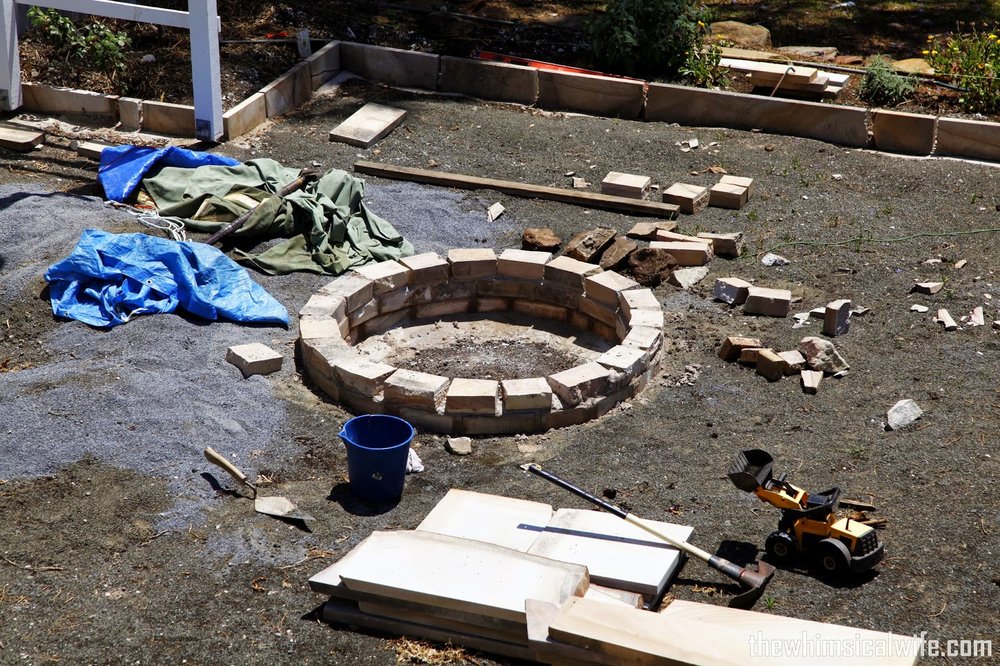
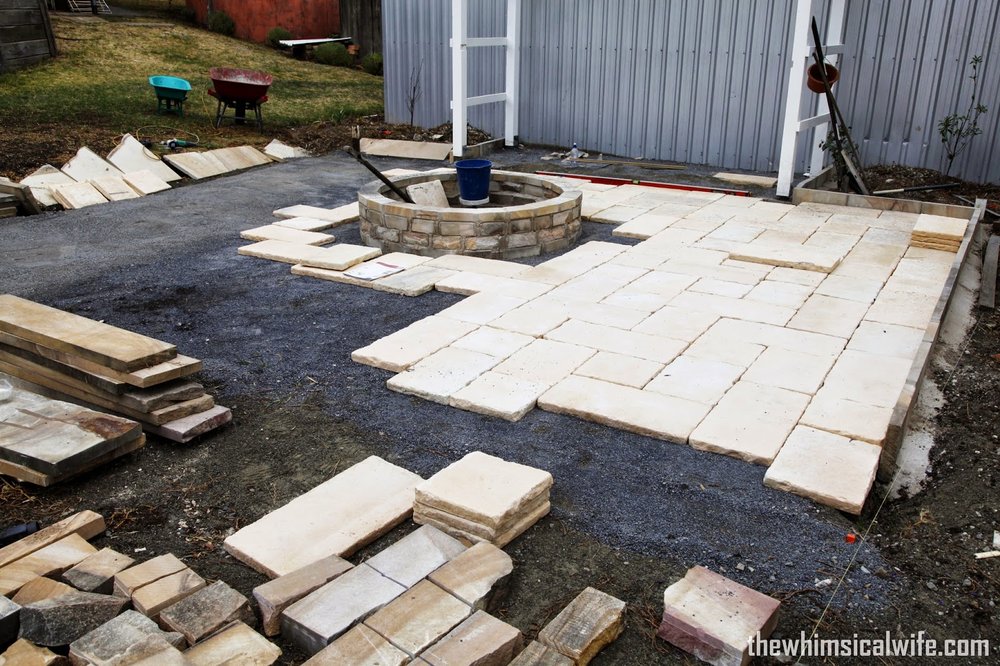
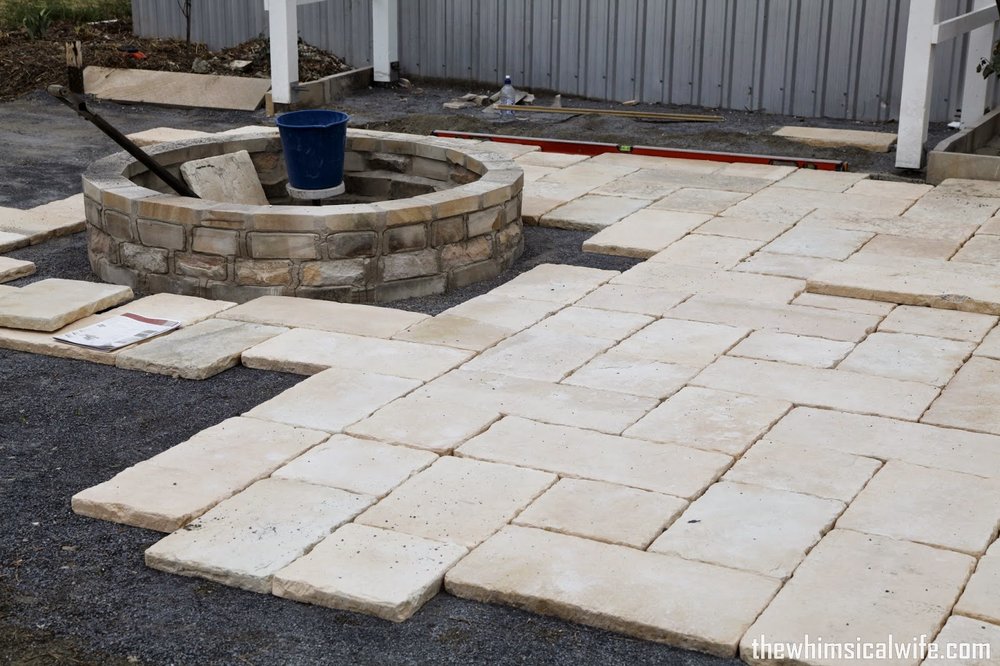
As you can see by the yellow digger above J.D though this was a massive sandpit and had a ball playing around in it! Once the fire pit was complete Bevan started to layout the Bradstone Old Town pavers. We followed the pattern instructions in the brochure as to how to lay them out correctly. The pavers come in three different sizes to give a random and rustic look. I just adore the look of these pavers as they are pitted and worn on the top and along the edges and it fit our french rustic brief that we were going for. Bevan continued laying the pavers around the fire pit and to the other side of the of the space, leaving the pavers around the edge of the pit till last. He had to cut these by hand using a grinder to fit them perfectly against the fire pit.
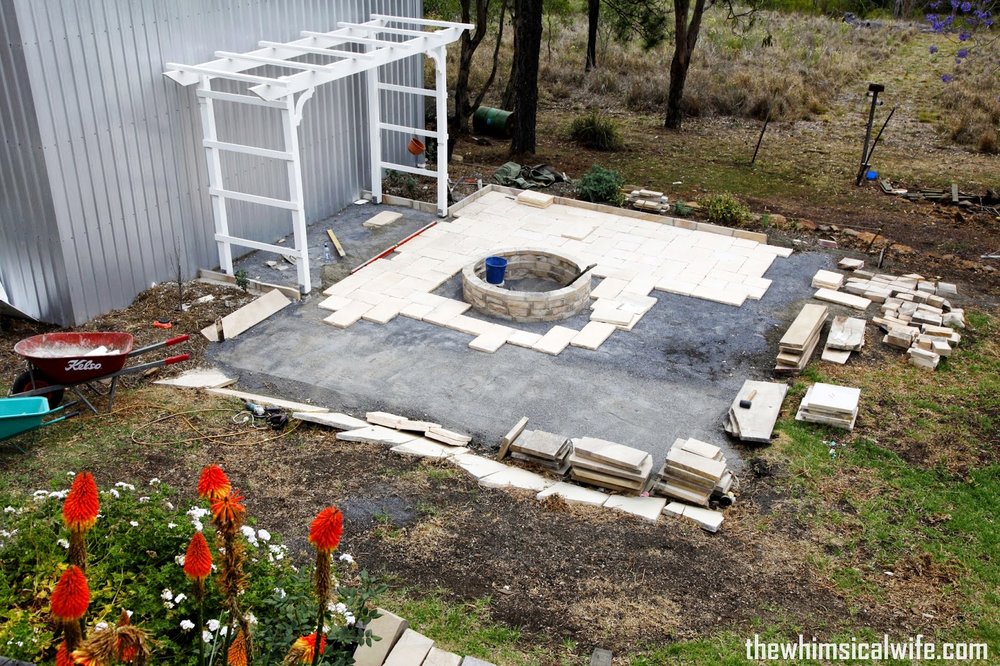
In the picture below you can see the string line in the lower right hand corner and also the haunching in behind the sandstone garden edging. Bevan did this around all the sandstone garden edging to keep it stable and firm for many years to come. We make things to last round here. You can also see the process of the Bradstone Old Town paver being laid. I think it took hubby about a full days work to lay the entire section of pavers. Not including the finishing details around the edges. This poor guy also worked through 37 degree heat to complete this fire pit area. He took two weeks holiday when Little Miss was born to work on this area and we just so happen to have a massive heat wave during that time. He trudged along still working in the blaring sun. This man is a legend. I was in a newborn baby haze so the poor guy didn't get any help from me with this.
Somewhere along the line we forgot to take more photos of the area being completed. I blame just coming out of hospital and dealing with a newborn baby. It was all I blur sorry and the camera got put on the wayside and forgotten. So the steps that we missed photographing was completing the rest of the garden edging, small sandstone retaining wall and stairway entrance. Filling in between the pavers with gap sand and making the final touches to the whole space. So instead of more progress photographs you get to see the finished result sooner. So without further delay lets crack on to see how the area looks now. Voila.
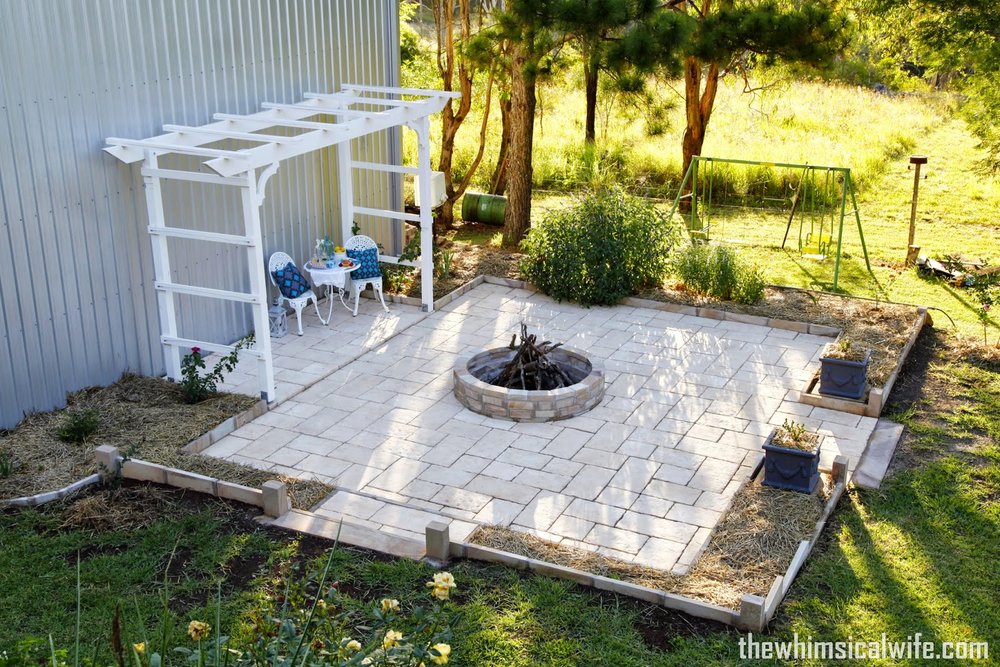
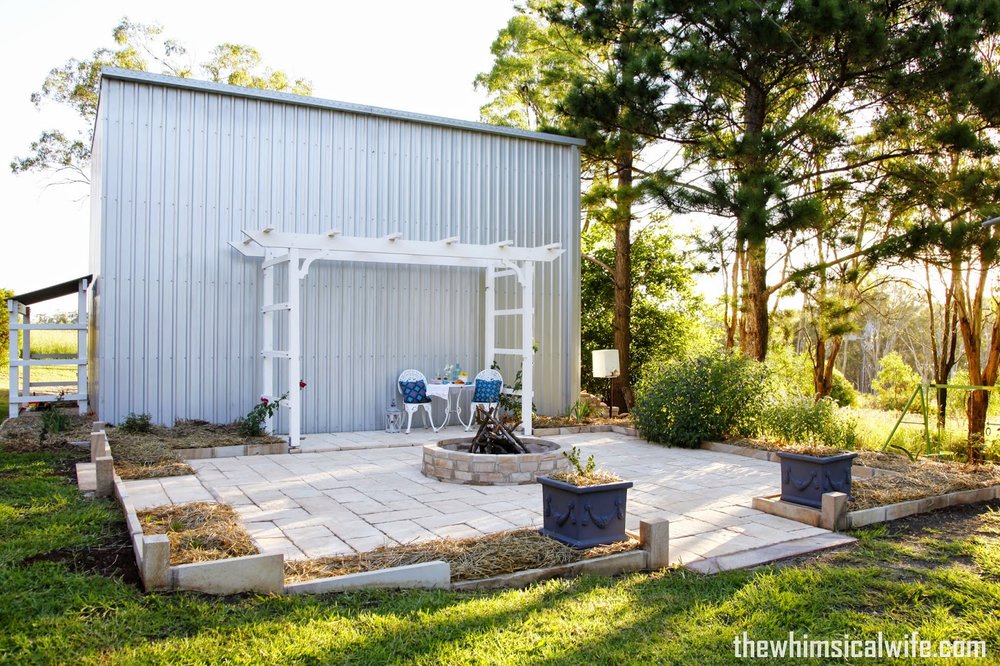
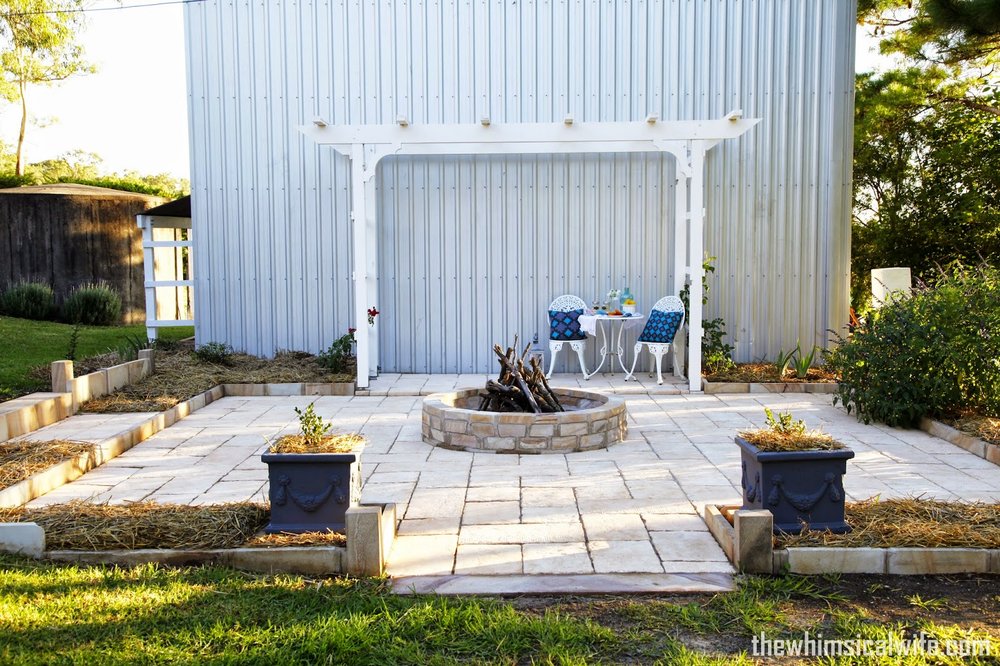
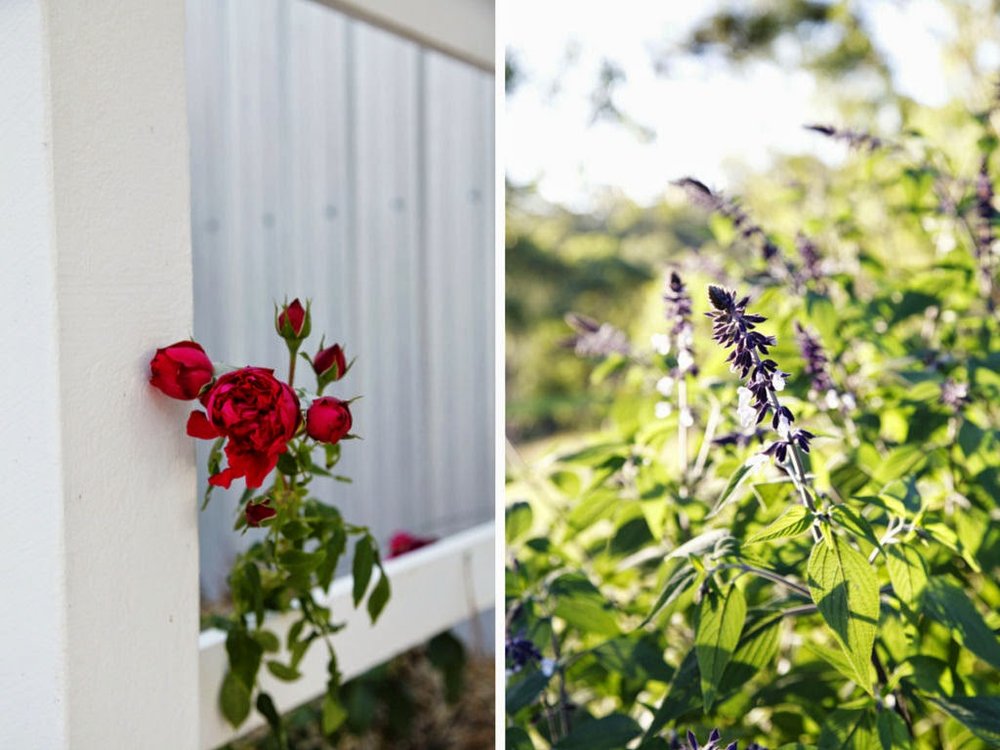
This space turned out better than I had envisioned. Hubby finished off the area so well with the arbour, garden edging, paving, fire pit and the sandstone pillars flanking the entrances. These elements created the formal look we were going after. The square pots flanking the main entrance were a dump find which I painted up in a beautiful charcoal colour - project details to come. I planted Japanese Box Buxus in these pots which I hope to shape into topiary balls in the coming years. We have also planted flowering lilly pilly's in the garden beds around the edge of the shed which will grow to about 3-4 meters. This will help in covering up this massive silver box. I also planted a gorgeous red climbing Pierre De Ronsard rose either side of the arbour. I cannot wait to train this beautiful rose up the arbour and bask in it's flowers for years to come. Other plants we have chosen to grow is Pink Federation Daisies either side of the stairway and we plan to plant a row of lavender either side of the pots. We have a specific variety we are after and haven't got to getting it yet. We planted two different varieties of salvias in the garden bed on the right hand side. These are already getting established and blooming away. They are a super hearty plant and put on a great display of flowers.
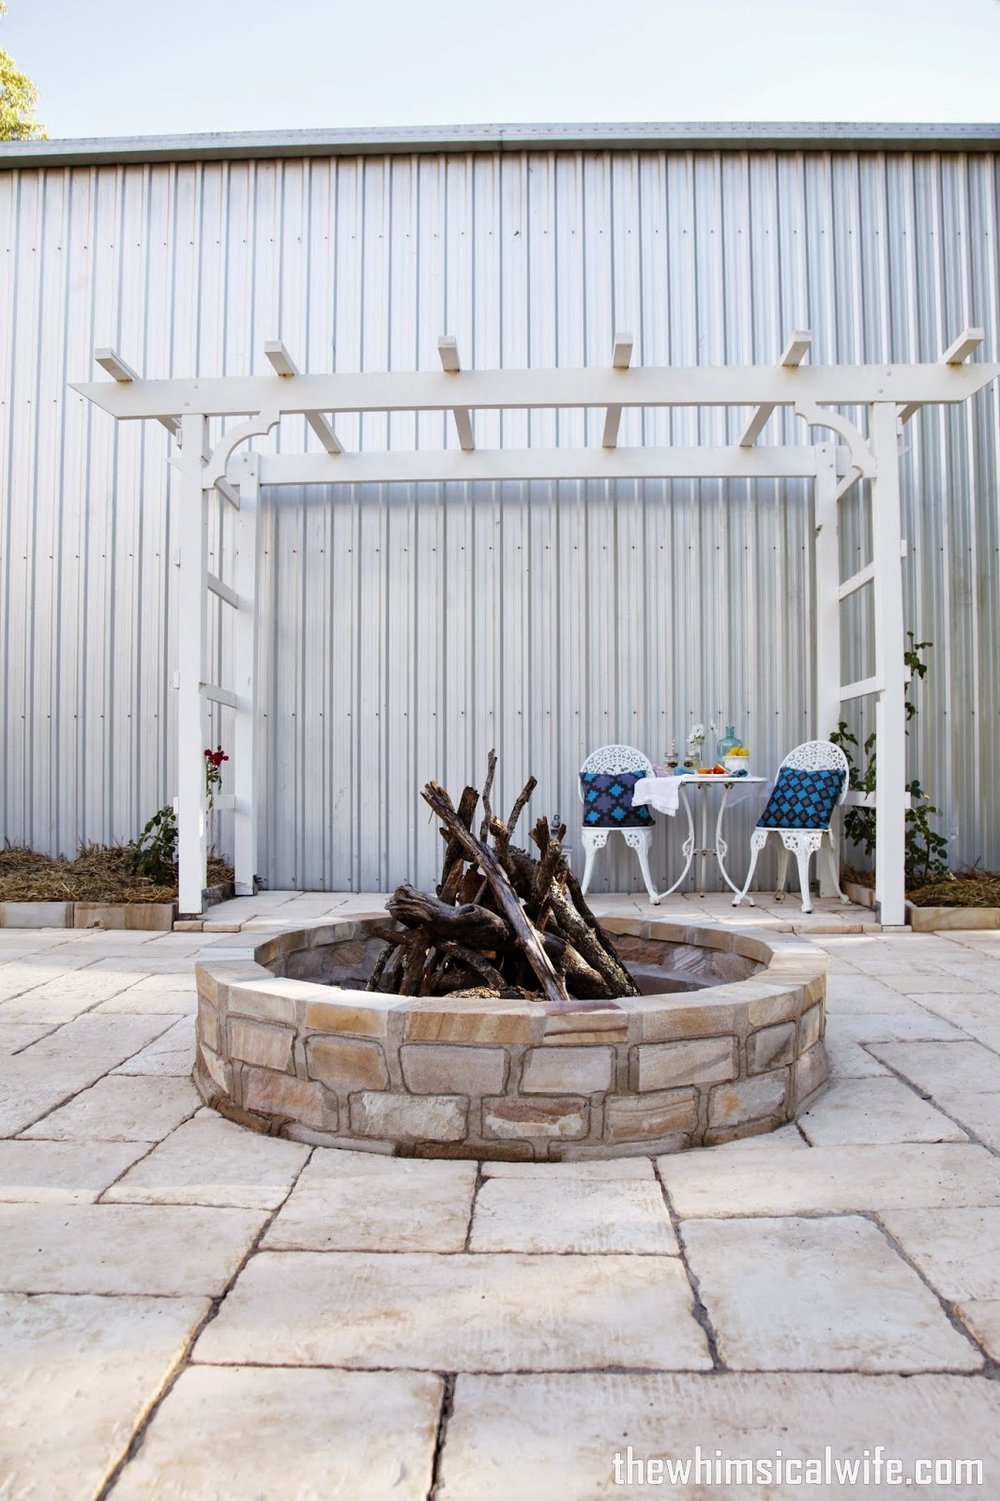
We have not yet christened the fire pit itself. We have been in a high fire danger in our local area so we will have to wait for a time when it's safe to do so. I am hoping in the years to come this space will make some happy and memorable moments for us as a family. I hope as the kids get older it will become a tradition to light the fire pit and we huddle around toasting marshmallows and maybe even bake some damper. I have been enjoying sitting out in the late afternoon as the sun is setting, relaxing under the arbour and just breathing in the fresh air. It's my favourite time of day and this area has enhanced the experience as the sun filters through the trees across the pavers. Then a ball comes flying across your head as your two and a half year old stand smirking across the yard... such is life at the moment!
{Disclosure: We were given a discount from Boral when purchasing the pavers, however all opinions on their product is my own