


How To Age Terracotta Pots

I have another fun project for you today that involves one inexpensive terracotta pot, your favourite indoor or outdoor plant and some lime powder and water. The end result is a gorgeously aged looking pot that is one-of-a -kind and full of character ready to be put on display. Anything chippy and rustic looking gets me every time and these pots take pride of place in my home. I seem to be on a bit of a roll with the terracotta pot project but they are just so much fun to play with. The possibilities are endless with what you can do with them and it is a cheap project for yourself or the kids to do and it makes a pretty special gift too. Like my
project this one takes minimal time to complete and doesn’t cost the earth. I think by the pictures you will see the results are pretty special as well. This is a project I completed a little while ago and the tutorial itself was something to be desired so I thought I would re-do it and it made a great excuse for me to add another indoor plant to my already growing collection. So let’s jump straight into it.
Materials required:
- Unsealed Terracotta pot & saucer, size of your choice
- Lime powder (*see note below)
- Bowl
- Spoon
- Paint Brush
- Water
- Water based paint of your choice *optional*
- Newspaper
- 120 grit Sandpaper
- Plant of your choice
*I used builders lime powder which is white in colour. You should be able to purchase this from all good hardware stores however if cannot get your hands on that garden lime will also work. Note that this may be different in colour.
You can choose to keep the natural lime colour on the pot or on the second coat of lime wash add in your choice of paint colour. By adding a different coloured top coat this will create a two toned look when the lime wash is sanded back.
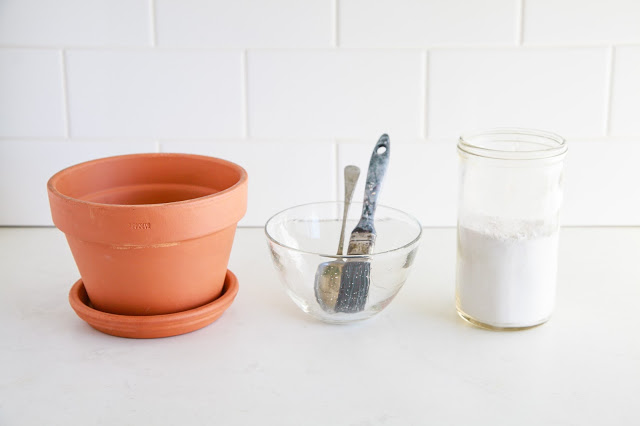
Step 1:
Collect together all the materials required and lay out the newspaper in the area that you will be painting the pots and place them on top of the paper. This can be done indoors or outdoors.

Step 2:
In the bowl place 1 part lime powder to 1 part water (i.e. 1 cup lime powder to 1 cup water) and mix together with a spoon to form a smooth paste. It should be the consistency of pancake batter.

Step 3:
Dip the paint brush into the lime wash paste and paint onto the sides of the terracotta pot. If the mixture is going on to thick add more water to thin it down. Continue painting the remaining sides of the pot and around the inside of the rim and the accompanying saucer. Set the pot and saucer aside for 20 minutes to let the lime wash dry completely. Cover the bowl of the remaining lime wash paste with a damp cloth to stop it from drying out.


Step 4:
If you have chosen to add a different colour for the top coat add in about ¼ -1/2 cup (depending on how much you have left) of your chosen water based paint colour to the remaining lime wash paste. Mix together with the spoon to thoroughly combine. Paint the top coat onto the pot and saucer. Set aside to dry for 2-3 hours.
I chose to add in a beautiful mint colour to my remaining lime wash paste called Green Frost by Dulux.
If you have chosen to stay with the colour of the natural lime paste then simply continue adding the top coat to the pot.
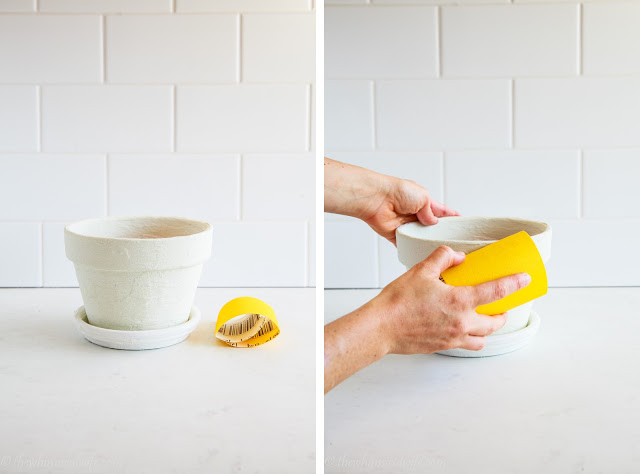
Step 5:
Once the lime wash has dried to the pot it is now time to add a little bit of rustic charm by sanding back sections of the pot with 120 grit sandpaper. I generally aim for the raised edges around the top and along the edges of the base of the pot. I then choose a few areas randomly around the side of the pot taking some section all the way back to the terracotta or just to the white base underneath the painted top coat. By sanding back these sections on the pot you will be creating a beautiful worn and rustic patina that normally would take decades to create in real life.

Step 6
: Give the pot a good wipe over with a damp cloth to remove any dust from sanding. Use a quality potting mix to plant up your now beautifully aged pot with your chosen plant. Position it in pride of place in your home or outdoors and admire your handiwork.
I planted my newly aged pot up with a lovely Ficus Frosty plant which I found in the indoor plant section at my local hardware store.
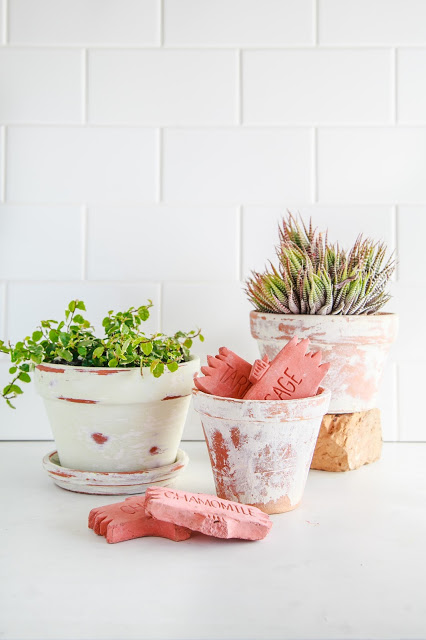
I told you it was a pretty simple project to complete and you could go to town with the myriad of different colours on each pot. The white pots pictured are the original ones I did 4 years ago now and they hold my herb garden tags and one of my many succulents. The lime wash patina has held well to the elements as these pots have weathered many days of beating sunshine, rain and frost.
A collection of these aged terracotta pots in varying sizes planted up in succulents or other varieties of plants placed together would make quite a striking display.
What a great idea…. Don’t mind me… I’m off to buy more pots to paint!


