

Sorry no Tasty Tuesday today but I have something extra special to show you. I have been gnawing at the bit to show you this light that I made a few weeks ago for the nursery. As always I was inspired to make this light for the babies room from Pinterest.

Gotta love Pinterest for so many wonderful and inspiring ideas.....
In my original "inspiration" for the baby room I wanted to buy this Maskros light from Ikea. It had a nice $150 price tag on it and I just knew we couldn't afford to put this in the babies room no matter how much I wanted it. So the search began on what other lights I could use in the room. I came across a string pendant light at bunnings for $99 and after examining it a few times I thought I decided surely I could make one myself for cheaper.
So onto Pinterest I went searching for DIY string pendant light ideas..... I can across a heap of tutorials which really helped cement the idea for me to make one myself.
I gathered all of my supplies and one sunny Monday morning I set myself up to make this light. If you want to make one yourself you will need the following supplies - this is what I used to make a 50cm round pendant light. (Not all are photographed)
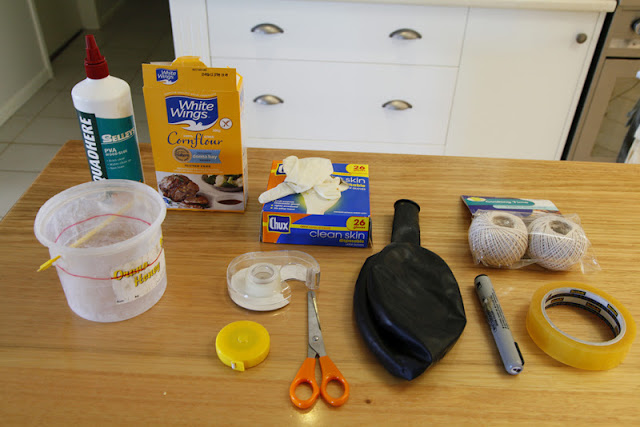
Supplies Needed
- 1 x 90cm Balloon (You can buy these from your local party shop)
- 2 x Balls of cooking twine or jute string (whatever colour you want your light shade to be)
- Vaseline
- Gloves
- Tape Measure
- Scissors
- Sticky Tape
- Black Permanent Marker
- PVA Wood Glue
- Cornflour (or Cornstarch if your from the US)
- Water
- Medium sized container to hold the Fabric Stiffener glue
- Wire insert from old light shade (make sure it will be big/small enough to suit your light shade size)
- Pendant Light connector kit
______________________________________________________________
Homemade Fabric Stiffener Recipe
300ml PVA Wood Glue
8 Tbsp Cornflour
1/2 Cup Warm Water
- In a small cup mix the cornstarch and warm water until dissolved.
- Tip the cornflour into the container you will be using and add the wood glue.
- Stir to combine.
*This should be more than enough glue for a 50cm string pendant light. You may have some left over.
*You can buy fabric stiffener from spotlight but it is about $15 for a 500ml bottle.
______________________________________________________
Make up the fabric stiffener mixture as per the instructions above and soak one of your balls of twine in it for about 10 minutes. First make sure you find the start of the ball of twine so you don't have to go searching for it when it is all sticky and gooey from the stiffener mixture.
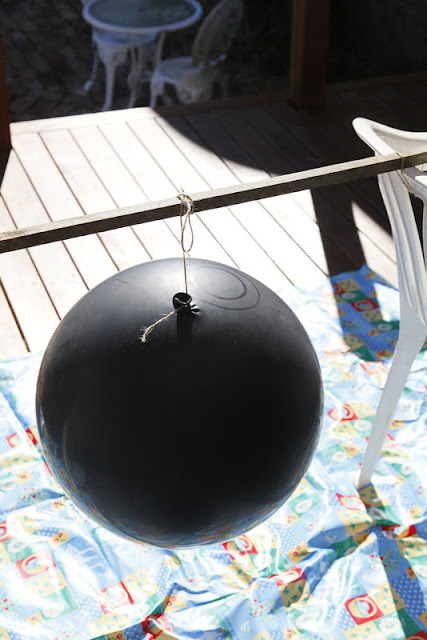
The next step is to blow your balloon up to the desired size you want your light shade to be. Make sure you measure the approximate drop from the ceiling so that you don't make it too big and everyone hits their head on it. I made my balloon about 50cm in circumference and it drops about 10 cms from the roof to the top of the light shade.
The next step is to draw (or trace a circle) around something big enough to fit your hand through onto the balloon using the permanent marker. I used the inside of a large reel of masking tape for this. Make sure it off to the side of the balloon (See above). This is how you will remove your balloon later and change your light bulbs in the future.
(*Note I recommend using any other coloured balloon except black - I found that it got too hot in the sun, didn't show the permanent marker very well and shrunk under the heat of the sun when it was drying)
Set your balloon up between two chairs and on a stick like I have done below. This will help you place the string easier later on. I would recommend setting it up in a warm, shady position. I didn't do this and I think the balloon expanded and then contracted later as it moved into the shade causing a little bit of warping of the shape during the drying process. Also cover underneath the balloon with newspaper or a plastic sheet as it is going to get a little messy from now on.
Next don on your gloves and slather the balloon with Vaseline over the whole balloon. This will stop the string from sticking when dry and make your job a whole lot easier to remove the balloon later.
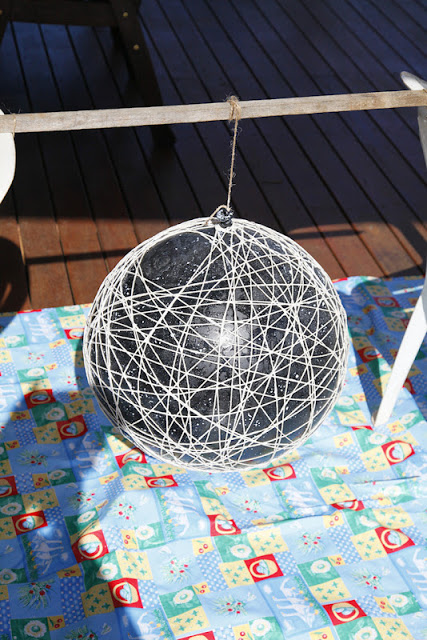
With a new set of gloves on find the start of your glue soaked twine. Tie the end around the knot of the balloon securely so it doesn't come undone later on. Now the fun begins. Simply start randomly placing the string firmly around the balloon - horizontally and vertically. Stop at certain points through doing this to check where you need to add more string. I missed a section in my balloon which annoyed me later but there was nothing I could do about it. As you do this make sure you by-pass the circle you drew at the top to create the opening - as you can see in the picture above.
I only used on ball of twine for the 50cm light that I created but I think I probably could of done another if I did it again. It depends on how thick you want the string pendant light to be. Remember the more string the less light will show through.
Once you are happy with the placement and amount of string that you have on your balloon, it's time to be patient and let it dry. I would recommend not letting it dry in the sun but in a warm, shady spot. It may take a day to dry depending on the weather. It is important though to be patient and let it dry completely.
Once the glue has dried, it is now for the fun part. Popping the balloon. I would recommend going outside to do this as bits of the dried glue go everywhere and it's a bit messy. You will probably need a sharp knife for this as a pin won't do the job. The balloon makes the funniest noise as it comes away from the dried string. As you can see the glue leaves a bit of a residue on the string and you may need to get a stiff brush or your fingers and work it off the string.
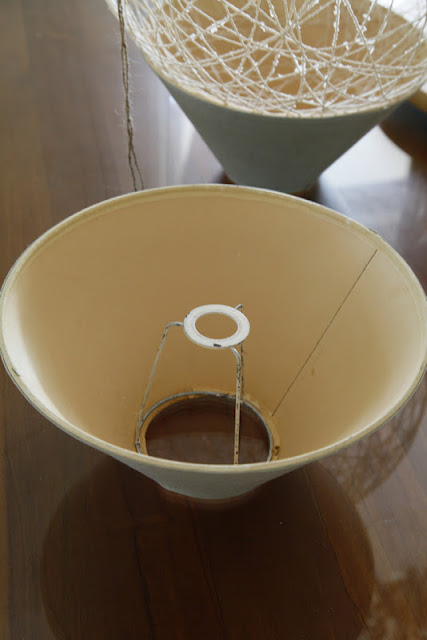
I then removed the wire insert out of a old lamp shade I picked up for $1 from the local op shop. I spray painted it white using Universal Spray paint from Rust-Oleum. After it had dried we then inserted it with the pendant light kit I picked up from ebay for $18 (I got two for this price).
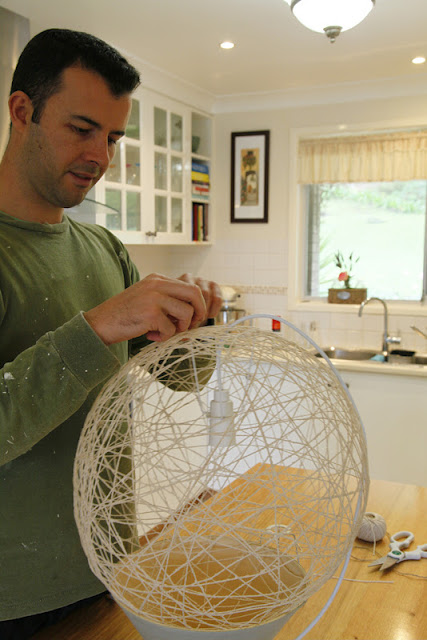
Hubby and I then attached the wire insert and pendant light fitting inside and to the top the string light using the same string I made it with. After cutting the excess string off we dabbed the knots with PVA glue to stop the knots undoing later on. Let this dry completely before attaching the pendant light to the electrical fitting.
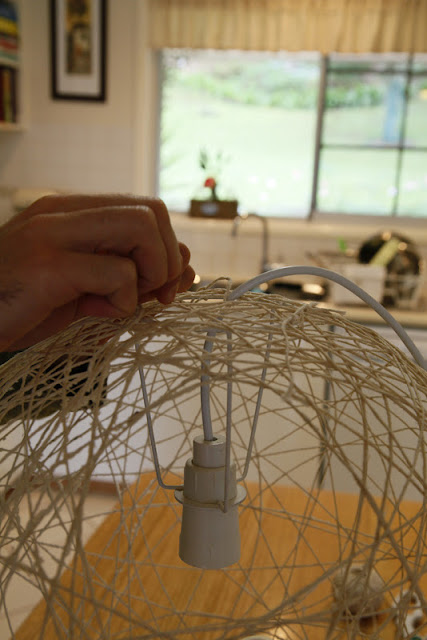
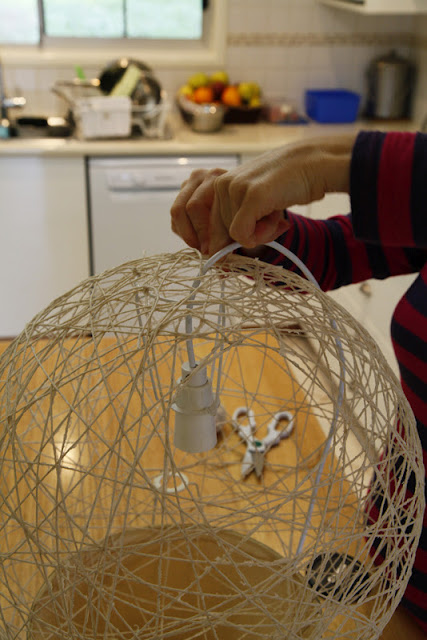
We had to shorten the pendant light fitting to the length that we wanted in the room so that no one would hit their head when they came in. When fitting the light make sure the entry circle you created at the top of the light is facing away from the door so that it is not easily seen when entering the room.
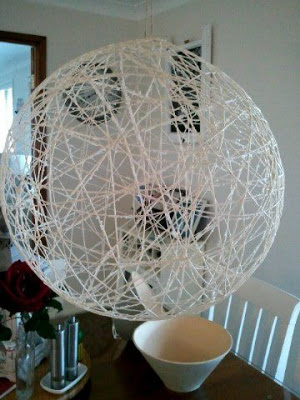
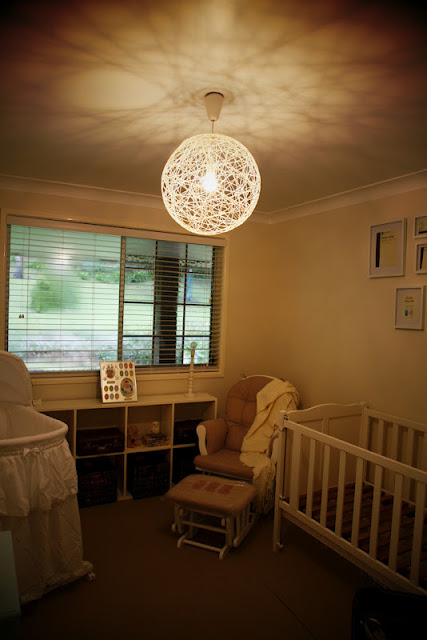
And there you have it - you very own DIY pendant string light.
Mine isn't perfect but overall it looks pretty good when the light is on.
I think in total this string pendant light probably cost me about $25 to make including all the fittings and supplies. I did have a lot of the materials already and the things that cost the most was the pendant light fitting and the big balloon. Expect to pay around $7 for the 90cm balloons.
Would love to hear from anyone who makes one of these or who has already made a light shade themselves!
You can view the full tour of my finished nursery here.
You can view the full tour of my finished nursery here.
Happy light making!
Sharing this project over here:


blog directory