

I can't believe how that past week has flown! I am sorry that it has been a week since I last posted! I guess I have been a little pre-occupied with things such as preparing for an over sea's trip to India in the next 10 days, lots of jars of relish being made and I am also organising a baby shower for a friend this weekend!
I have been meaning to show you the progression of our herb garden and rustic brick path that we have been creating for the last 6 months at the back of our house. It has taken so long because we have been scavenging around for more old rustic bricks to finish off the path. SO finally we found enough to do so and have finally finished it!
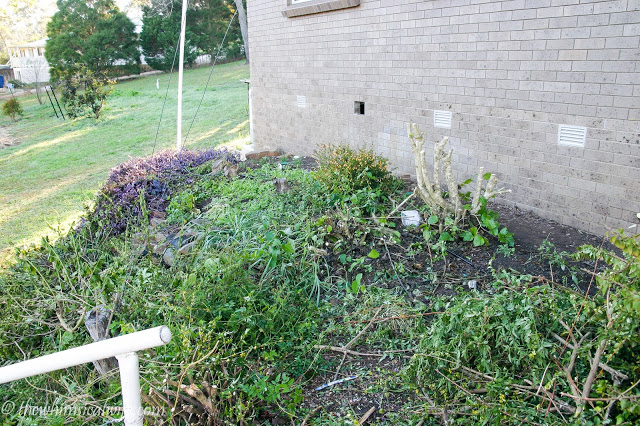
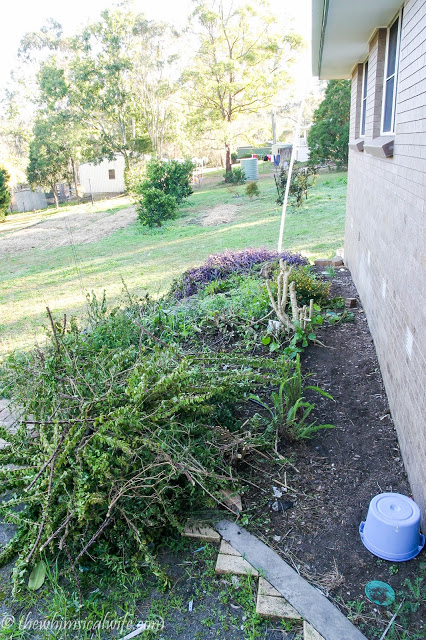
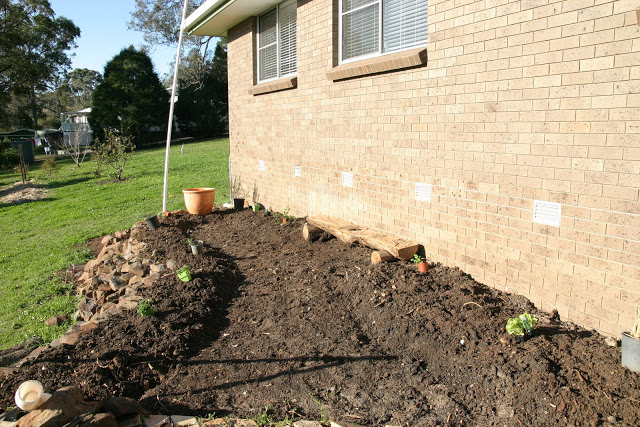
These photo's were taken after Bevan has done some pruning and clearing so it looked a lot worse than this The previous owner had let this garden area grow pretty wild and it was in need of a little attention. These photo's were taken about July 2010 after we moved in. We though about replanting this area and making it into another garden but with a little fore-thought realised this is where our planned deck stairs would exit onto and would make a nice "landing" as such to continue on down to the rest of the yard.
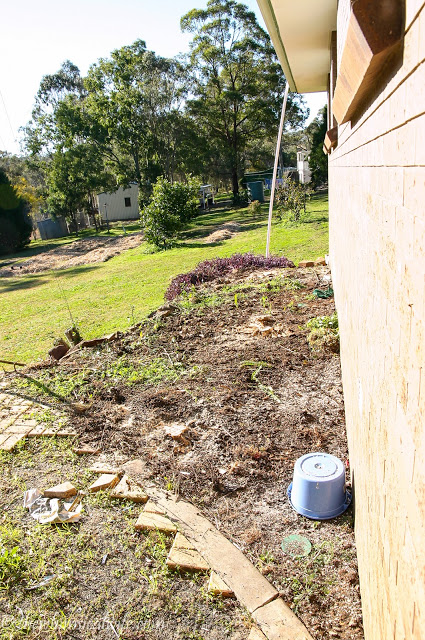
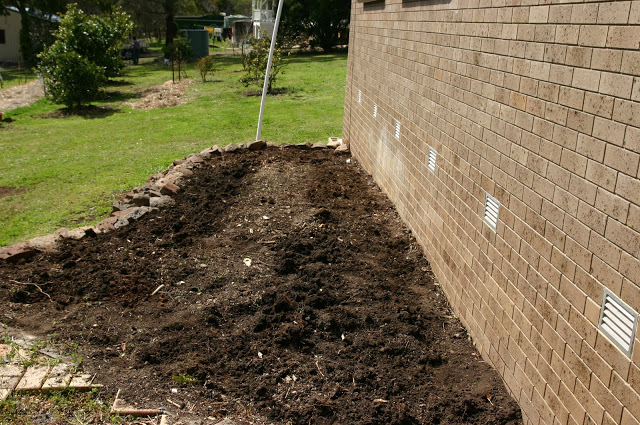
In late August 2010, Bevan and I got to work clearing the rest of the shrubs and starting with a blank canvas. (Read Post HERE). There was a LOT of hard yakka involved in getting it to this stage and I have to admit I was not involved a great deal in getting rid of the hard roots and shrubs, my poor husband did that! We make a great DIY team - I am the visionary and poor Bevan is the labourer. I think I got the good end of the deal.

After the garden area was cleared of all remaining plants and roots we installed a long piece of white flexible drainage pipe around the garden, which enables us to place our grey water from the washing machine in it to water the plants. We are not hooked up to town water where we live and rely on tank water for household water and a bore for use in the garden. We try to recycle as much water as we can by saving water from the washing machine and using it on our plants where possible.
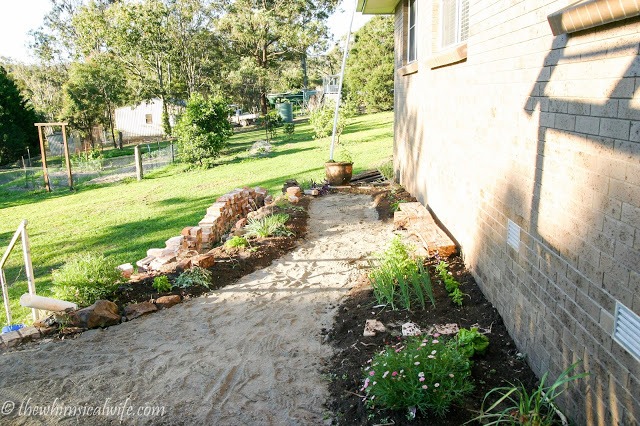
Our idea for this garden was to create a rustic brick path using reclaimed bricks meandering it's way through the center of the garden. We also wanted to incorporate a circular brick design at the entrance of the path which we can place a small cafe style setting on.

Read about our path inspiration HERE
In early September 2010 we were able to start building proper garden beds and plant herbs and salad items such as lettuce and spring onions. It all looked a little bare and uninviting but we persevered with our idea. Good things come to those who wait.
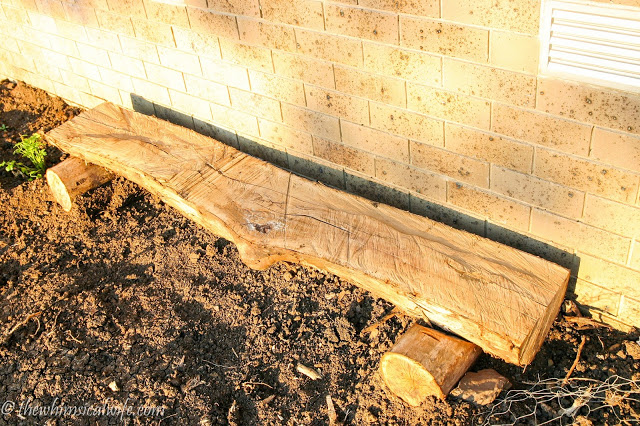
Bevan created this cute little wooden bench out of a tree that he cut down (It's all about recycling!) It created a nice interest point to the garden!
We laid a bed of crusher dust down over the black soil to cushion the bricks, reduce movement and have a more stable foundation to lay them upon. The sand was compacted down before we started laying down the bricks on top. Before we could lay the bricks we had a little work ahead of us to clean up the old lime mortar off our reclaimed haul.

In November 2010 we started collecting old re-claimed bricks ( Read about our Scavenging Adventure HERE) It took us a little while to reclaim enough bricks to be able to pave the entire area. Patience was required especially when you are itching to finish off a project such as this.
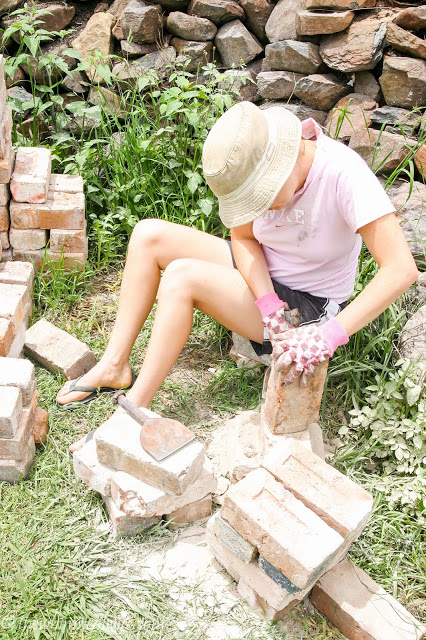
Once we had enough bricks to pave the area the real work began. We got to work removing the old limestone mortar on about 400 bricks with a bolster and hammer. This was a little bit of a painful process but the end result was well worth the effort.
Once the process of removing the limestone mortar from the old bricks was complete it was time to start laying out our design. To create the circular design in the path we created a circle template in the crusher dust to work off from. To create this we started by pegging in a stake to where the center of the circle would be and then tied a piece of string to the stake and etched a circle into the gravel with a sharp instrument tied to the string.
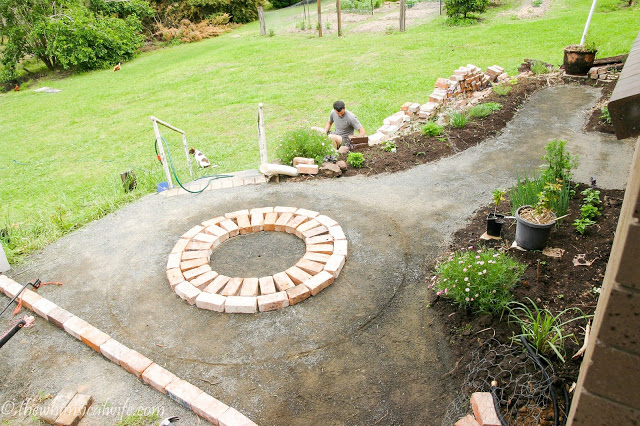
By using this as the template we were able to pave our circle evenly and in a perfect circle formation. We started with the inner circle before making our way outwards until we reached the size that we were happy with.
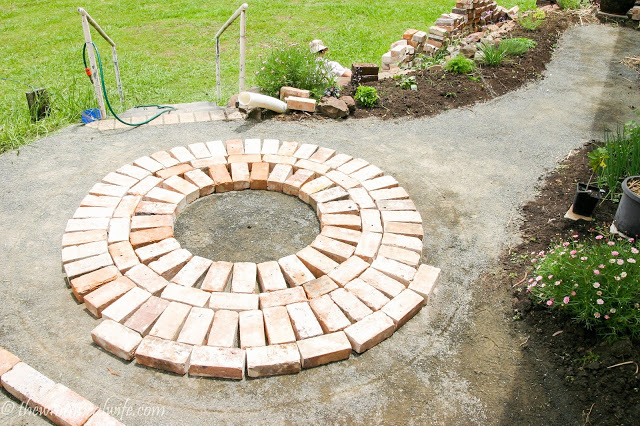
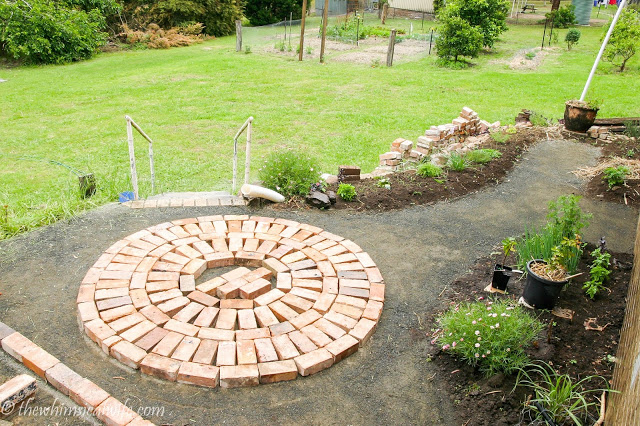
Once the circle was complete we filled the center of the circle with small offcuts of the reclaimed brick. I was starting to clap my hands together at this point as I could see my vision slowly coming together. I couldn't wait to see the rest of the space paved and finished off.
Want to see the whole vision come together pop on over here.
Herb Garden & Rustic Brick Path - Part 2