

I have a admission to make.... I LOVE STATIONARY! Yep there I said it. I have a quirky addiction to notebooks and all things stationary. I don't know where I got it from but I just LOVE going into the stationary section of the shops, newsagent or office works and looking at all the pretty new notebooks, pens, pads and folders.

Yeah I know I'm a little strange.... but at least I can admit it! :-)
There is just something nice about opening a brand new notebook all fresh, crisp and clean awaiting in expectation of what you will fill the pages with. I use them as my journals or idea's notebooks for the blog! I love funky designs and colours on my notebooks and try and find different ones to use. The unfortunate thing is though it seems the funkier the notebook the more expensive it can be. I have seen some very cool and lovely looking A5 notebooks but with the price tag of around $10-$15 a pop I just can't justify buying them - no matter how much I love them!
I had a few cheap notebooks that I had picked up at office works recently for $2- $3 each on standby for a few different things. They weren't pretty or funky but just plain jane notebooks. I decided I should rectify that with trying to pretty them up somehow...... enter Pinterest AGAIN!
I found some very cool ideas on how to bedazzle your plain old notebook using fabric. These covers then can be re-used once you have finished the notebook - making sure you purchase the same size again of course. Talk about a great money saver.
So off I trotted to spotlight to find some funky fabric to make these covers out of. There was too many options for me to choose from but I settled on some funky green pear printed fabric and a retro looking chook fabric. I also had some remnants at home that I was going to use on the others.

You will need:
Patterned Fabric (For Front Cover)
Plain Fabric (For Lining)
Matching Cotton
3mm Braided Elastic
Button
Scissors
Pins
Notebooks

I thought I would start with the retro chook fabric and cover a small notebook with this. I am using this notebook to write down on my "green" cleaning recipes. By this I mean recipes to clean your house using only the basic things such as bicarb, vinegar, cloudy ammonia etc. Anyway that is for another post another time.

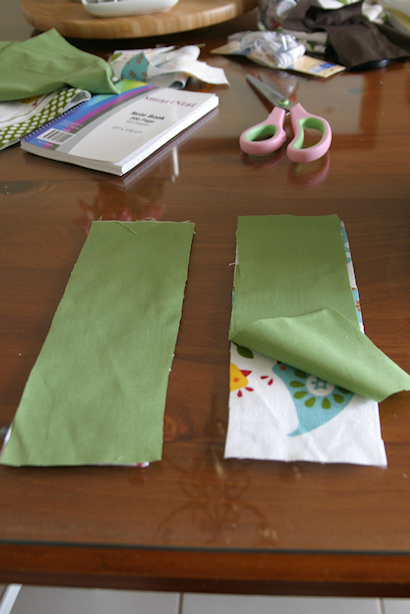
Step 1. Cut your patterned fabric out leaving enough room on the short edges that you can fold your fabric over the book and tuck into the notepad. (As seen above) This will be trimmed later but it's better to have more than less!

Step 2. Measure the cover of your book and divide that measurement in half and add 1.5cm seam allowance. Cut out two sections of fabric by this measurement - these are to be used as the pockets in which the cover and back cover slip into.

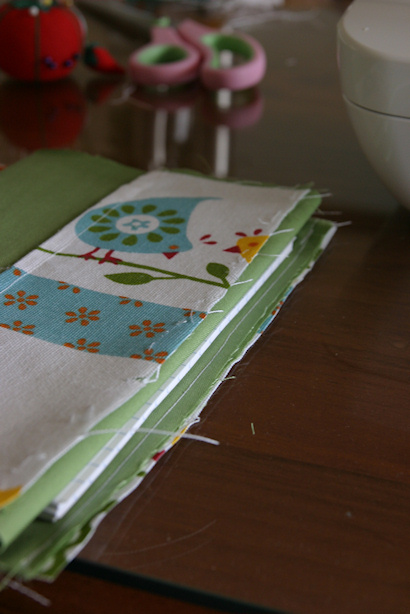
Step 3. Repeat with the lining as seen above.
Step 4. Place the right sides of the lining and patterned pocket strip material together , making sure you have your patterned fabric facing in the right direction. If this isn't checked now you may have upside down chickens or flowers on the inside of your cover.

Step 5. On the left hand piece sew the left hand side of the strip, repeat with the right hand piece sewing on the right hand side as see above. If you have your fabric in the right direction this will ensure you have perfectly directed patterned fabric on the inside of your notebook cover.

Step 6. Turn the fabric the right way out and iron down. Run a top stitch along the side that you have sewn. (As seen above)

Step 7. Place the notebook sized patterned fabric right side up (pattern in correct direction), place the pocket piece right side down with the top stitched seam facing inwards (making sure the pattern is in the right direction) and the notebook lining fabric on top (See picture above) *Do the right hand side first*

Step 8. Pin all the pieces of material together and sew. *It is important that you do the right hand side of the notebook fabric first*

Step 9. Place the notebook that you are covering onto the lining side of the fabric against the right hand seam that you have just sewn leaving about 1/2cm gap between the seam and the book.
Step 10. Fold the fabric over on the left hand side and tuck inside the notebook quite firmly but not tightly place a pin on the edge of the material where the cover ends. Open the book and add a 1.5cm seam allowance to the measurement you just made and trim both lining and patterned fabric. This is to custom measure the width of your notebook so that the cover will fit correctly. It is important that you measure the fabric with the book closed and the fabric tucked inside as if you measure the fabric with the book laid out flat you will cut it too small! I learnt this on another cover I made!

Step 11. On the left hand side that you have just trimmed cut out a length of the braided elastic (approx 7-8 cm) depending on the size of the button you are going to use. Fold in half and place in the middle of the fabric, cut sides together against the edge of the material (as seen above).

Step 12. Place the remaining pocket piece of fabric right side down with lining facing outwards (repeating step 7) on top of the elastic (remember put the pattern in the right direction and top stitched seam facing inwards.) and fold over the large piece of notebook lining on top and pin the elastic in place with a pin. Pin the edge of the material and sew the seam.

Step 13. Place the notebook on the fabric and pin the top and bottom outline of the notebook. At the bottom seam leave a section about 6-7cm wide unpinned (as seen above). Do not sew this section as this is where you will turn your cover right side out!

Step 14. Sew the top and bottom seams making sure you don't sew the section you left open at the bottom! Trim the seams and cut the corners off . This will give your a neater corner when you turn it the right side out.

Step 15. Now the true fun begins... seeing your creation! Turn the cover the right side through the hole you left on the bottom seam. Press the end of your scissors gently into the corners inside your cover to press them out and give it a nice finish. Iron the entire cover and fold the seams inside your hole to match the rest of your seam. (As seen above)

Step 16. Run a top stitched seam close to the edge around your entire notebook cover. This will sew up your little hole at the bottom of your cover and give it a professional finished look.

Step 17. Match up your button to your elastic, making sure it is far enough away that the elastic will be firm when folded over the button. Sew into place.
And now sit back and admire your handy work.....!


I made 3 fabric notebook covers in total over a 2 day period. I got a little hooked and couldn't stop. Once I got the hang of making them I could whip them up in about an hour or so. This is a great project to do if your in the mood to do something crafty one afternoon.

I did one for our veggie garden book. This book documents every planting season we do throughout the year into our veggie patch. It's a great way to keep track of when you planted each crop for each season, how much you planted and where you planted it in the patch. This way you can easily rotate you patch to get the most out of it each season. You can also note down what flourished and thrived, what did not and what problems and solutions you found along the way. It's very valuable to us and I wanted to make it look a little bit prettier than a plain old boring notebook. With this notebook cover and the one below I made a simple title label and embroidered the words onto the label. I used some iron on adhesive to adhere the label to the front of the books.

I also added a "spine" to these books. I added these after the last step, simply top stitching them into place. I made one for our boy - it's going to be a bit of a diary of sorts - so i can write little things about him as he grows and changes and all his little milestones. A bit of a keepsake really for when they grow up and you can look back an reflect on the good times (and bad). These would make great baby shower gifts or any type of gift in fact.

I had so much fun making these little covers.... I have to admit I am a little hooked and want to make some more.... gives me a good excuse to go to the stationary section and full fill my stationary fetish! :-)

blog directory