

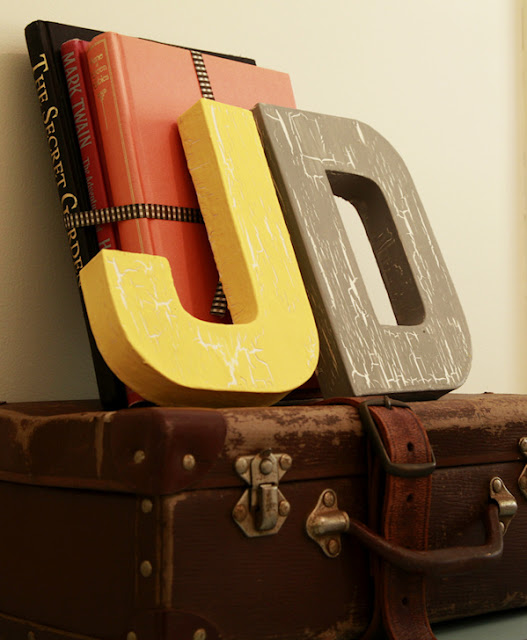
I have been trying to do little crafts to add splashes of "boyness" to my nursery now that this little one has arrived. I have admired the large vintage letters that have shown up on Pinterest and in various interior magazines. I think it really adds such great interest to a room and really wanted some of them in the nursery.
I scoured different websites and ebay to see if I couldn't buy some for the nursery. I did find some ones that I loved but for the price tag of $35 -$80 a letter I just couldn't justify buying them. I know I am truly a thrifter at heart! They were rustic metal ones but it didn't really concern me what they were made out of as long as they had a rustic look to them.
So begin the search to see if I couldn't try and create some of my own in the initials of my little man for cheaper. I first found this tutorial on Pinterest on how to create a rustic "crackle" effect using plain old wood glue. I "pinned" it for later use and kept that in the back of my mind to use on something. Sometime late saw that spotlight had a sale on their large cardboard craft letters. So off I went and purchased the initials that I needed for the boys nursery. In one of my sleepless nights I was thinking of how to decorate these letters to create the vintage look I was going for in the nursery. The paint crackle tutorial came to mind and I knew that is what I had do with the letters!
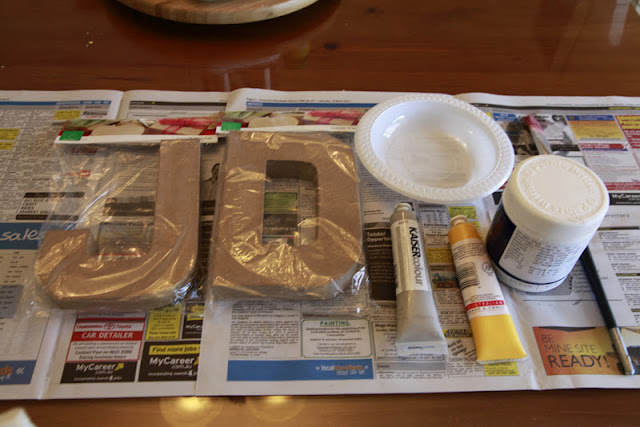
Materials you will need:
Cardboard/Wooden Letters
Acrylic Paint - Top colour & Base colour
Paintbrush
Wood glue
Plastic bowl
I chose to go with yellow and grey as my top colours and a neutral white for the base.

Step 1. - Paint the letters in your base colour. Give it two coats if necessary. These need to be completely dry before proceeding into the next step or otherwise the crackle effect will not work....... as I discovered!
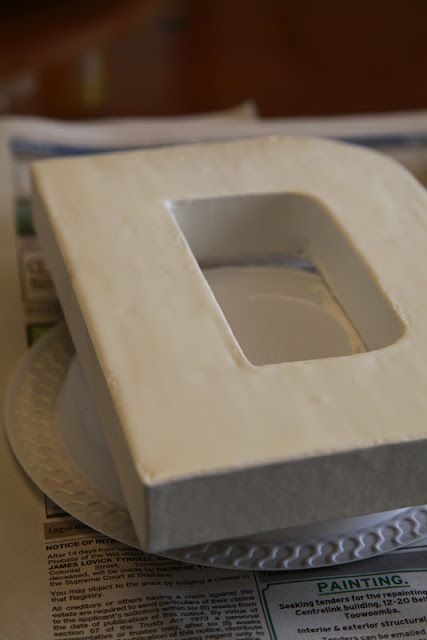
Step. 2 - Paint the wood glue in a even layer over the letter. You can't see very well in the picture above but the top of the letter is coated in wood glue. Depending on the temperature and the thickness of your wood glue you will need to leave this dry for 5-15 minutes. Keep checking every few minutes. The wood glue needs to be tacky and still sticky. If it has dried too much add a bit more wood glue and start timing again.
I had to re-do my letter J as I painted the wood glue onto the base coat before it had dried and by the time I painted the top coat on it was a disaster and didn't crackle at all. So my impatience got the best of me and I had to start all over again with the base coat once it had all dried. It still turned out fine but took a bit longer than necessary if I had been patient in the first place.

Step 3. - Paint your chosen top coat colour over the still tacky wood glue. Paint in one direction when doing this otherwise it will look messy. Then the fun begins. Waiting! If you have put the top coat on at the correct time on the wood glue you will start to see the top coat cracking in areas as it dries. It's quite amazing to see it come to life as it dries.
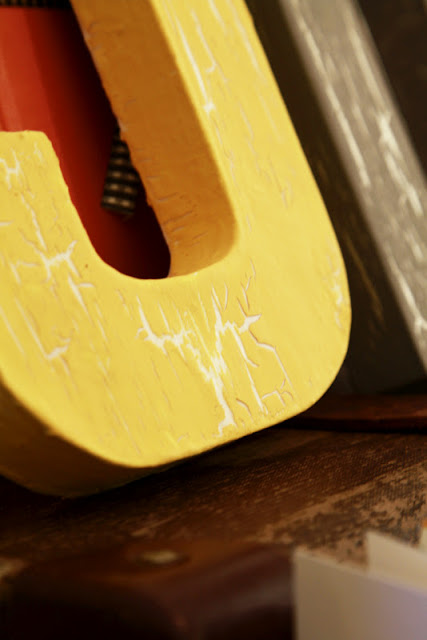

I did noticed that the wood glue does give a different crackle effect than to the "Elmers" glue they use in the US in the tutorial I mentioned earlier. However I still am quite happy with the outcome and love the effect the wood glue has given.
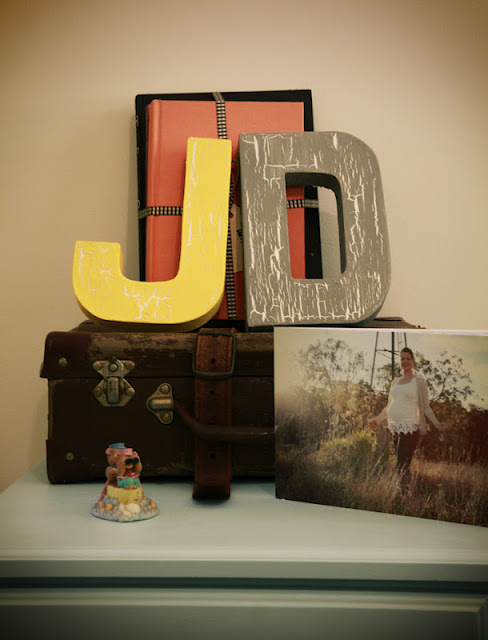
These letters worked out to cost about $4 each to make - a bargain considering the cost of the others. I had the paint and wood glue already so that did make the cost of these a little less.
I'm glad I didn't make them too babyish as they will last our little man a few years in his room until he gets older and can decide for himself what he wants.

I'm so excited this paint effect worked and I have a million idea running around my head of what else I could use this on. I guess the possibilities are quite endless really! I don't think this will be the last post on crackle paint effect projects!

Happy crackling! :-)
