

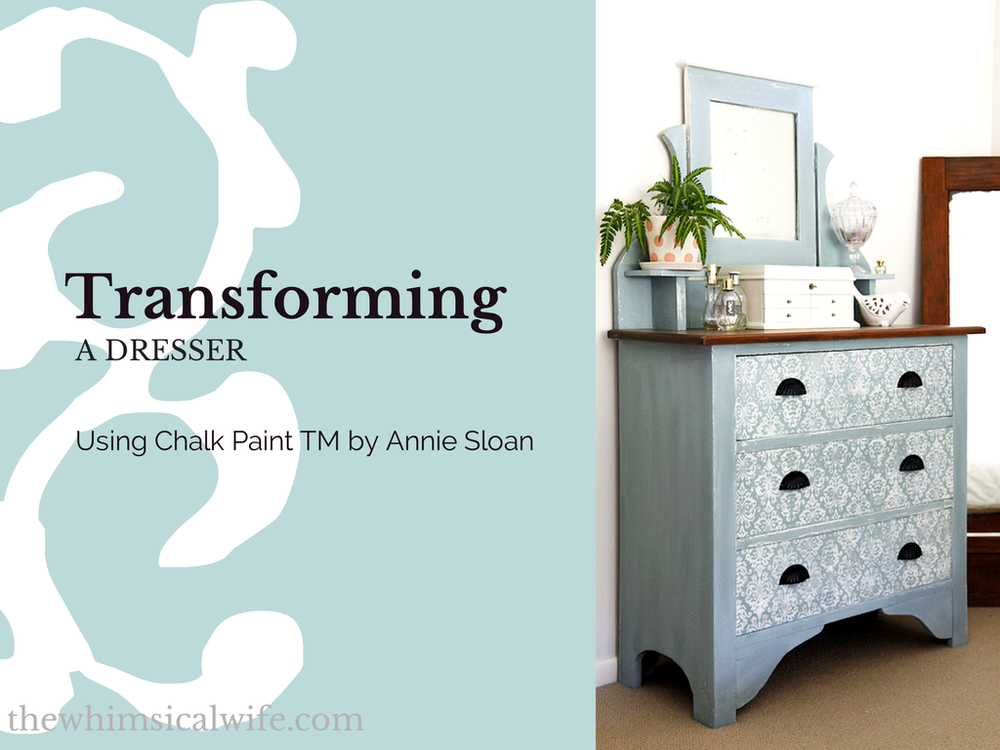
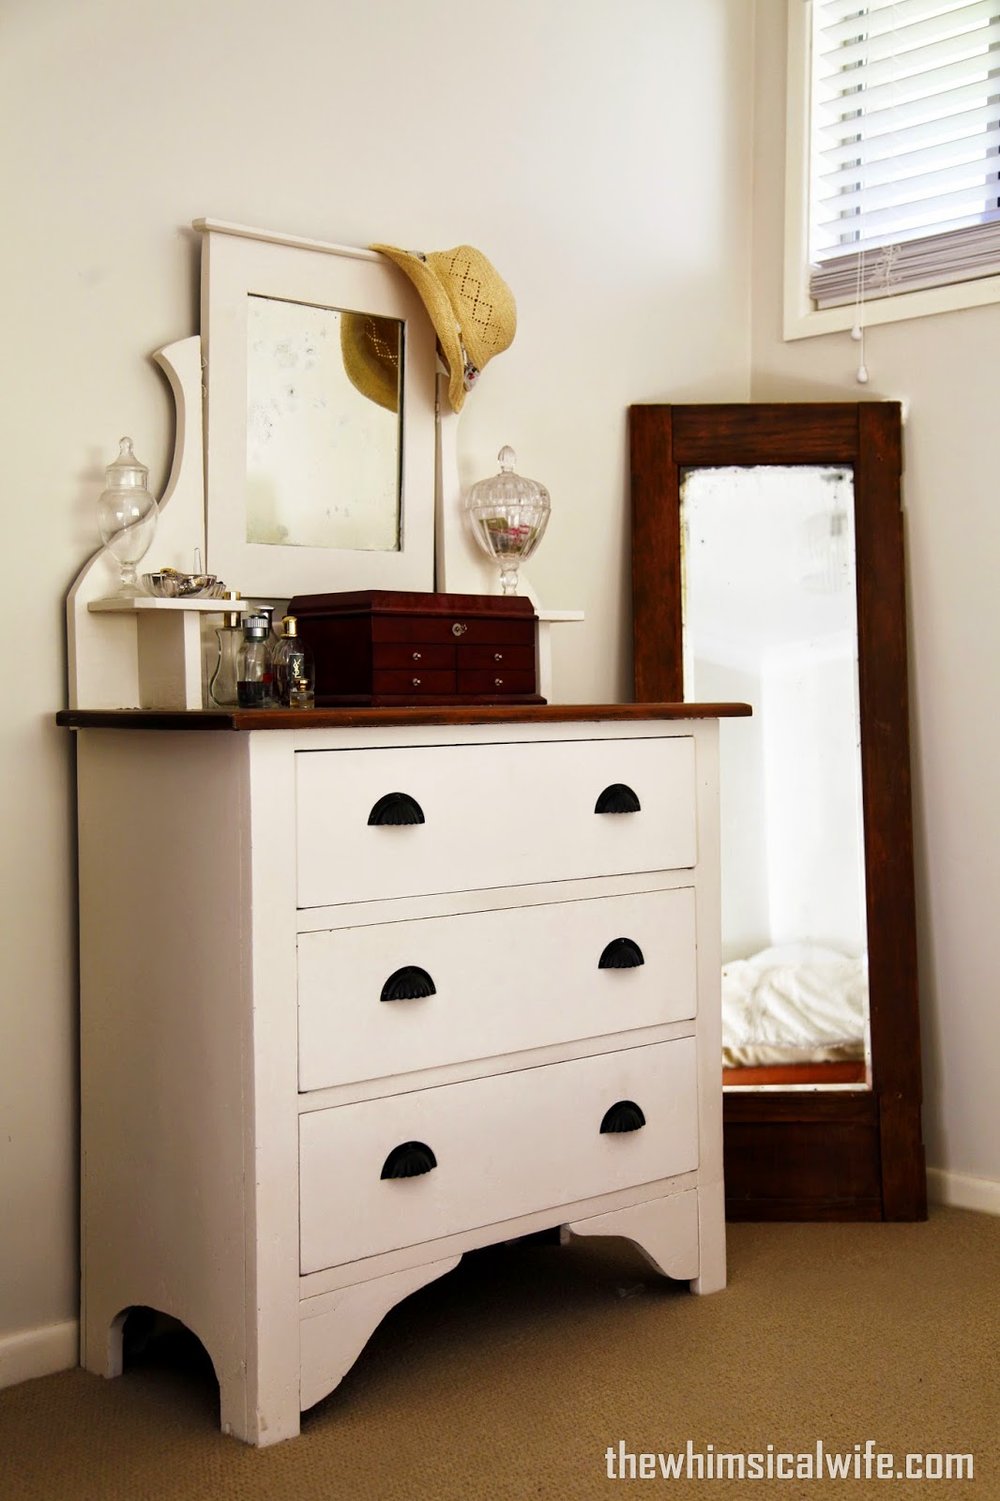
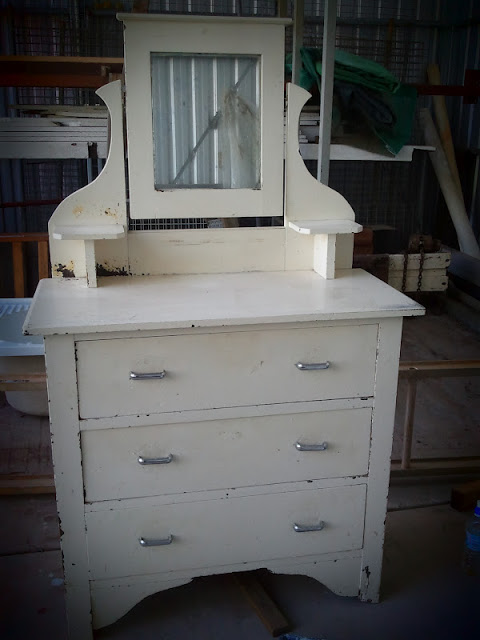
I'm so excited to share my most recent furniture makeover with you today. It's something a little bit different to what I have done previously with the addition of a little pattern action happening!. You may be looking at the before photo of this dresser and go hang on there is nothing wrong with this piece. Well you are right there. It is a piece that I had done a couple of years ago and it has been in our room being used as a dresser. You can see the what it originally looked like further below! I felt like it really wasn't living it's full potential in the colour that I had painted it. It was kind of blending into the wall and not really doing much for the space. It was bland. I needed to do something about that.
Enter Chalk Paint TM by Annie Sloan. Have you seen and heard about this paint? I have seen so many gorgeous pieces this paint has transformed all over the web. I have had paint envy for such a long time and couldn't wait to get my hands on some. The paint was originally only available in the USA but Chalk Paint TM by Annie Sloan has now expanded to stock it Canada, New Zealand and Australia. Yipeeee. I was given the opportunity to trial and review this Chalk Paint TM and I jumped at the chance! I chose the Duck Egg and Old White paint colours to have a play with. I was also given a clear soft wax and wax brush. Time to get painting!
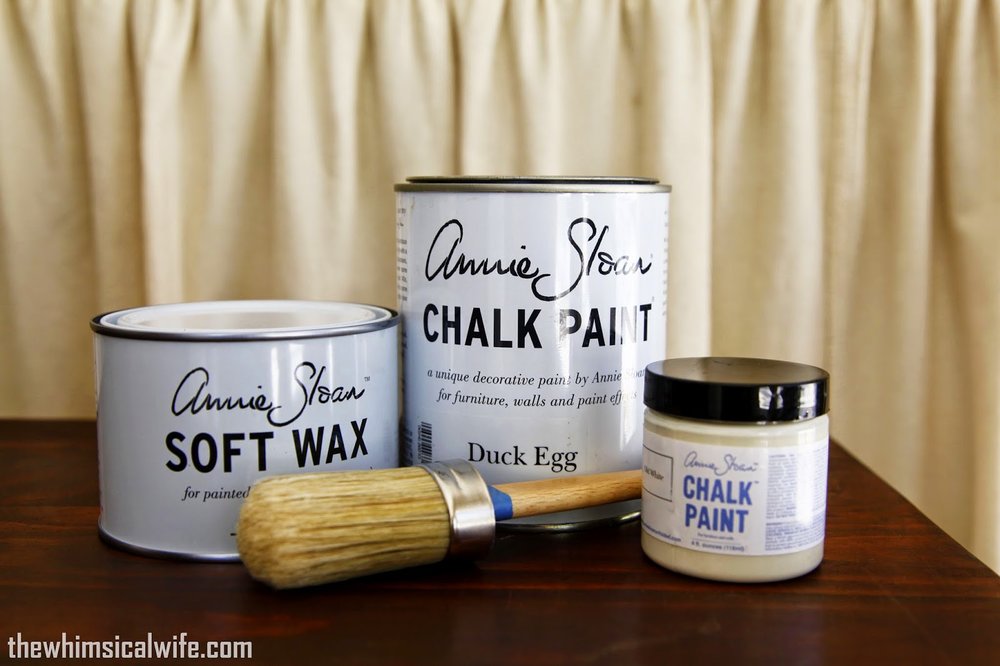
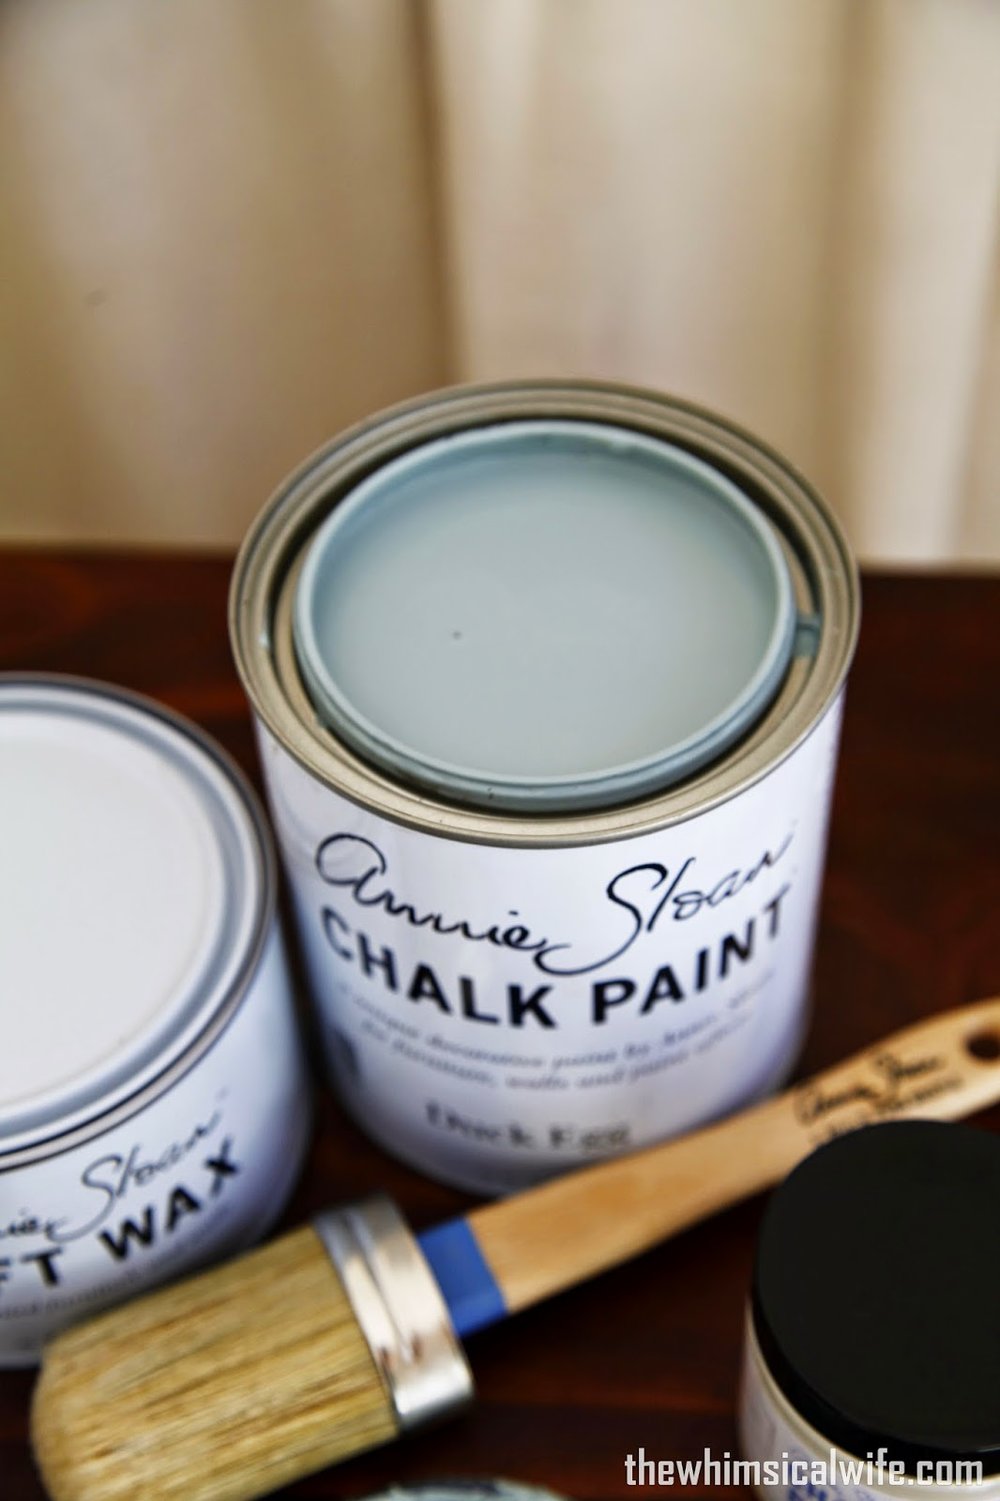
What makes Chalk Paint TM so unique is that it is a water based paint that requires no priming or sanding on surfaces before painting. The paint is also extremely versatile as it can be applied to many different surfaces such as metal, wood, plastic and terracotta and can be used inside and out, on floors, walls and ceilings! Its highly concentrated consistency allows for a more extensive coverage which in turn uses less paint. I was able to jump straight into painting this dresser without all the fussy prep that normally is involved in doing a piece of furniture. Since I am approaching 31 weeks pregnancy this was a bonus. Less work for this tired mumma. We moved the dresser to the garage and I was able to jump into painting straight away. I gave the whole piece a good wipe down to remove any built up dust before proceeding to mask up the stained wooden top in preparation for painting.
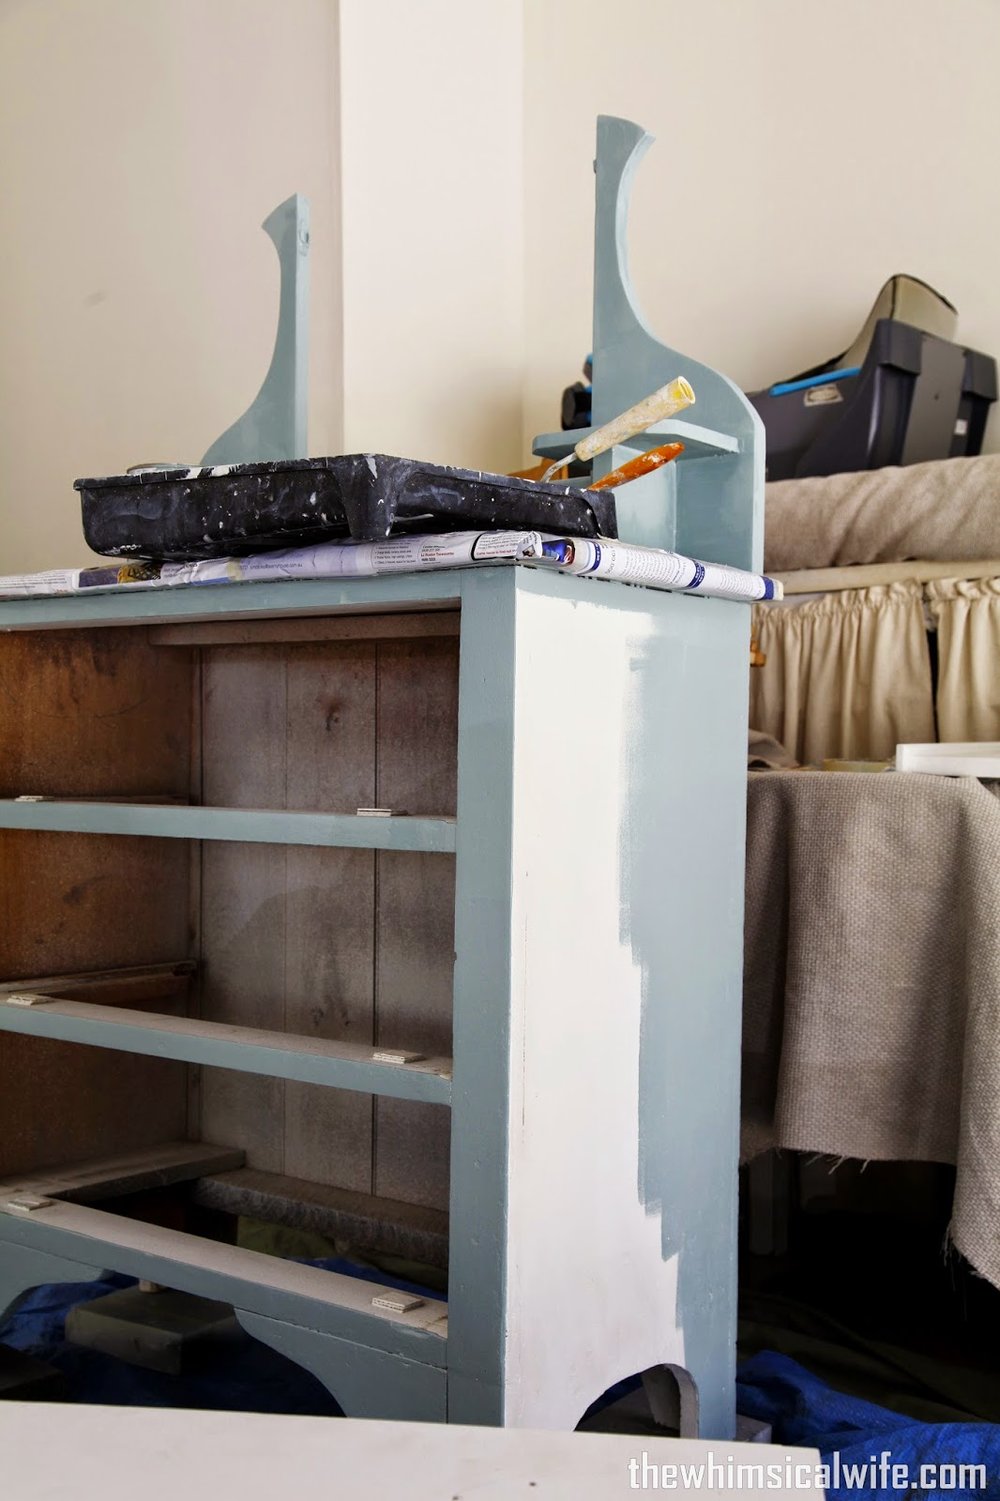
I tried two different methods in applying this paint. One with a paint brush and one using a foam roller. I found the paint brush method left slight brush marks in the paint but the foam roller gave a smoother finish. It does depends what kind of finish you're after. You can read more about how to apply chalk paint here.
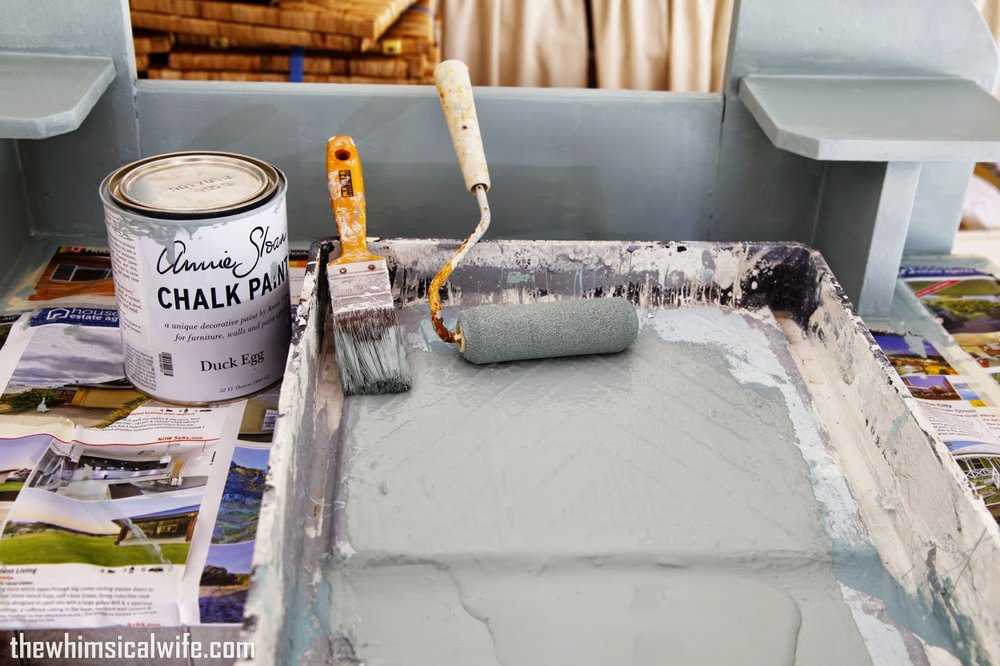
I didn't just want to paint this dresser and leave it at that. I wanted to add a little pizzaz and do something a little bit different. I checked my go-to inspiration source - Pinterest of course for some ideas. You can check out my Furniture Inspiration board here. I decided to add a pattern to the drawer fronts using a stencil I found at my local craft store. After painting the drawer fronts with Duck Egg and letting it dry I positioned the stencil over the drawer front. To apply the Old White paint onto the stencil I used the foam roller again. Make sure you have an even application of the paint on the roller and rolling gently over the stencil will allow for an even coverage of paint without any bleeding underneath.
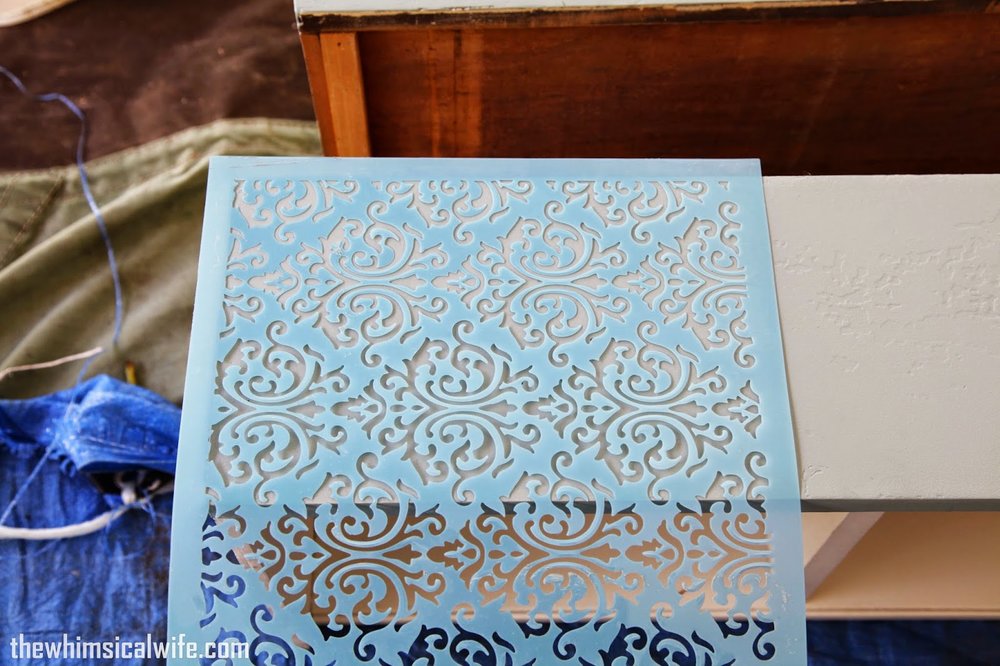
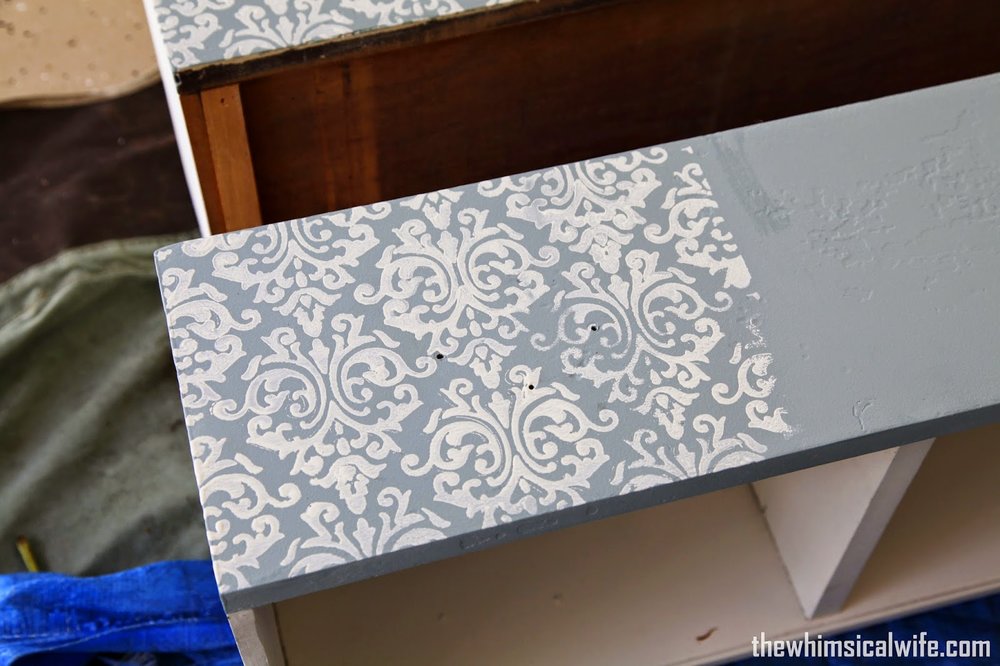
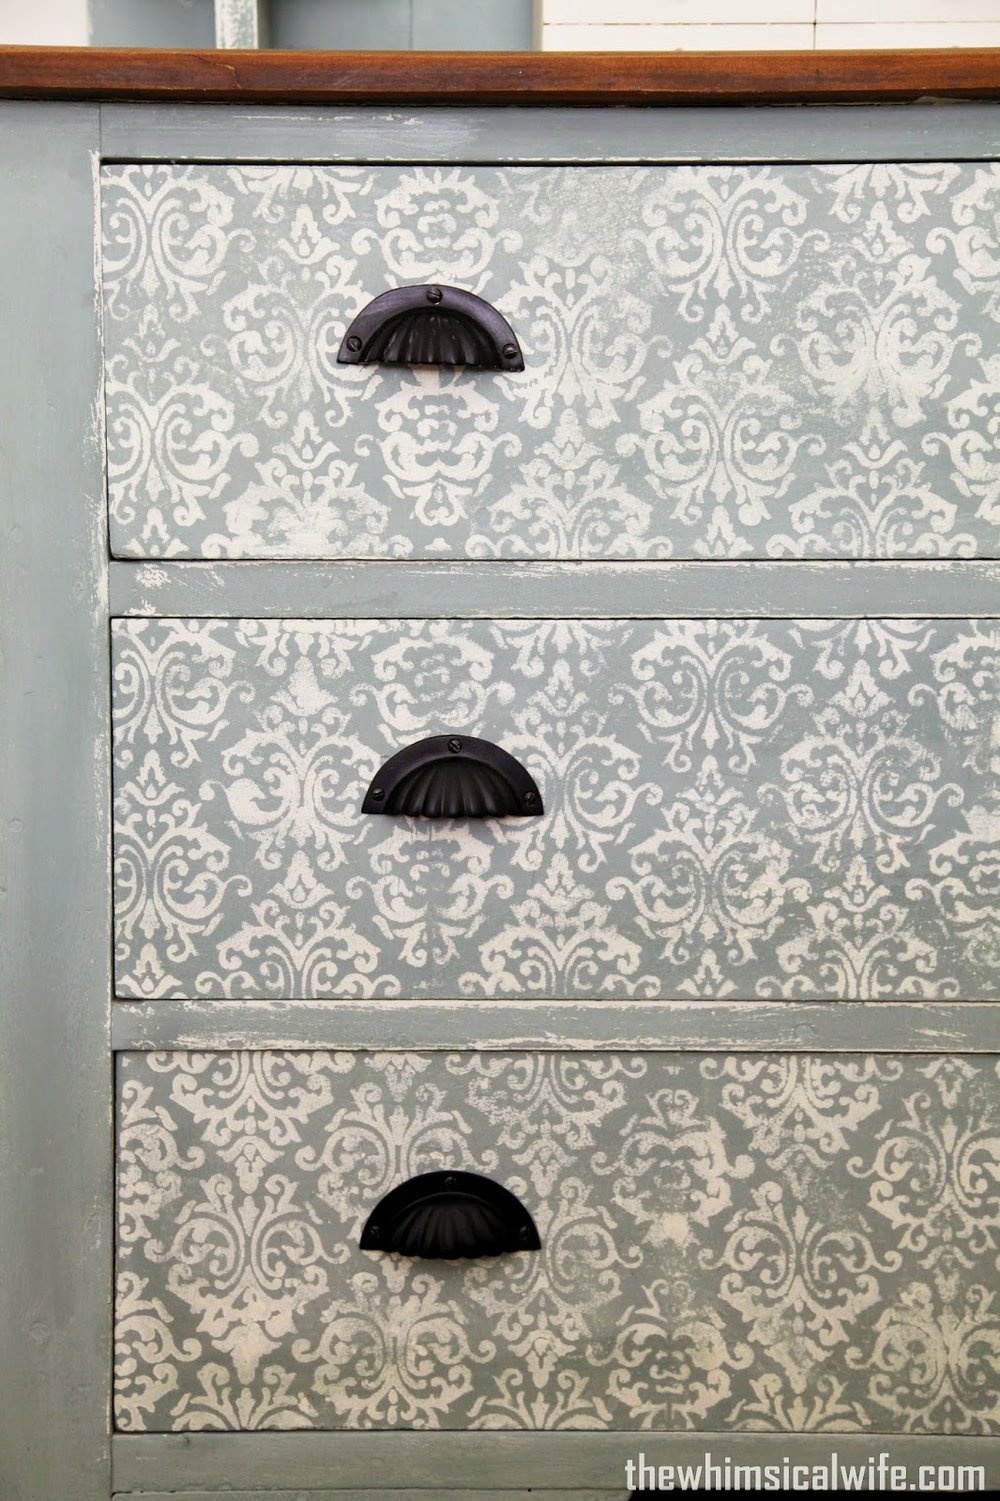
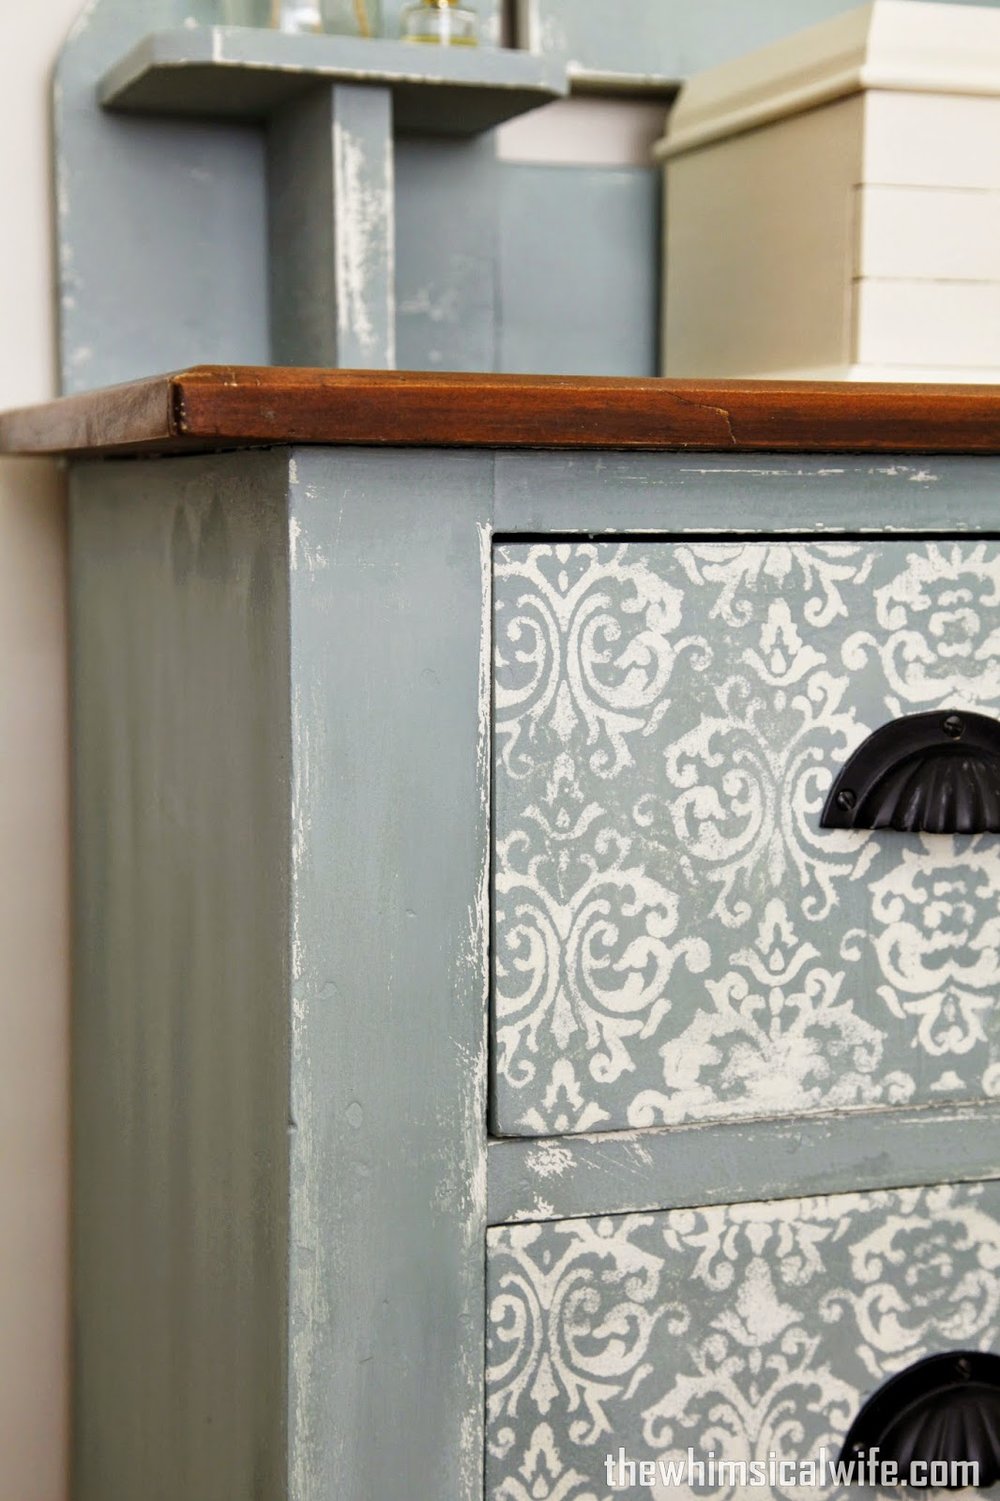
After letting each section of stencilling dry I then proceeded to match up the pattern and continue the next section. The paint dries pretty quickly so I was able to finish all 3 drawers in under an hour or so. The pattern stood out quite dramatically on the drawer fronts as you can see in the picture below. I found it to be a little overpowering so I decided to give it a light sand with some 240 grit sandpaper. You can see the difference further below.
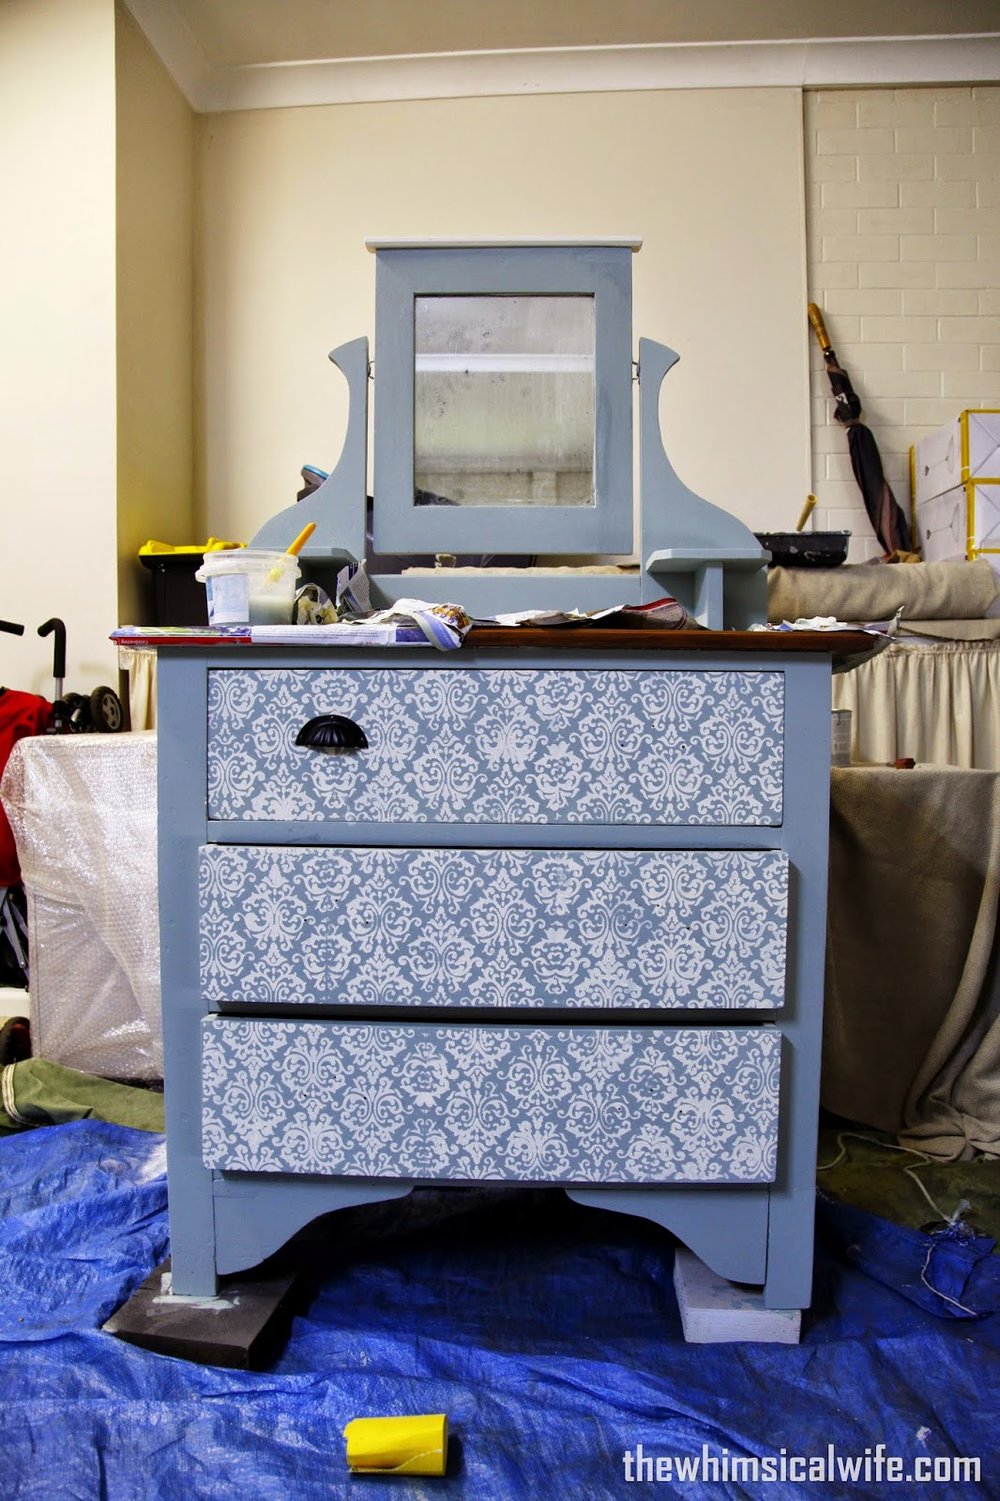
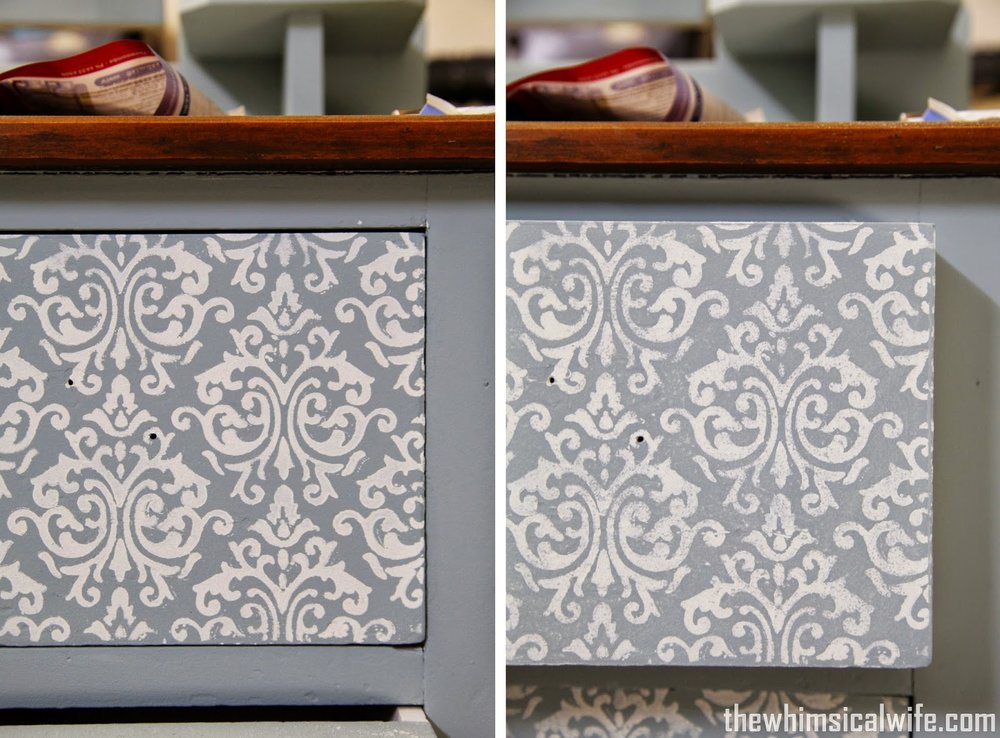
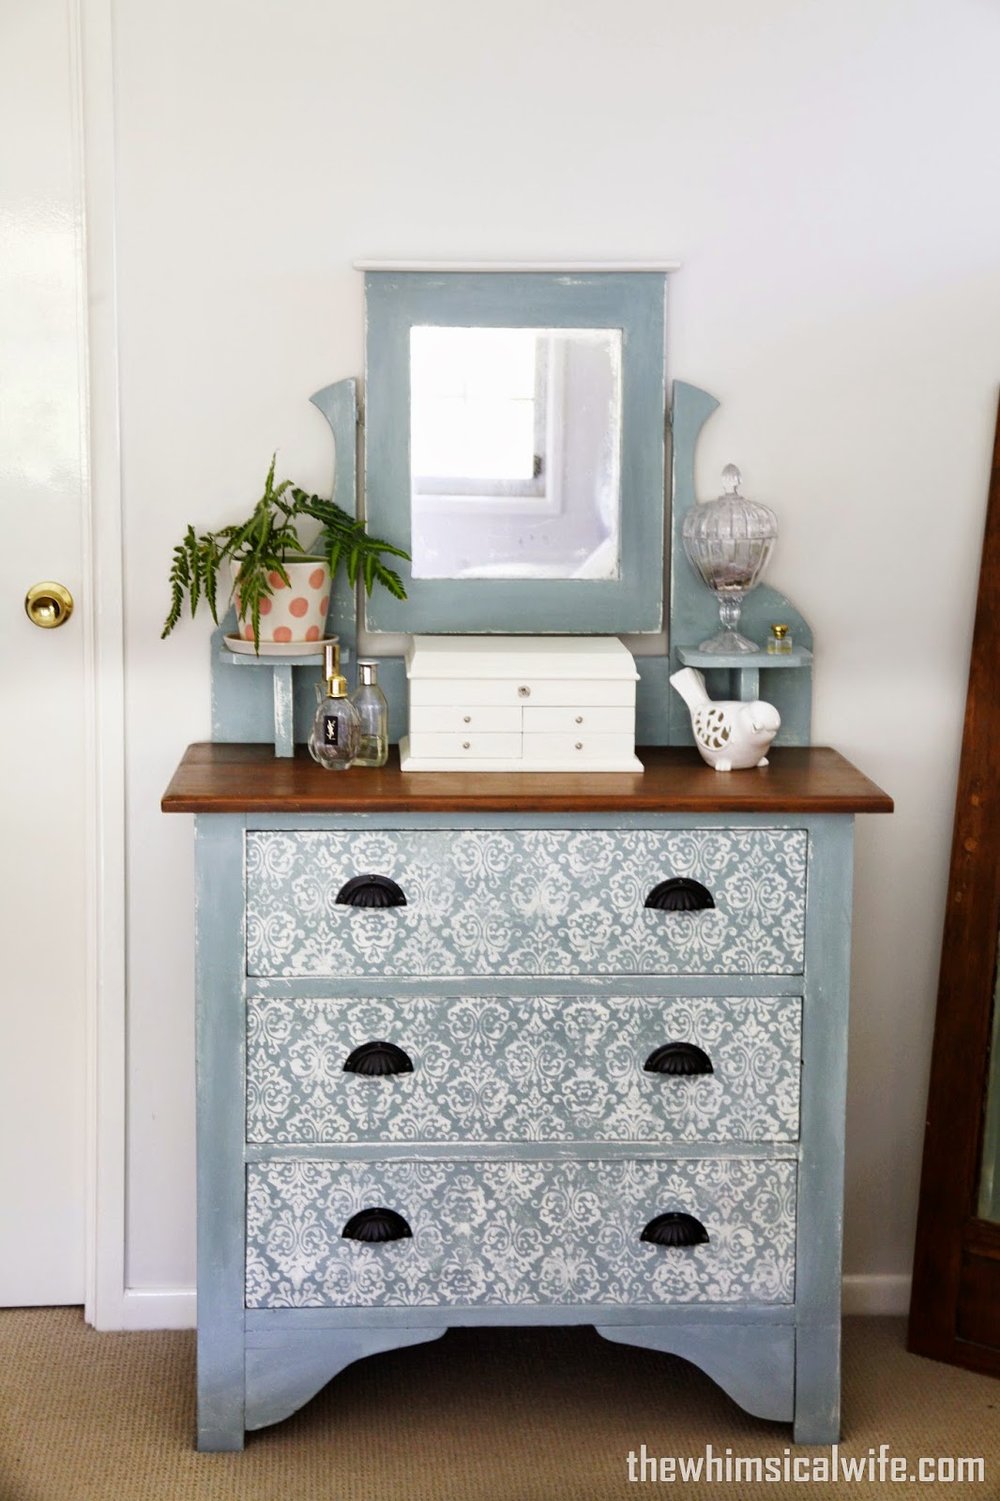
It didn't take much rubbing to tone back the pattern to a more rustic look as you can see by the photos. I gave the whole piece a light sand and a good rub back on the edges and corners to give it a slightly worn look. I then finished the whole piece off with a brush of Annie Sloan's Clear Wax to protect and seal the paint. I added back the old drawer pulls but I think I will replace or paint them in a pewter colour as I think the black is a little harsh on this finished piece. One day that will happen! I decided to also paint my jewellery box with some of the Old White Chalk Paint to tie it in with the dresser. It was a cinch to do and was a quick project to do while the toddler slept! I have to say I am really happy to have had a chance to work with Chalk Paint TM and would be sure to recommend it for your next painting project. In the mean time I will leave you with the finished result and let you have a squiz at what you can complete in a couple of days with some Chalk Paint TM and a stencil.

If you live in Australia and are interested in purchasing some Chalk Paint TM by Annie Sloan simply visit Annie Sloan Unfolded for more information on stockists.
{Disclosure: I was given the opportunity to trial and review Chalk Paint TM by Annie Sloan and was given product to use at my own discretion. I was not paid to write this post and all opinions are my own}