


How To Restore An Outdoor Garden Setting
Now that the weather is warming up I’m sure like me you are starting to get the itch for a bit of spring cleaning. The to-do list gets longer and longer during the winter months, put off until the weather starts to be more personable and you feel like you want to venture outside to do things. Our to-do list is currently like the cha-cha dance – we tick two jobs off (two steps forwards) only to add another two on as we tick these jobs off (two steps backwards). Such is life hey? One of the jobs we had on our list was to tidy up the outside area a bit more. Our fire pit area was looking a little forlorn with a build-up of leaves and dirt over the winter months plus the outdoor setting we had placed in there was in need of some serious TLC.

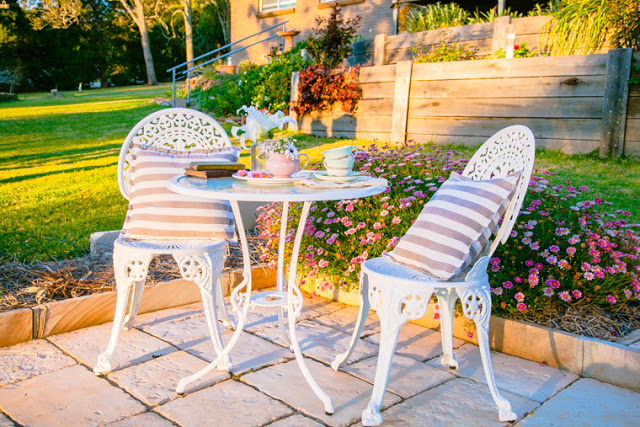
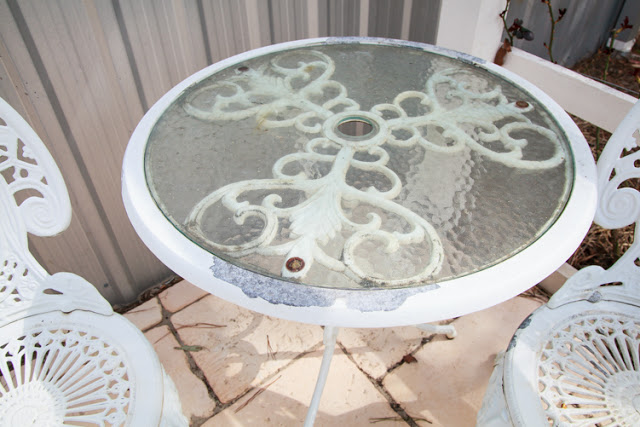
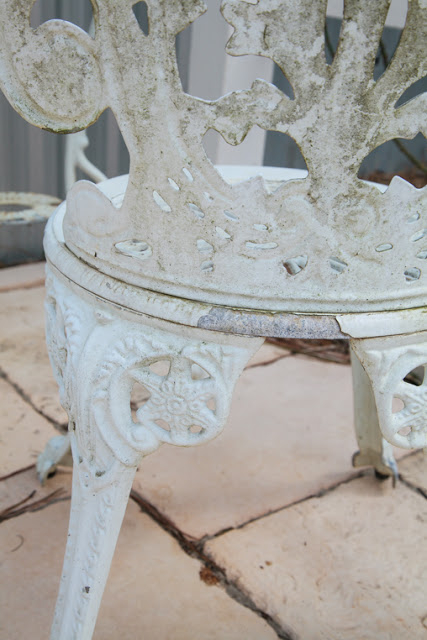
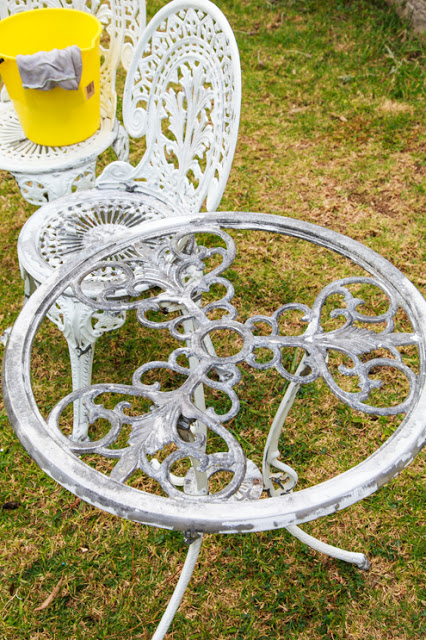
We bought this setting second hand from one our many garage sale jaunts in the early years of our marriage. It was our bargain find that day and at $30 for the setting we couldn’t turn it down. We are coming up to being married 9 years this year so this setting was definitely showing its age considering it already had some age on it when we bought it. As you can see from the pictures the paint was starting to flake off around the table edge and on the chairs. It was a great setting still with no damage to the structure but a little flaking paint a few sneaky rust spots poking through. It needed a little bit of cosmetic work to make it look brand new again. I love giving worn out and forlorn looking pieces a new life and this little garden setting was no exception.
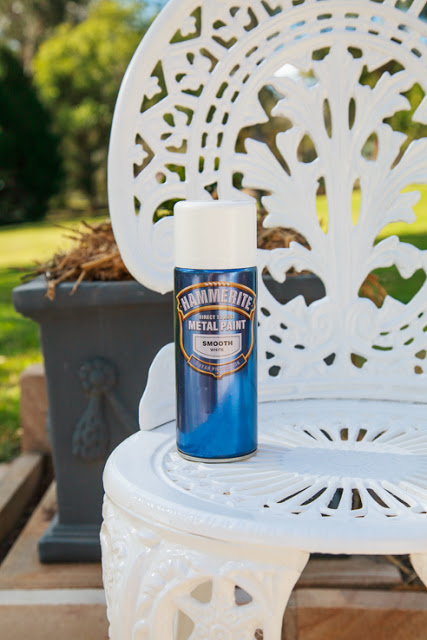
I was given some cans of
Hammerite Direct to Rust Metal Paint
spray paint to try and I knew this little outdoor setting would be the perfect project to try it on.
Hammerite Direct to Rust Metal Paint
is specially formulated to perform as a primer, undercoat and topcoat in one. It is able to be sprayed straight onto rust, it stops rust, is quick drying and easy to use and creates long lasting protection. It is the perfect product for giving this little garden setting a new lease on life.
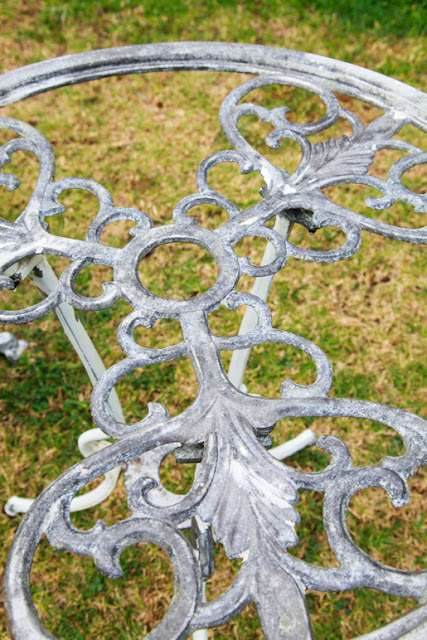
The first step in giving the setting a makeover was to take off the old flaking paint. Bevan kindly did this for me while I took a nap. He’s nice like that. Initially we thought we would be able to use a wire brush over the whole piece and just remove the worst of the flaking paint. After closer inspection we decided the whole lot of the paint needed to be removed and to start from scratch again. This will give a better finish in the long run with no old paint flaking off in the future ruining our hard work. If the piece you have to paint doesn’t have any flaking paint but has a little rust and just needs a new coat of paint a simple once over with a wire brush will probably do the trick.

Using a grinder with a wire brush disk (Wear eye & ear protection & gloves when doing this), Bevan ground back all the old paint revealing the aluminium base underneath. If you decide to go the whole hog and strip back all the paint and your base is zinc, aluminium or a galvanised surface it is recommended that you use the Hammerite Special Metals Primer before applying the
Give the whole piece a clean with water and a brush to remove any dust or build up from removing the old paint. Let it dry completely before moving onto painting. Setup an area outdoors but undercover to paint your outdoor setting. We are lucky enough to have a large shed to paint our pieces in and this protected the paint job from any falling leaves or dirt being embedded into it.
The next step was to apply the paint to the now dry and clean setting. Always wear a face mask when using any form of spray paint and always read and follow the instructions of the paint can too. After applying the paint to the setting we let it dry for a couple of hours until the paint was no longer tacky to touch. Repeat the painting process if more painting is required. We had to do a couple of coats to make sure the grey of the aluminium didn’t show through. After the painting was complete we let it dry completely overnight to make sure we didn’t ruin our hard work.

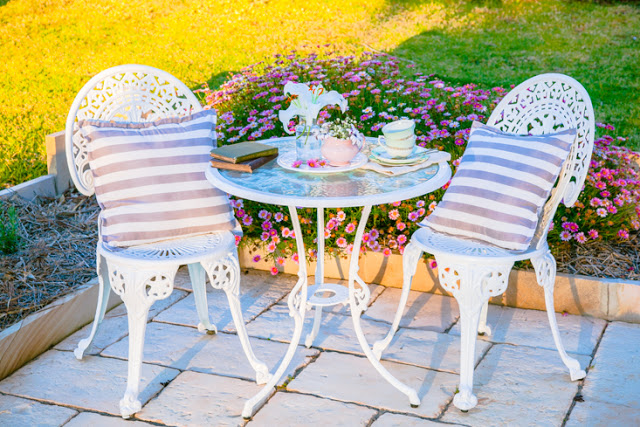
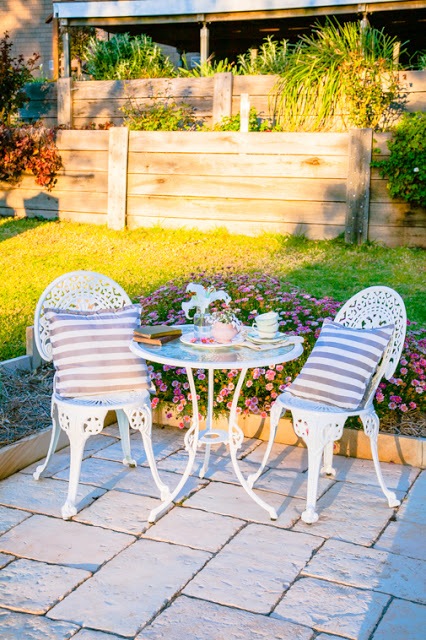
After it’s completely dried it is now time to pop your newly made over garden setting back to your favourite spot and admire your handiwork. Our setting now has been given a new lease on life and we hope to get another 10 years or more out of it. It looks fantastic and dare I say even brand new – it now stands proud in the corner of the fire pit area. This will now be my new favourite spot on lovely spring afternoons, enjoying a cup of tea watching the sun set. Bliss.


The next time you look at something and think it needs to be dumped give it a second look and it just might need a little TLC, some
Hammerite Direct to Rust Metal paint
and you just might have a little gem hiding under a little grime. Remember don’t dump it – Up-cycle it!!!
{Disclosure: I was not paid to write this post. I was given product to use and all opinions are my own}
