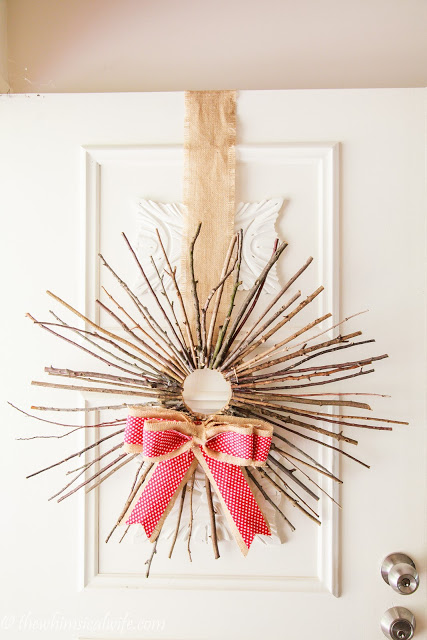
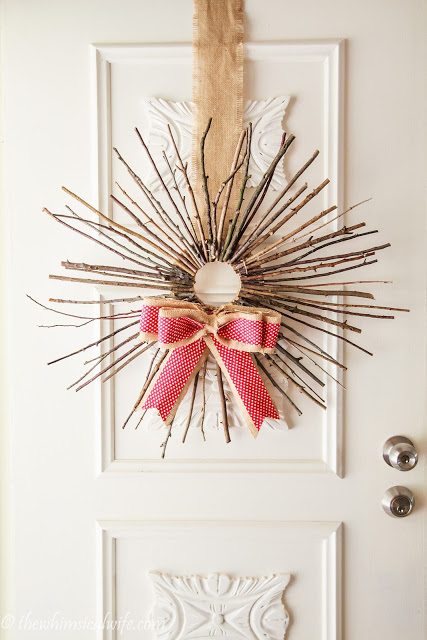
Rustic Sunburst Christmas Wreath
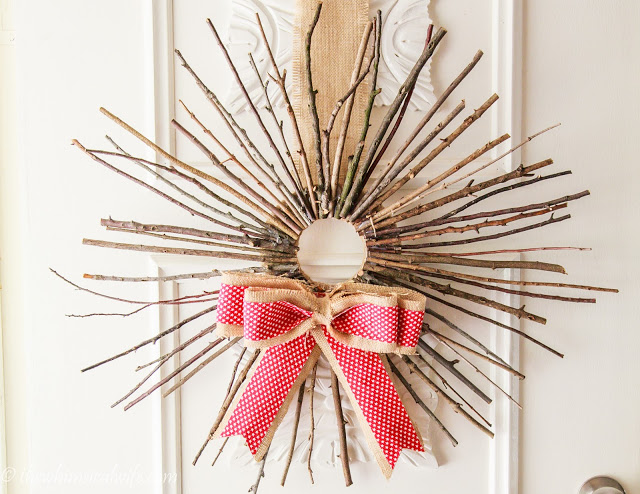
Christmas, Christmas, Time for Joy, Time For..... la la de la. Okay, so I've forgotten the words to that Christmas Carol. Ha. Oh dear. So I got all festive in November and made a Rustic Sunburst Chrismas Wreath for our front door. Not a traditional wreath but one using twigs and sticks. It's a little more rustic than the norm yet still festive and totally budget friendly and looks pretty darn good. .
I am not one for gaudy and bright Christmas decorations, and I like to keep my decor more along the rustic and neutral theme. You can see my
or my
tutorials here. I'll let you in on a little secret. I actually tried to record a video tutorial on how to make this wreath. Let's just say it didn't end so well. With me saying
Um
and
Ah
way to much, the kids waking up at the wrong time and constant interruptions I threw my hands up and gave up. Hopefully sometime in the future when the kids are older I'll try again but for now I'll add it back to my wish list of things to do for the blog.

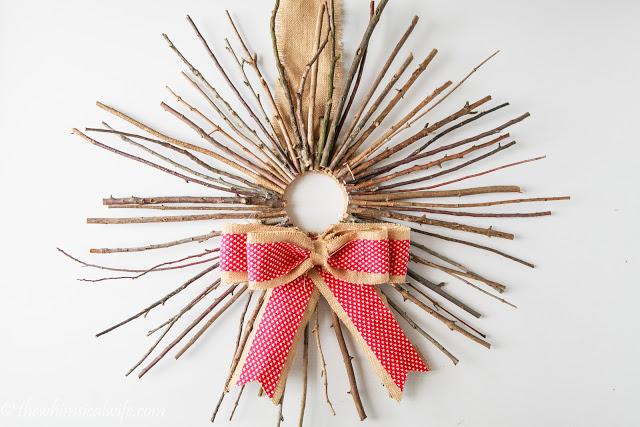
Christmas is a great time of year to bring out your crafty prowess and decorate your home with some gorgeous one of a kind pieces made by your nimble fingers. Making your own Christmas décor is not only cost effective way of decorating but you can bring some unique Christmas charm to your place. This Rustic Sunburst Christmas Wreath only costs pennies to make, and it makes a great statement piece to add to the entrance of your home and give a little Christmas cheer to all who enter. So let’s jump into how to make your own Rustic Sunburst Christmas Wreath.
Materials Required:
- 2 x cardboard circles (approx. 18cm in Diameter) with the center removed to create a ring.
- Jute twine
- 20-30 thin sticks – approx. 20-25 cm in length
- Burlap strips – 7cm wide x 155cm long
- 2cm wide x 10 cm long
- Christmas ribbon or fabric – 4cm wide x 155cm long
- Scissors
- Glue gun
- Ruler
Step 1:
Glue the two cardboard rings together with the glue gun. Once the rings have dried, it is time to tie the jute twine around the ring. Slowly wrap the twine around the edge of the ring and continue until all the cardboard circle had been covered with twine. This jute twine covered ring will now form the base of the wreath.

Step 2:
Place the jute covered ring onto a flat surface. Pick four of the straightest sticks and place evenly around the twine circle. Using the rest of the sticks carefully fill each quarter in with the remaining sticks. Repeat until the wreath is evenly filled with sticks. I found that having of a variety of different types of sticks with varying degrees of straightness or curviness helped with the overall look of the wreath.


Step 3:
Once you are happy with the layout of the sticks it is now time to glue them into place. Using the glue gun slowly make your way around the ring, gluing the sticks into place onto the jute covered circle. Make sure you line up the end of each stick with the edge of the inner ring to create an even looking wreath. Let the whole piece dry while you start making the burlap ribbon.

Step 4:
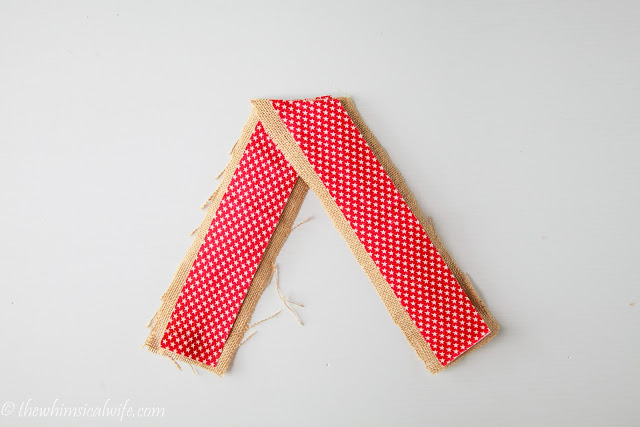
To make the burlap ribbon cut the burlap into lengths of 60cm, 45cm & 2 x 25 cm. Repeat the same sizes for the Christmas ribbon or fabric. Overlay the corresponding lengths of burlap and Christmas fabric together and glue into place.


Place the 60cm piece face down and fold each end into the center. Glue into place. Repeat with the 45cm piece. Place the 45cm piece on top of the 60cm piece to create the layered ribbon – making sure the joins are facing towards the back. Tie the center together with a piece of twine to create the loops for the bow. Wrap the thin strip of burlap (2 cm x 10 cm) around the center of the bow to cover the middle and finish the bow off. Glue the piece to start and finish at the back of the bow.


Step 5:
Glue the 25cm pieces together at the top on a diagonal to create the tails of the bow. Cut a V into the bottom of each tail. Trim the top in a straight line. To finish off the bow glue the loops on top of the tails. Let it dry before gluing into place on the wreath.

Step 6:
Add a strip of burlap or string to the back of the wreath to hang it from the door.
Step 7:
Place your newly created wreath in pride of place on your front door and stand back to admire your handiwork.