


A Clever Closet Wardrobe Makeover
What women doesn't love a good spacious wardrobe? I'll put my hand up for that. When we moved into our current house five years ago, I was let down a little with the walk-in-wardrobe space in the main bedroom. While it had plenty of hanging space, there was zero drawer or cupboard space to put the rest of our clothes. So we lived with stuffing our remaining clothes into this little tower of drawers and shelves that were already located in the wardrobe. For the last five years, we suffered from the chaos of squeezing our clothes into such a small space with things always overflowing and being pretty unorganized. We knew we wanted to add extra space to the wardrobe when we had the time but other jobs like renovating ou
or
kind of took priority.

Once some of the larger renovation jobs were finally under our belt, and we had some spare time and cash to focus on the smaller jobs on our ever-expanding list of things to do I jumped at getting the wardrobe finished. I was more than a little sick of living in a dysfunctional closet. The first step was to decide what we wanted out of this space in our closet.
Our brief for the Closet:
- Customizable, simple and easy to install
- Does not block the natural light
- Lots of open shelving
- Lots of drawer space
The primary goal for both of us was to increase the drawer and shelving space to make the area more functional and spacious to contain our clothes. The next step was to decide on how we were going to achieve this. We discussed the possibility of building our custom drawers and shelving units but realized this was a pretty big job and something we didn't want to take on. I wanted something that we could buy pre-made and customize it to fit our space, and that was easy to install. We didn't want this project to turn into a bigger job than we anticipated. After researching a number of different closet systems and pre-made wooden cabinets, we decided upon using the
from Bunnings.
There are two ways you can go with the Clever Closet. You can purchase a pre-packaged system that will fit a particular sized area with certain fittings such as hanging space, drawers, shelves, etc. or you can tailor the individual Clever Closet parts to suit your specific needs, which is the way we went. What I also loved with the Clever Closet system was that could install open wire shelving next to the window, and it would still allow a lot of natural light in without blocking it off.
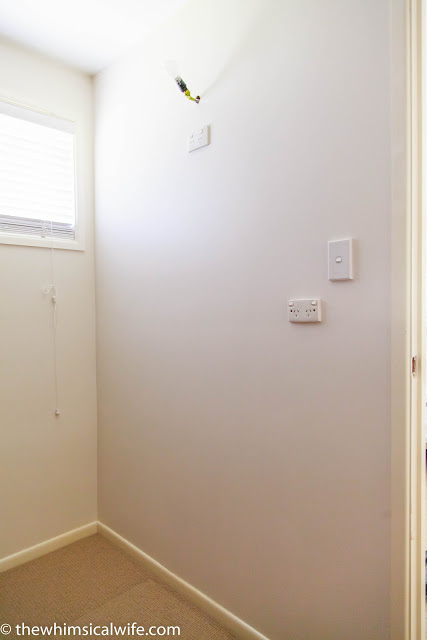
The first step for us was to measure the wall we intended on installing the Clever Closet to and working out what components we wanted and what configuration would work best for our needs. We also had to work around a couple of sets of power points on the wall as you can see as we decided against removing them as the cost of getting an electrician would have pushed our budget through the roof.
Our first port of call was to pop into the local Bunnings store and work our the pricing on the different components before we went ahead to sketch out our design. We also talked with a lovely Bunnings store worker who gave us a run down on what other elements we would need for a full installation. With that information in hand, we went home to do our homework. We sketched out a few different solutions on paper using various combinations and arrangements.
Once we settled on an arrangement, we liked we then worked out the costing of this particular setup from the pricing we did earlier. Our idea was to have a tower of drawers each side of the wall for hubby and I and above these drawers a couple of sets of open shelving above. Our first closet sketch was a little over our budget, so we removed a set of drawers each side of the wall, and this got us back down to our required budget.
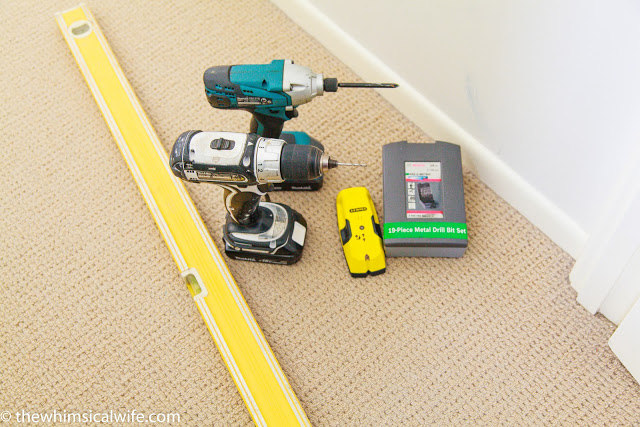
We then wrote a complete list of all the components we needed for the installation and made our way to Bunnings to pick up our required pieces. Once we collected all the parts for the install, it was now time to get the tools out and get started.
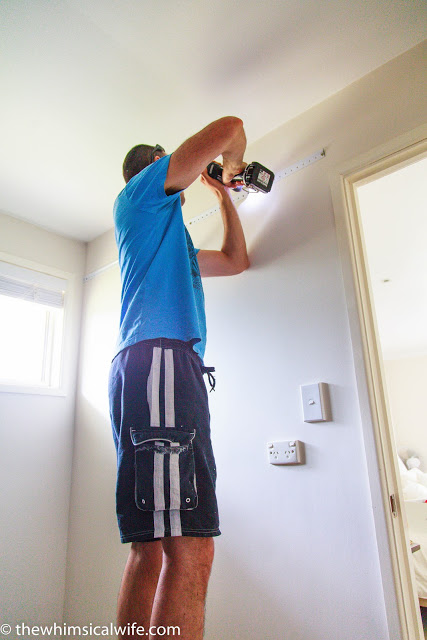
The first step to the installation was to install the top rail which the vertical tracks would be then be attached to and would run down the wall. This makes up the backbone of the Clever Closet, which all the components would be connected to.


Once the vertical tracks had been leveled and screwed into place, it was time to assemble the sliding basket frames. With ten frames to put together, we created an assembly line with me putting the frames together and Bevan screwing them together. This probably was the most time-consuming part of putting the closet together. Once we found a rhythm we got the drawers put together in no time.

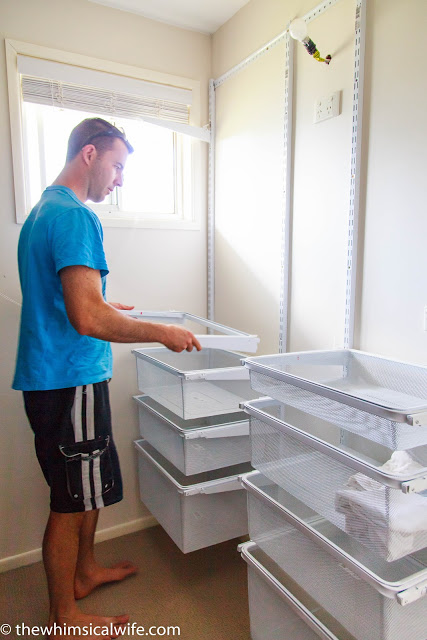
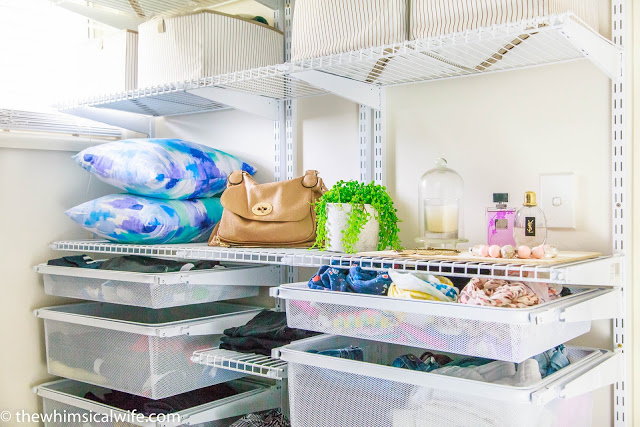
Once the drawers were attached to the vertical tracks we then simply clicked in the brackets for the wire shelving to click into. We were able to install the closet in an afternoon while the babies slept which meant no little helpers underfoot. It was so exciting to put the finishing touches to the closet with some fabric boxes to store our out of season clothing and adding a few little knick-knacks along the bottom shelf.
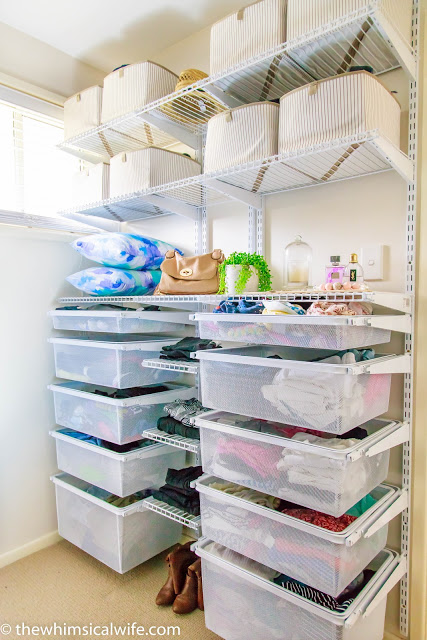

I am just in love with my closet now. With all my clothes in their proper place, neatly arranged and easy to access there is no need for rummaging around looking for something and leaving a great big mess. I guess there is no excuse for clothes to be left on the floor now!!!
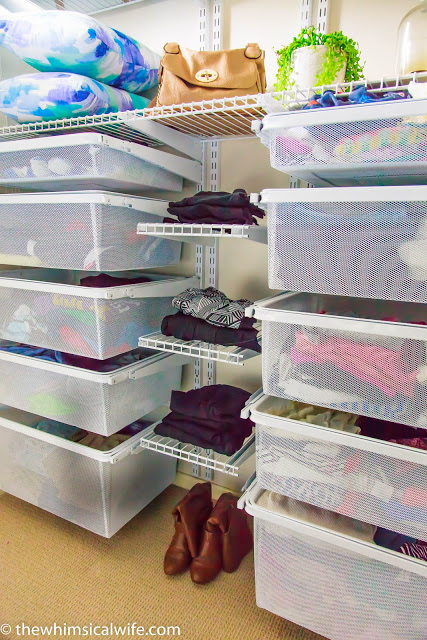
While the Clever Closet system is a little more expensive than the general store-bought melamine wardrobe shelving inserts it is worth spending the little bit extra for it. I just love how compact and organized it is with no bulky shelves or cupboards taking up extra space, how it can be totally customized to suit your needs and how super easy it is to install. I am totally smitten. Can you tell?
{This is not a sponsored post. We installed and paid for the Clever Closet after concluding our own research. I just wanted to share how much I love my new closet!}


