

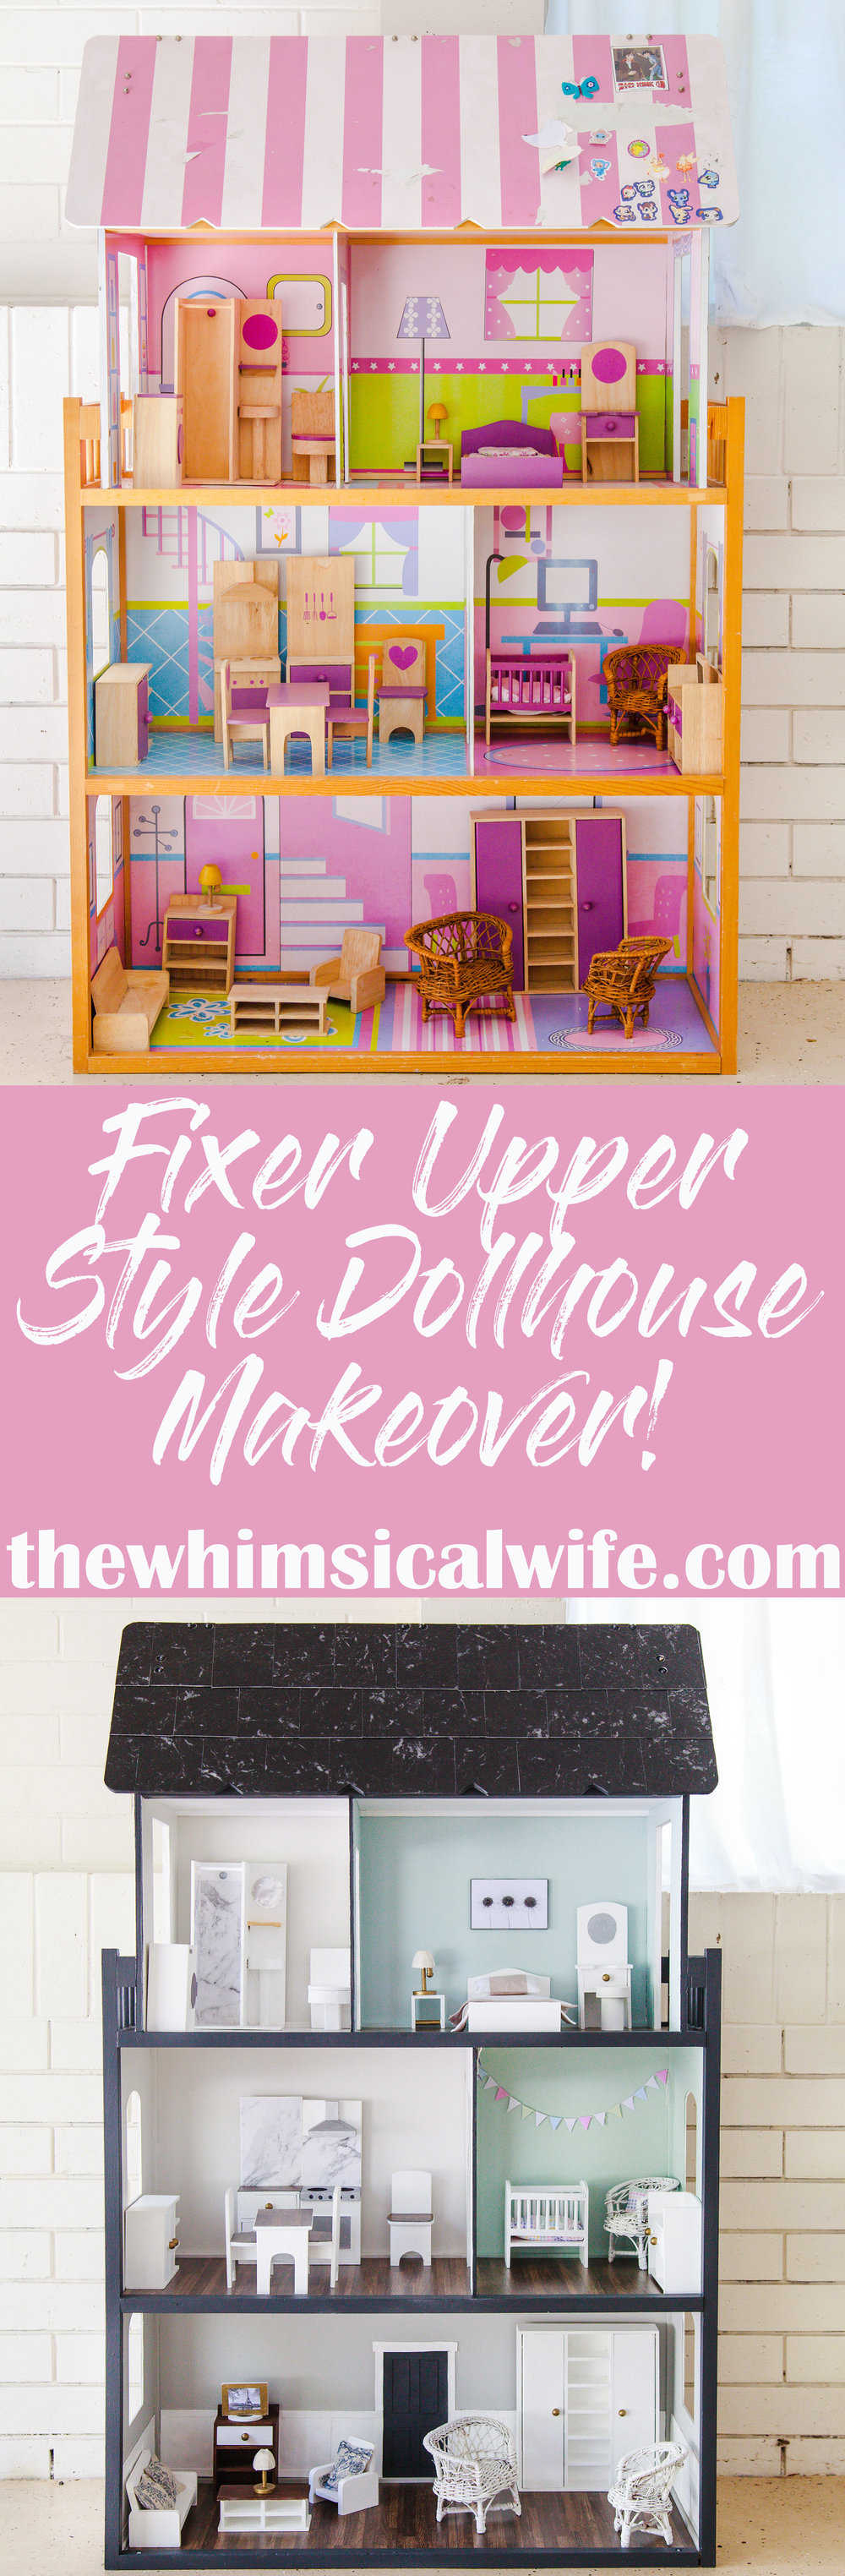
My Fixer Upper Style Dollhouse Makeover + Video
I promised months ago that I would share with you my Fixer Upper style dollhouse makeover and here we are in February and I am only sharing it with you now. My apologies friends. It was a really bad time of year trying to put together a post like this one during the busiest season of the year Christmas. Following that add in our first year of school with J.D and I feel like life has been absolutely mad. Now that I have got my breath back a little I thought I would pull it all together and finally reveal it to you.
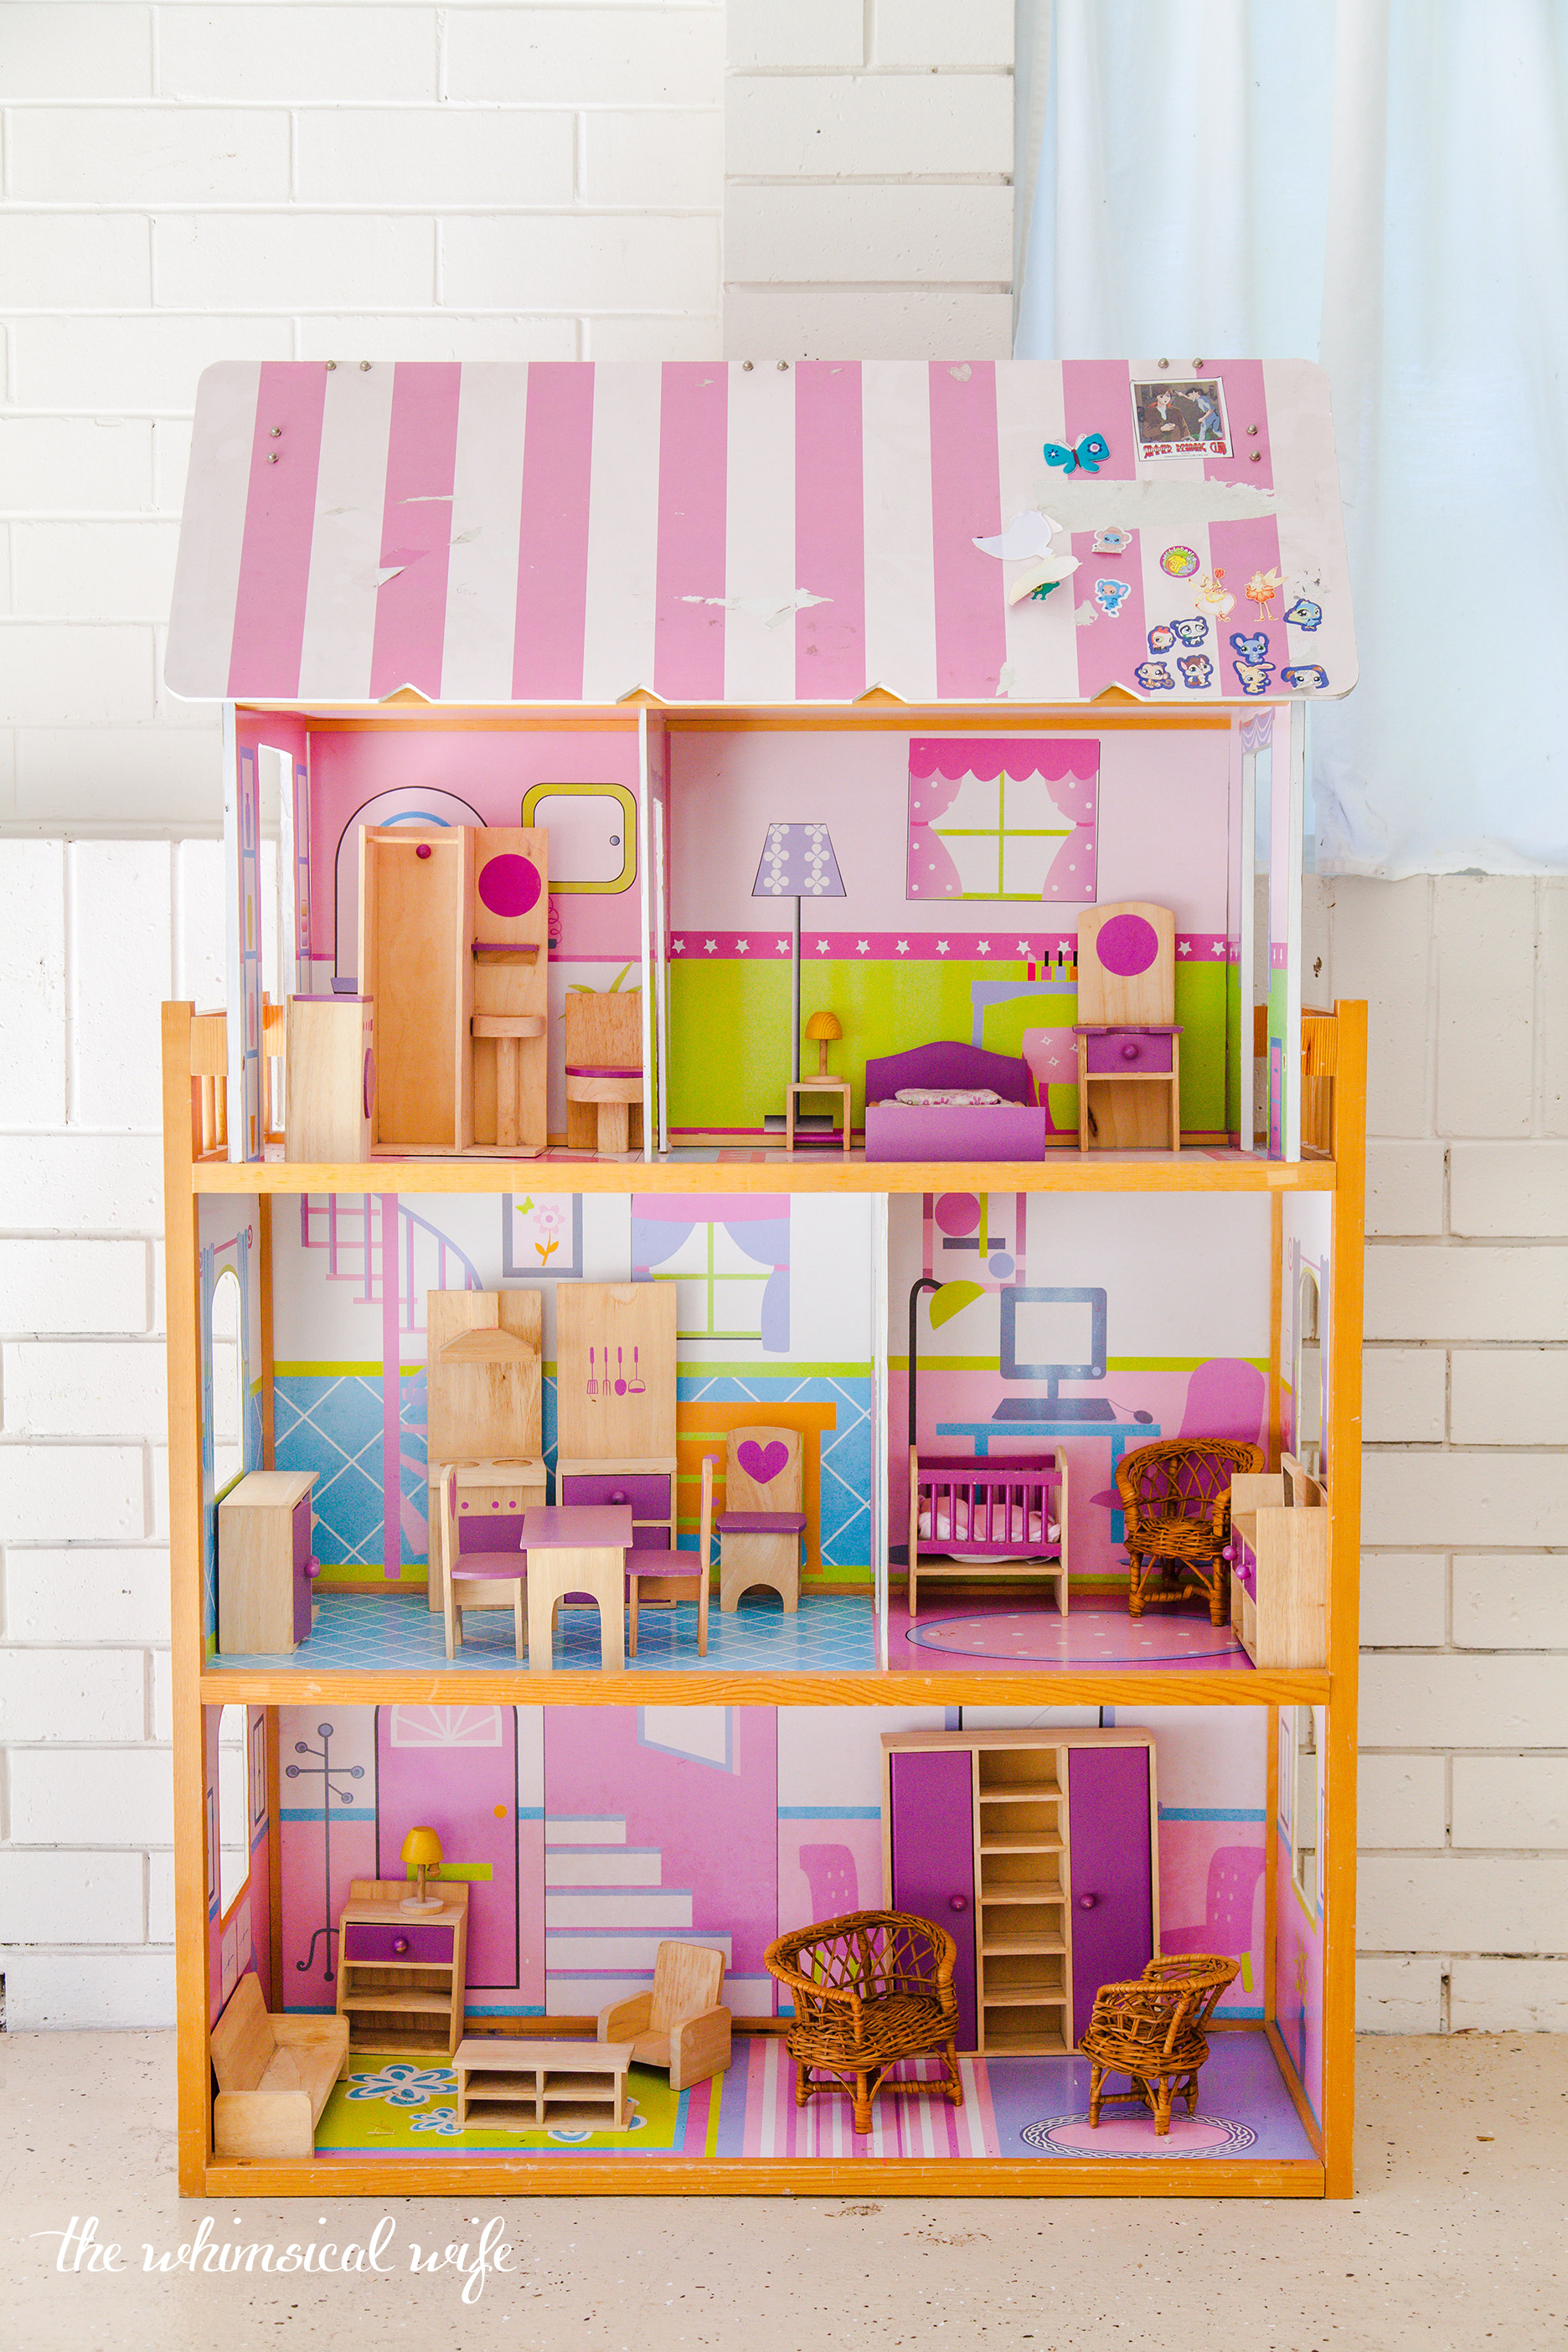
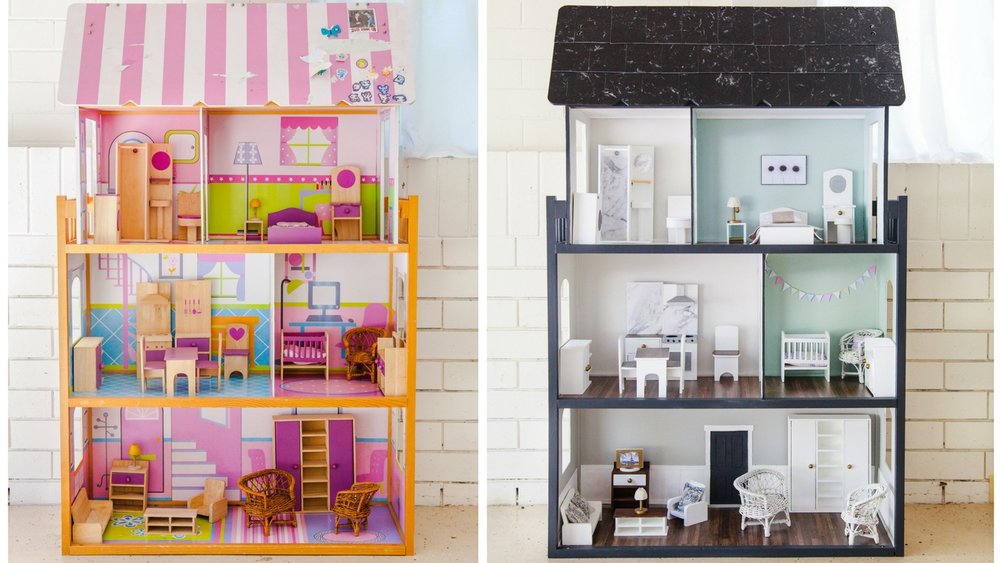
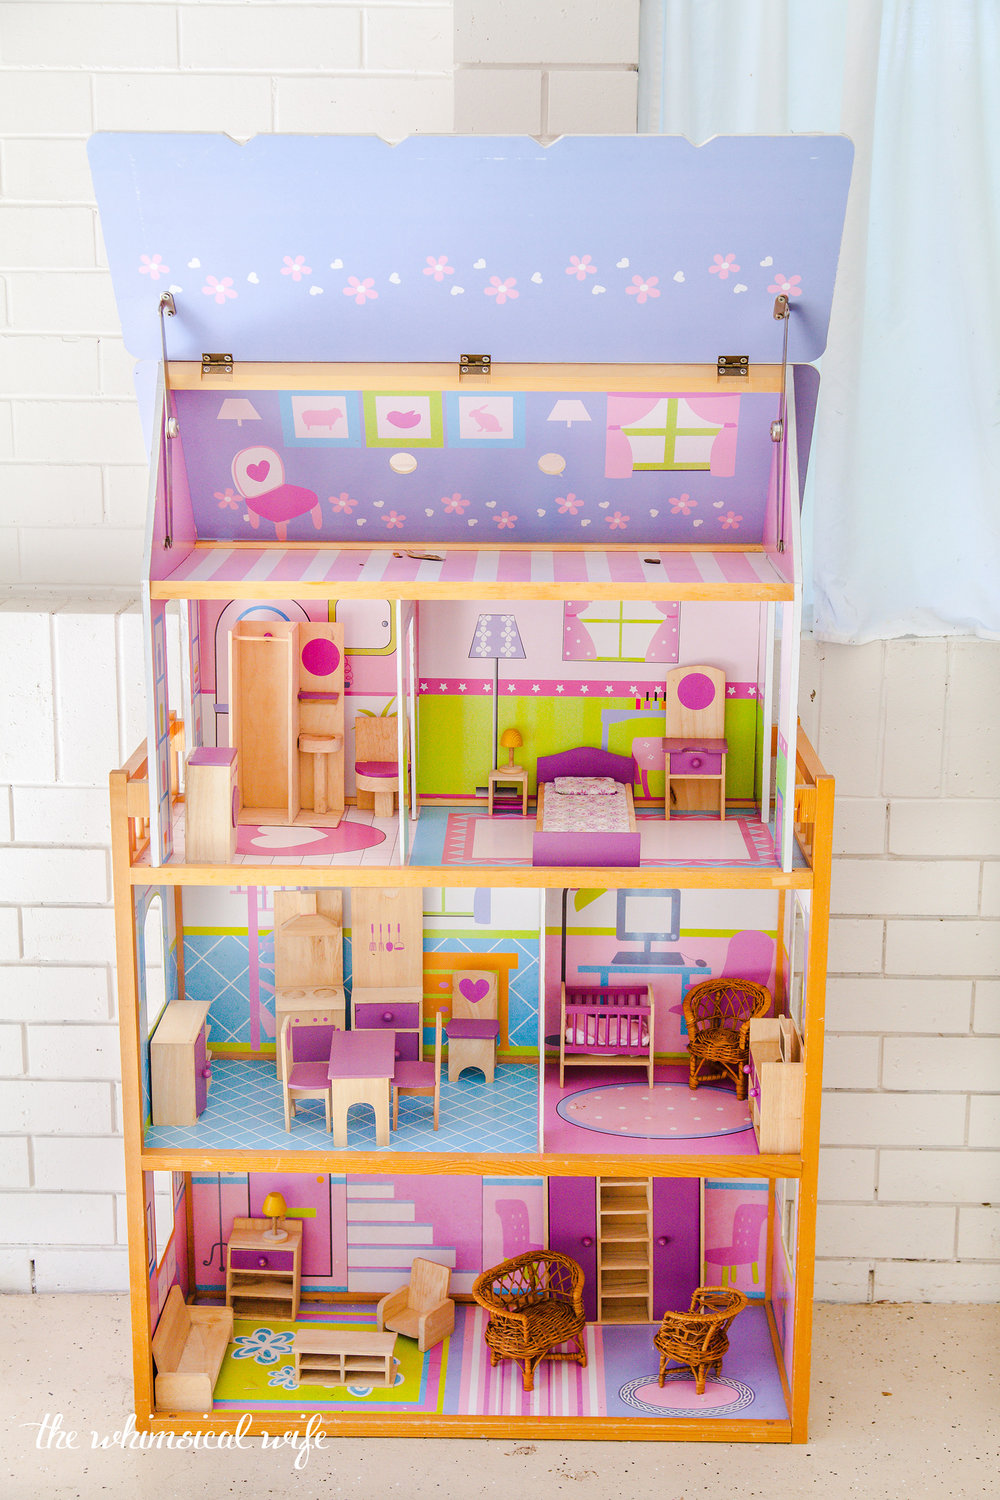
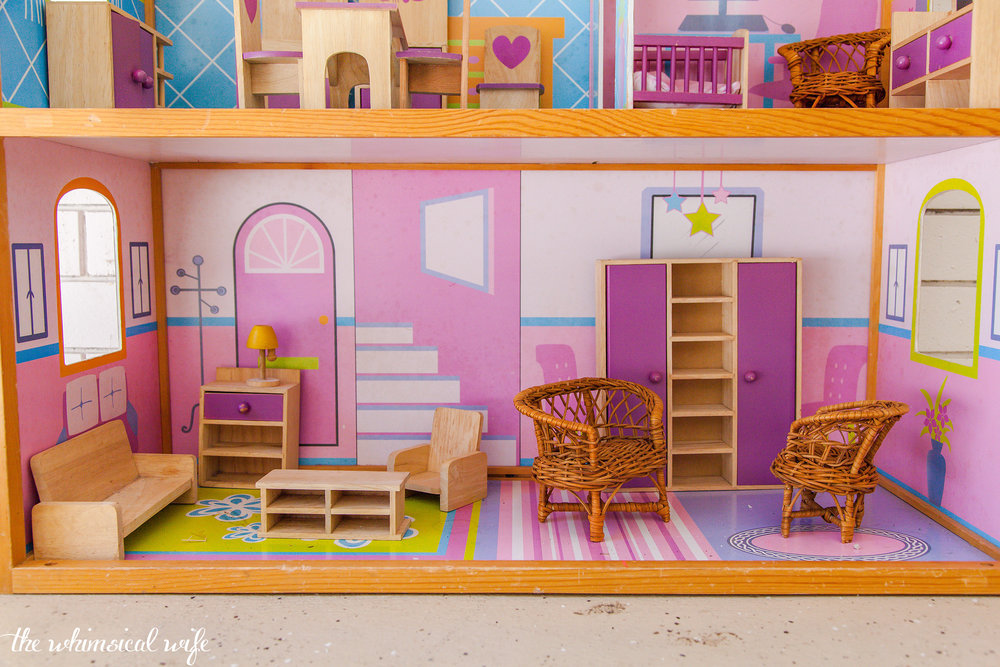
This project has been one that I have been most proud of in its finished state. The work involved in transforming this dollhouse from a well-loved but weary-looking piece into something resembling one of Joanna Gaines Fixer Upper houses was something I wasn't ready for.

I took this project on for a friend of mine to transform it for her three little girls in time for Christmas. I had about 4-6 weeks to complete it and boy did I need all the time I could get. What I didn't factor in was just how fiddly it would be to paint the dollhouse, add the detail and transform every piece of furniture into something worthy of a modern farmhouse look. That being said I did get a lot of enjoyment out of what I created even if it was a tad tedious at times. So let me walk through what steps I took to turn this well-loved dollhouse into something show-stopping. I have a video of the entire process from start to finish below but if you want to read about the process also just keep on scrolling.

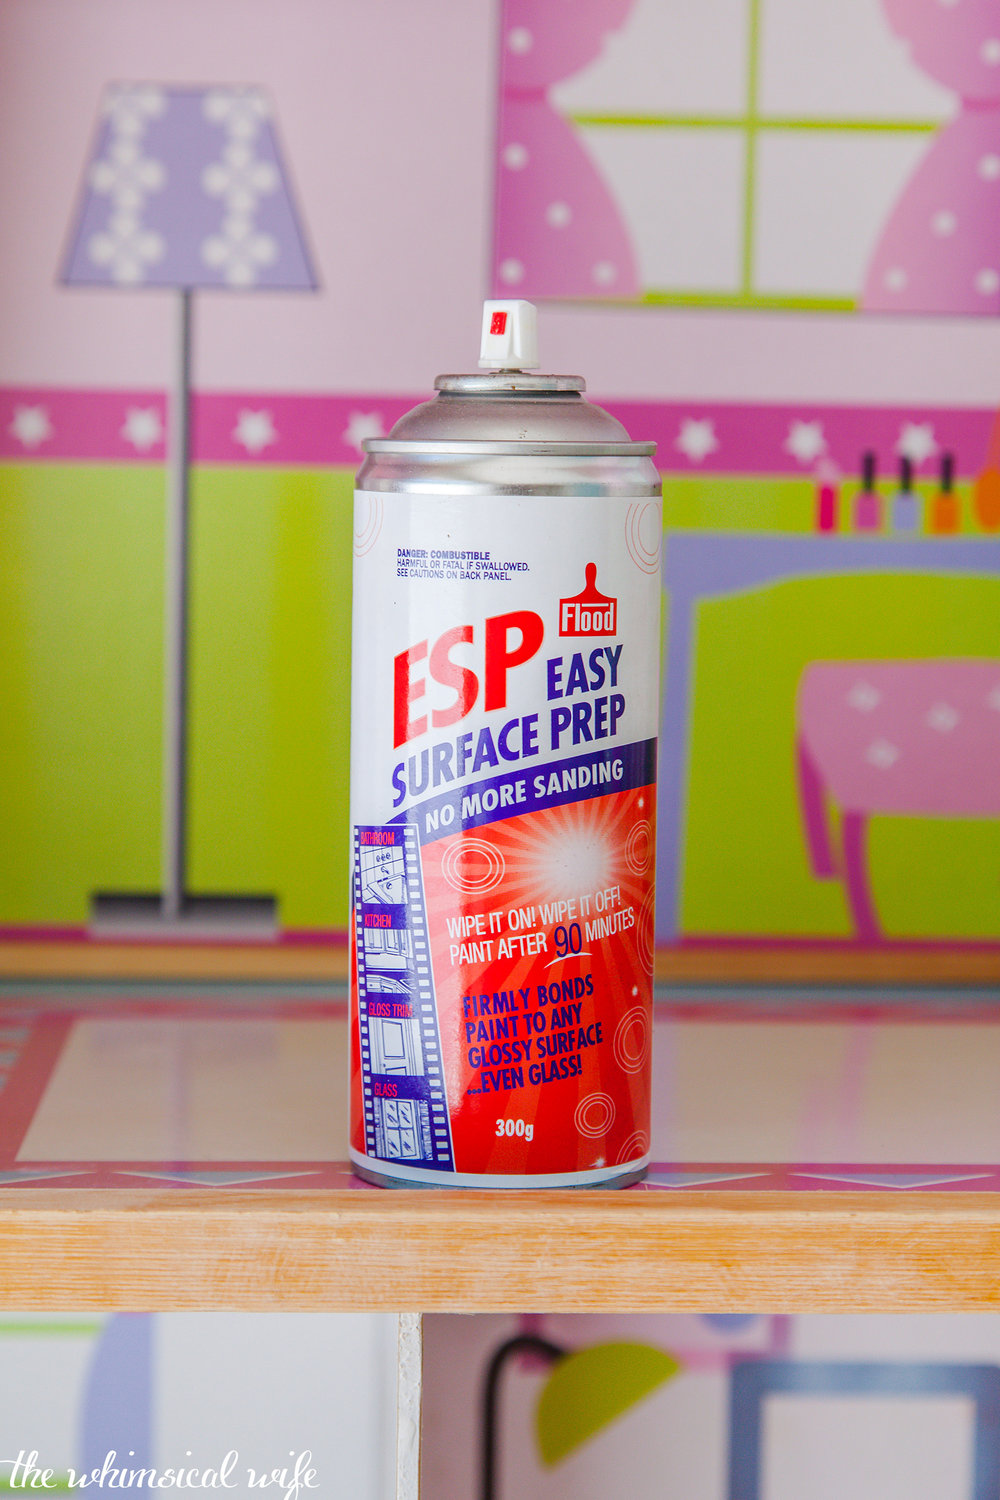
The first step was to wipe the entire dollhouse over with sugar soap and water to remove any grime, dirt or dust so that that paint has a clean surface to stick on. I let it dry before sanding down the wooden edges of the dollhouse with 120 grit sandpaper ready for the first coat of paint. To prepare the melamine walls and floors of the dollhouse I sprayed the entire house with ESP {Easy Surface Prep} spray so that the paint bonded to the melamine and not just scratched off.
This is extremely important as simply just painting the melamine would result in a finish that would not last. I let the ESP dry before hauling it down to my spray booth in my workshop in the back shed. Also an important note I don't wipe the ESP off as it says to on the can. I left it on to dry which I find helps the paint stick better than wiping it off.

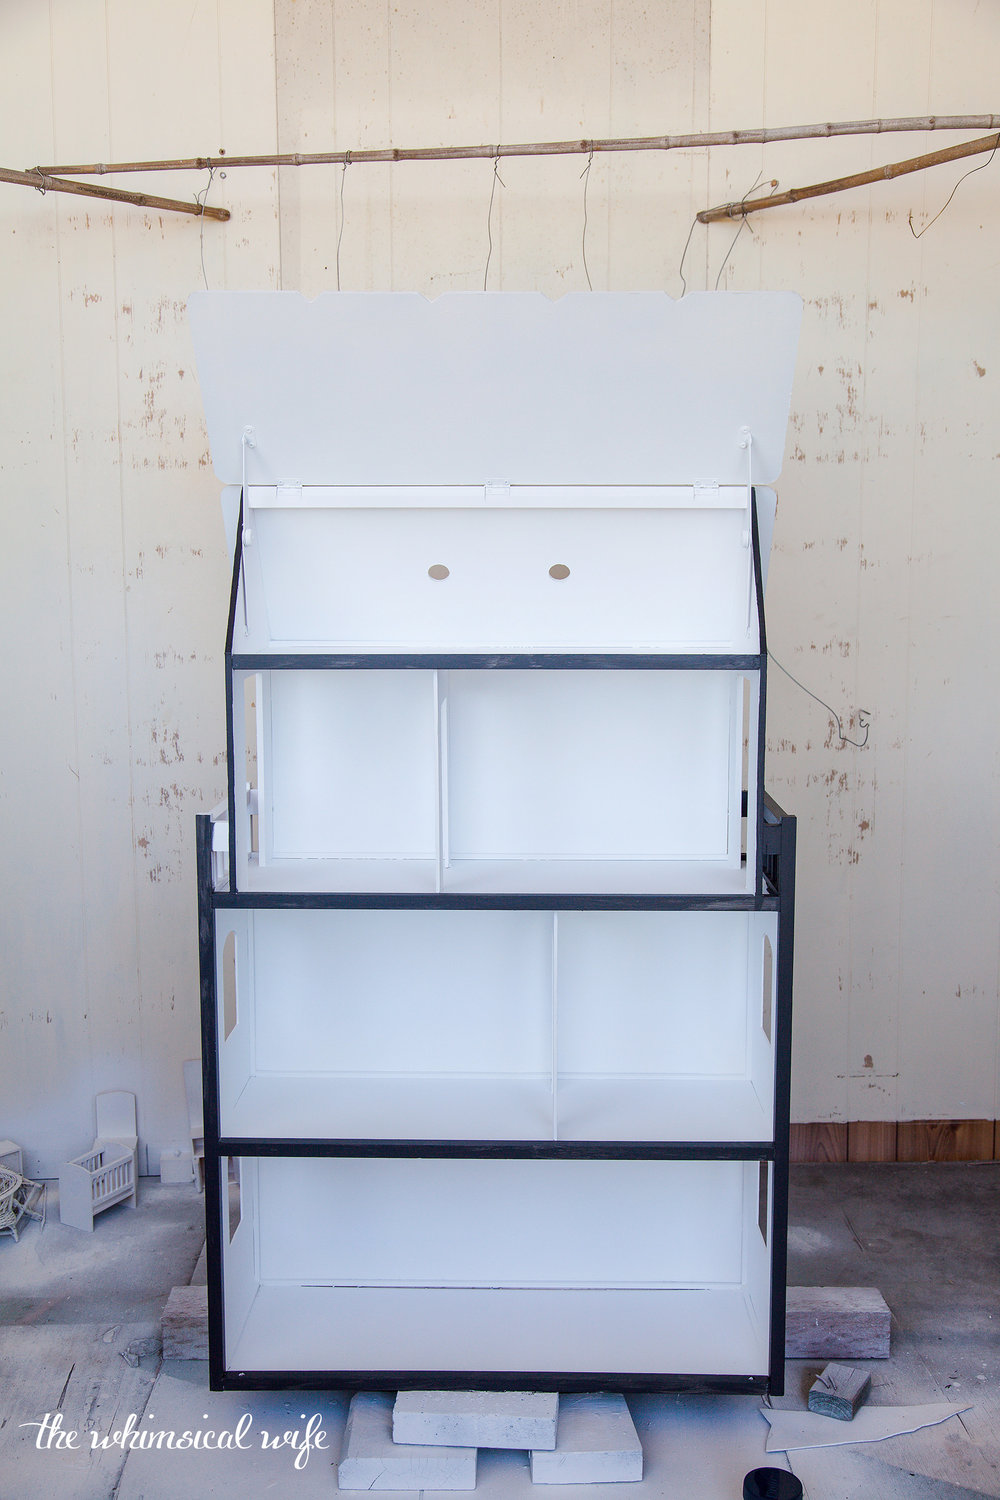
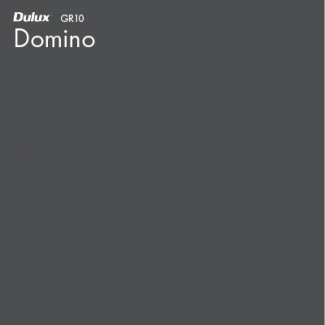
I didn't take any photos of the next process but I sprayed the entire dollhouse using my Wagner FineSpray Paint Sprayer with VIVID WHITE by DULUX. I applied three coats of white which resulted in the perfect coverage over the bright pink colours underneath. I use the paint sprayer on most of my projects that require painting as the finish is smooth and you don't get the awful brush marks that come with using a paintbrush. If you don't have a paint sprayer the next best option is to use a paintbrush to cut in the edges and use a foam roller to paint the walls/floors etc with. I then painted the wooden sections of the house in DOMINO by DULUX.

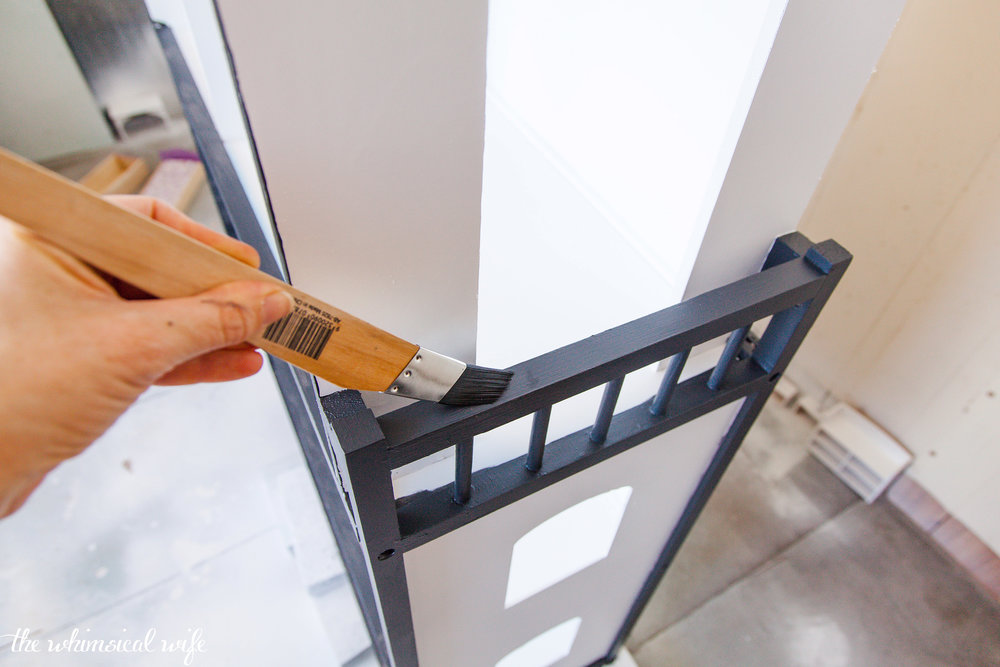
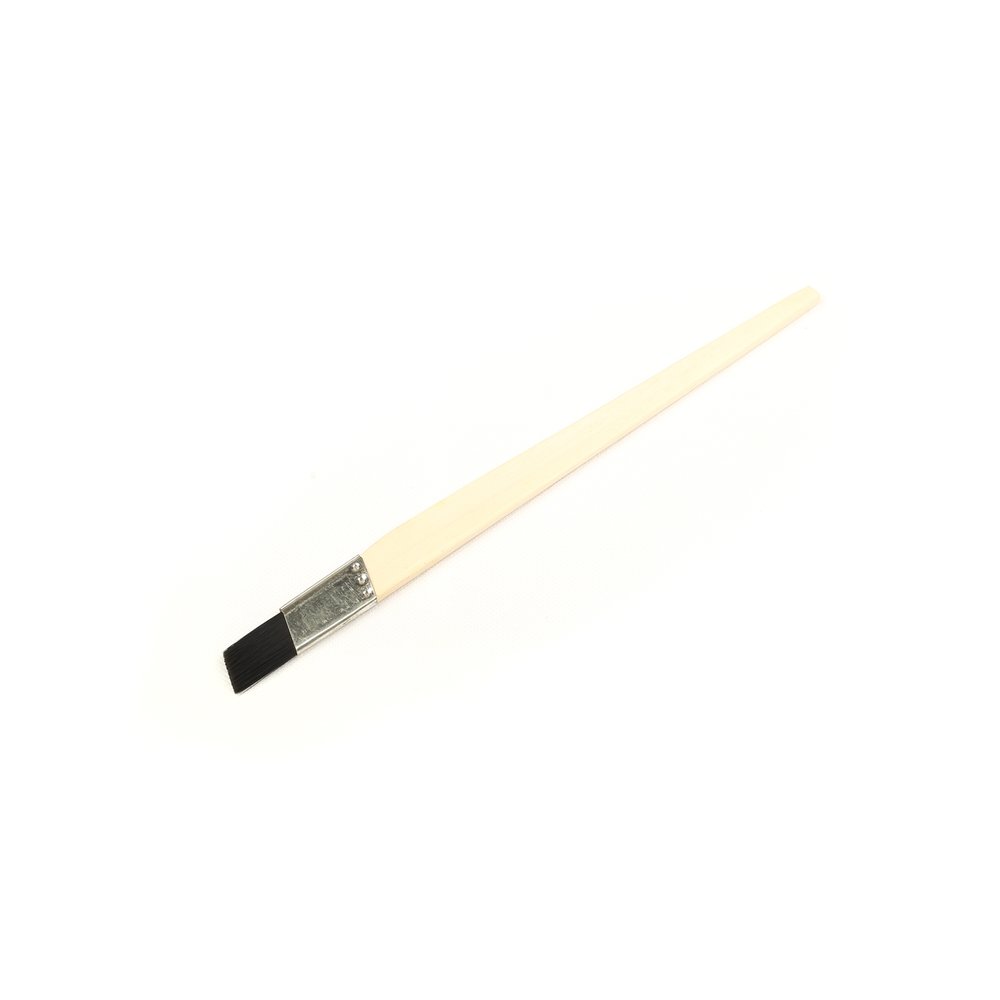
I found the best brush at Bunnings to paint the fiddly sections and it was a lifesaver. It was a 25mm Bevel Paintbrush {Similar to this one} and it helped cut in around the hard areas and gave a precise finish. I also bought a 6mm version as well for the even smaller painting that I had to do on the furniture pieces.

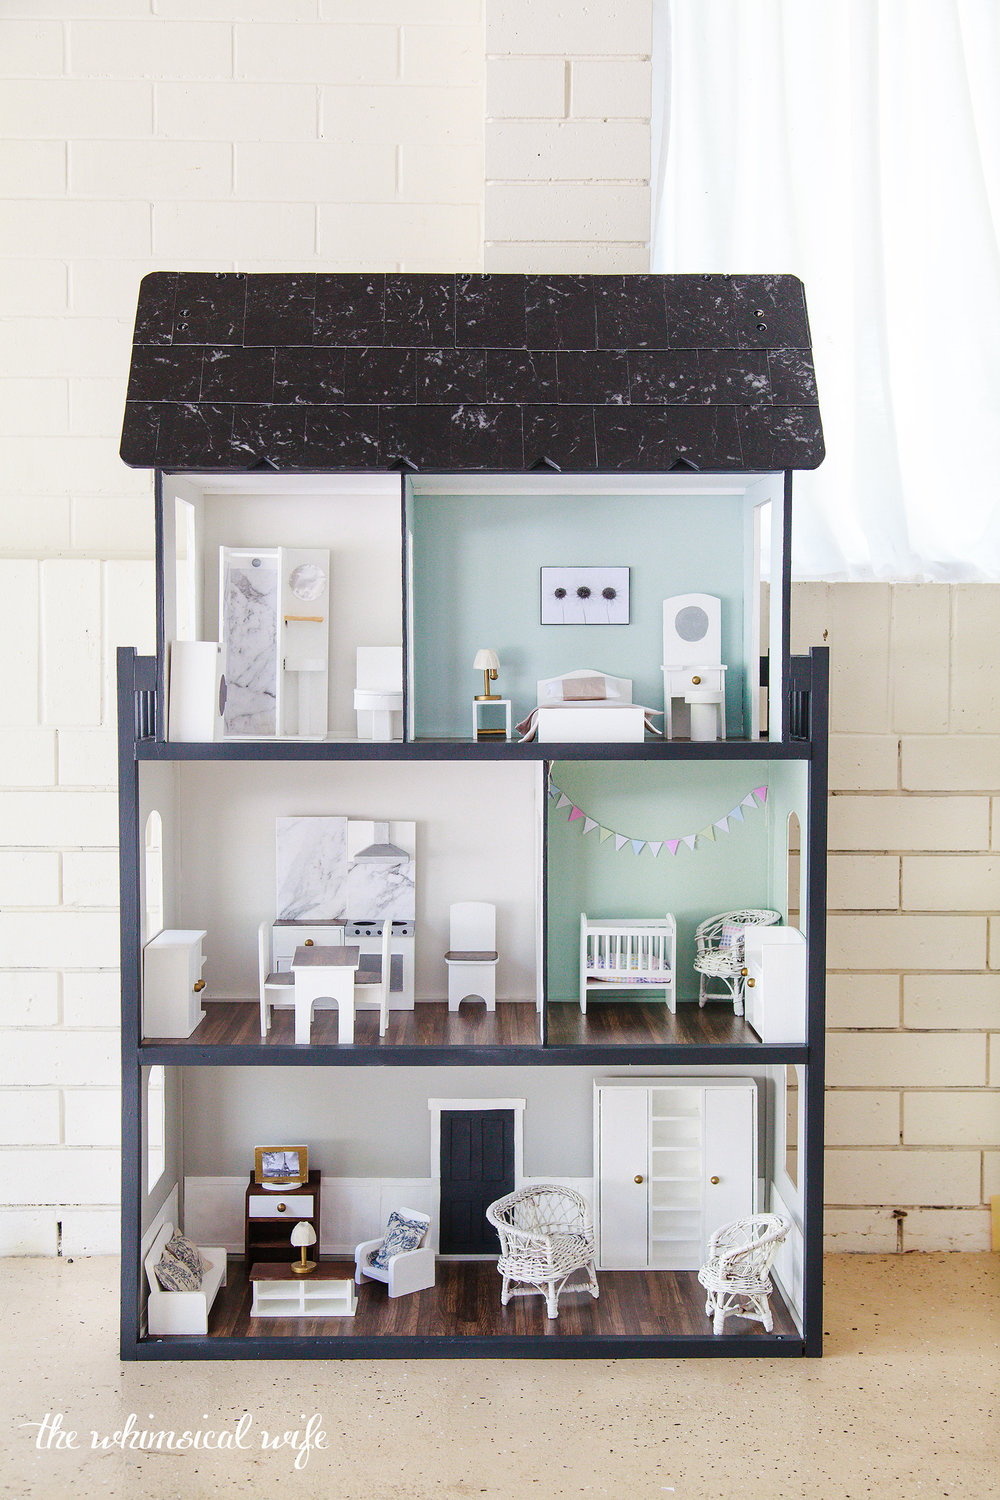
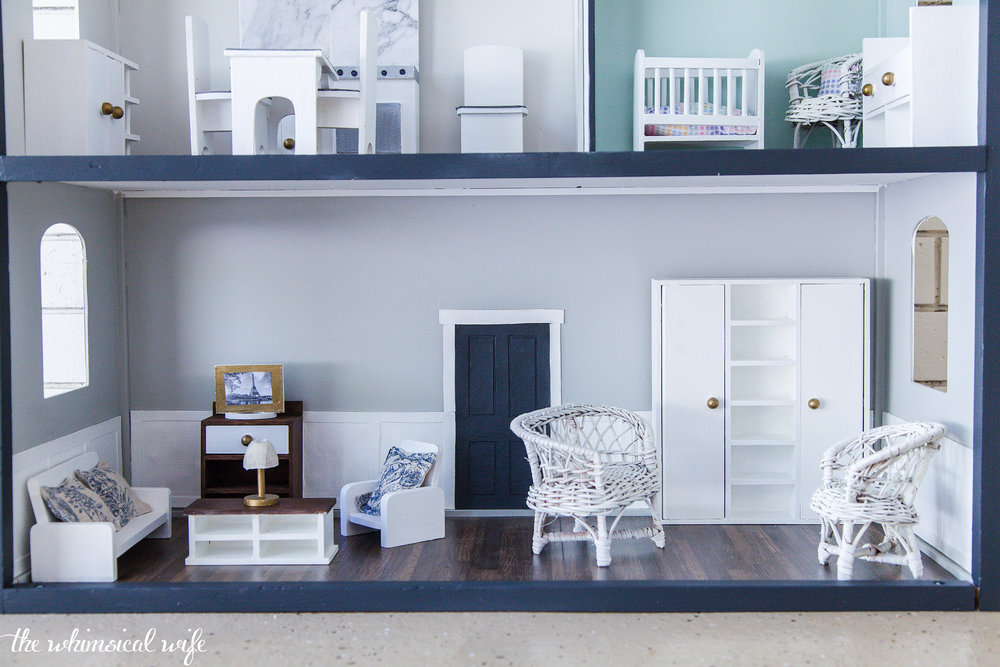
After I had painted the fiddly balustrading and edge sections I started adding some colour to the rooms inside the dollhouse. I started with the nursery and painted it a soft mint green; the main bedroom got a soft blue and the kitchen and bathrooms I chose a very light grey. The main living area I decided to do a dark grey as I was going to add wainscoting around the bottom of the wall. The wainscoting was going to be white, so this would contrast nicely with the dark grey on the main living room walls. I used a foam roller and the bevel brushes I described above to paint the walls on the inside of the house. I couldn't use the paint sprayer as it would have been to much work to mask the other areas of the dollhouse off to avoid overspray.
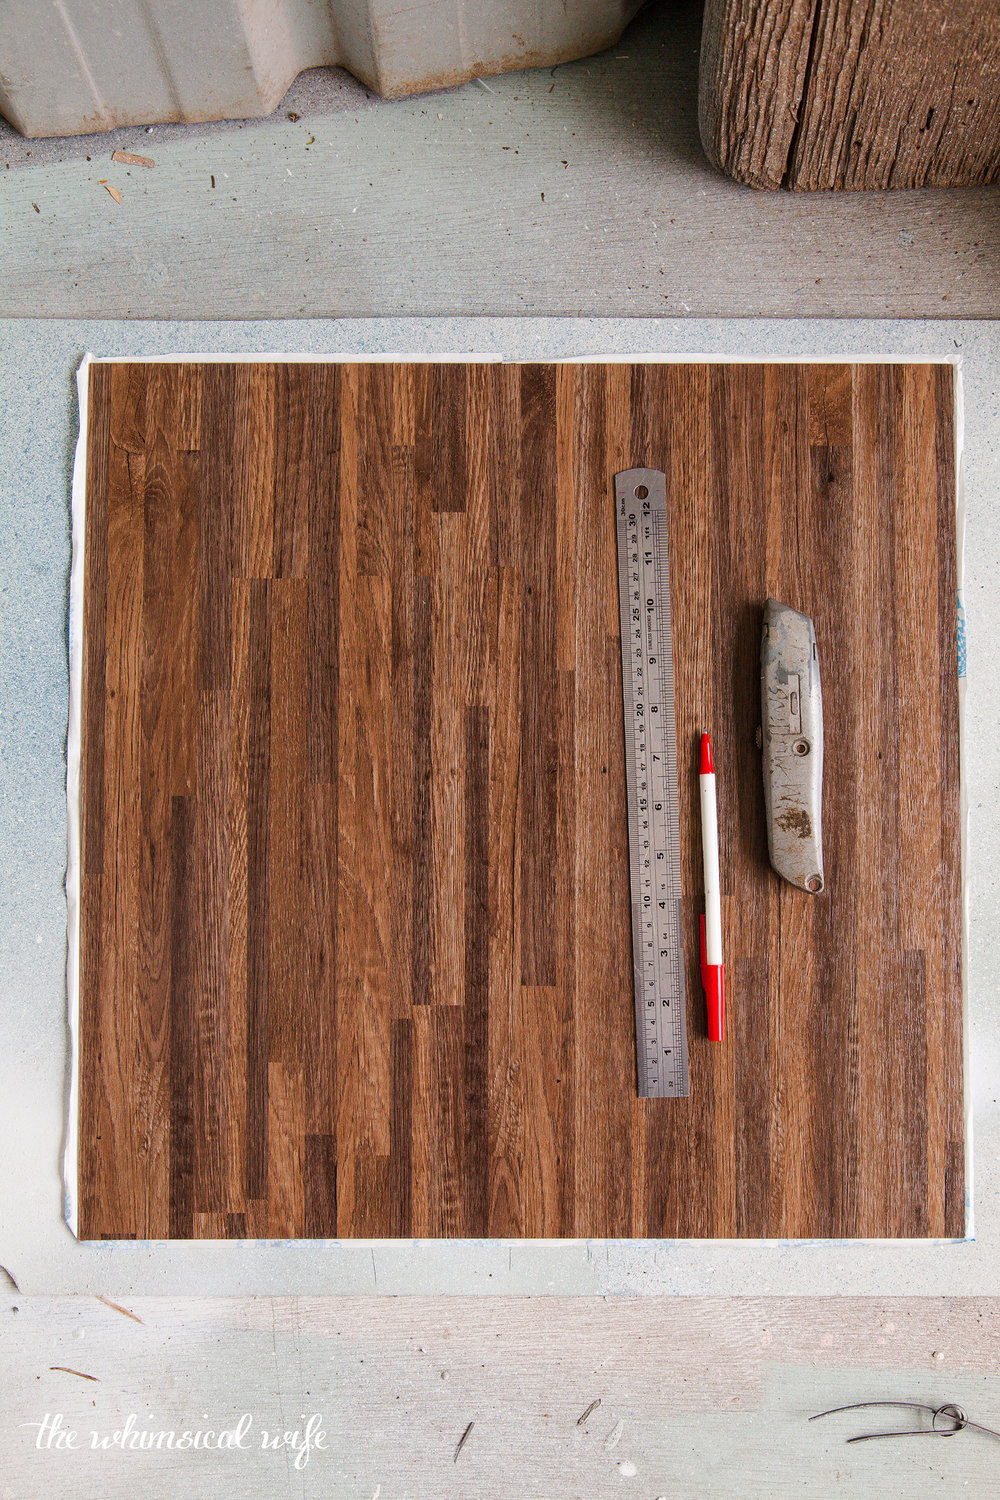
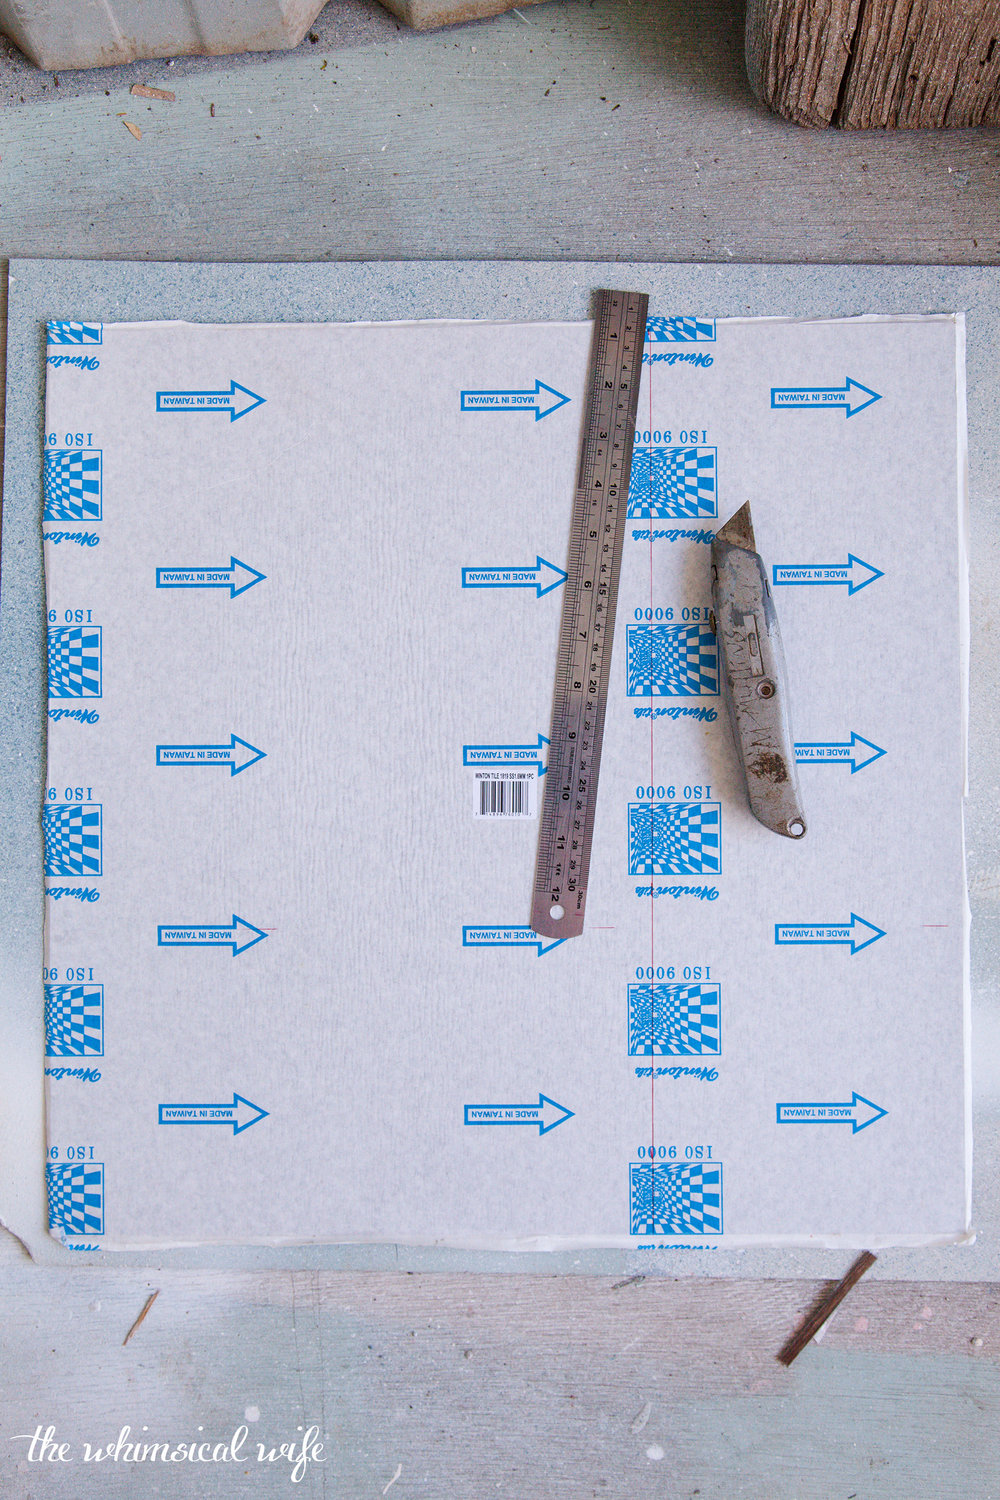
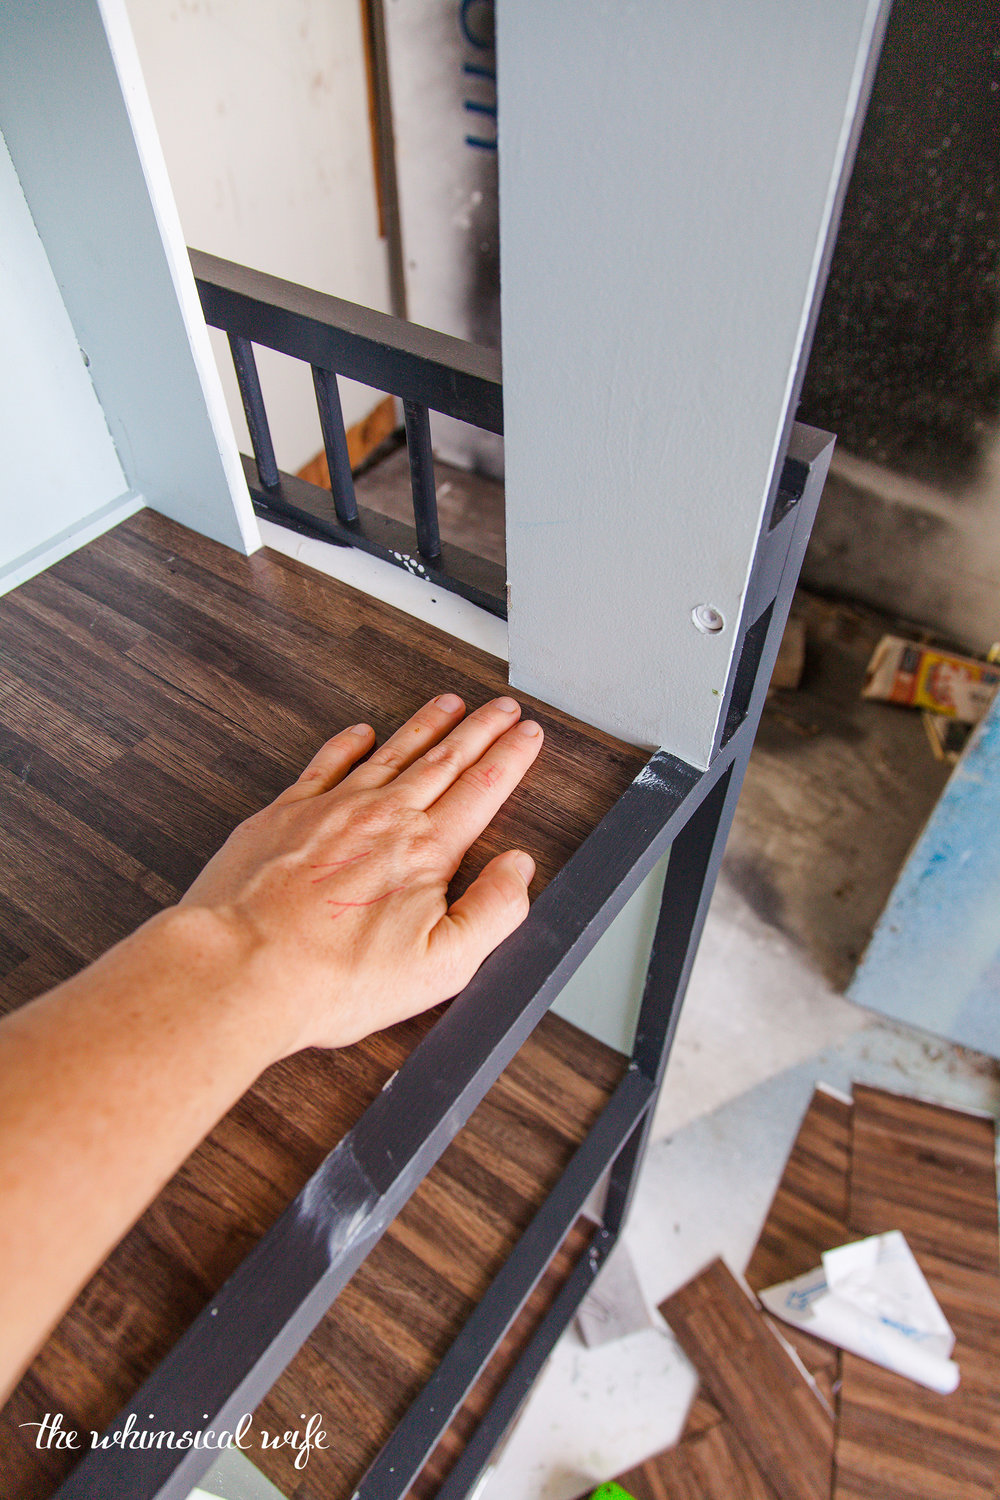
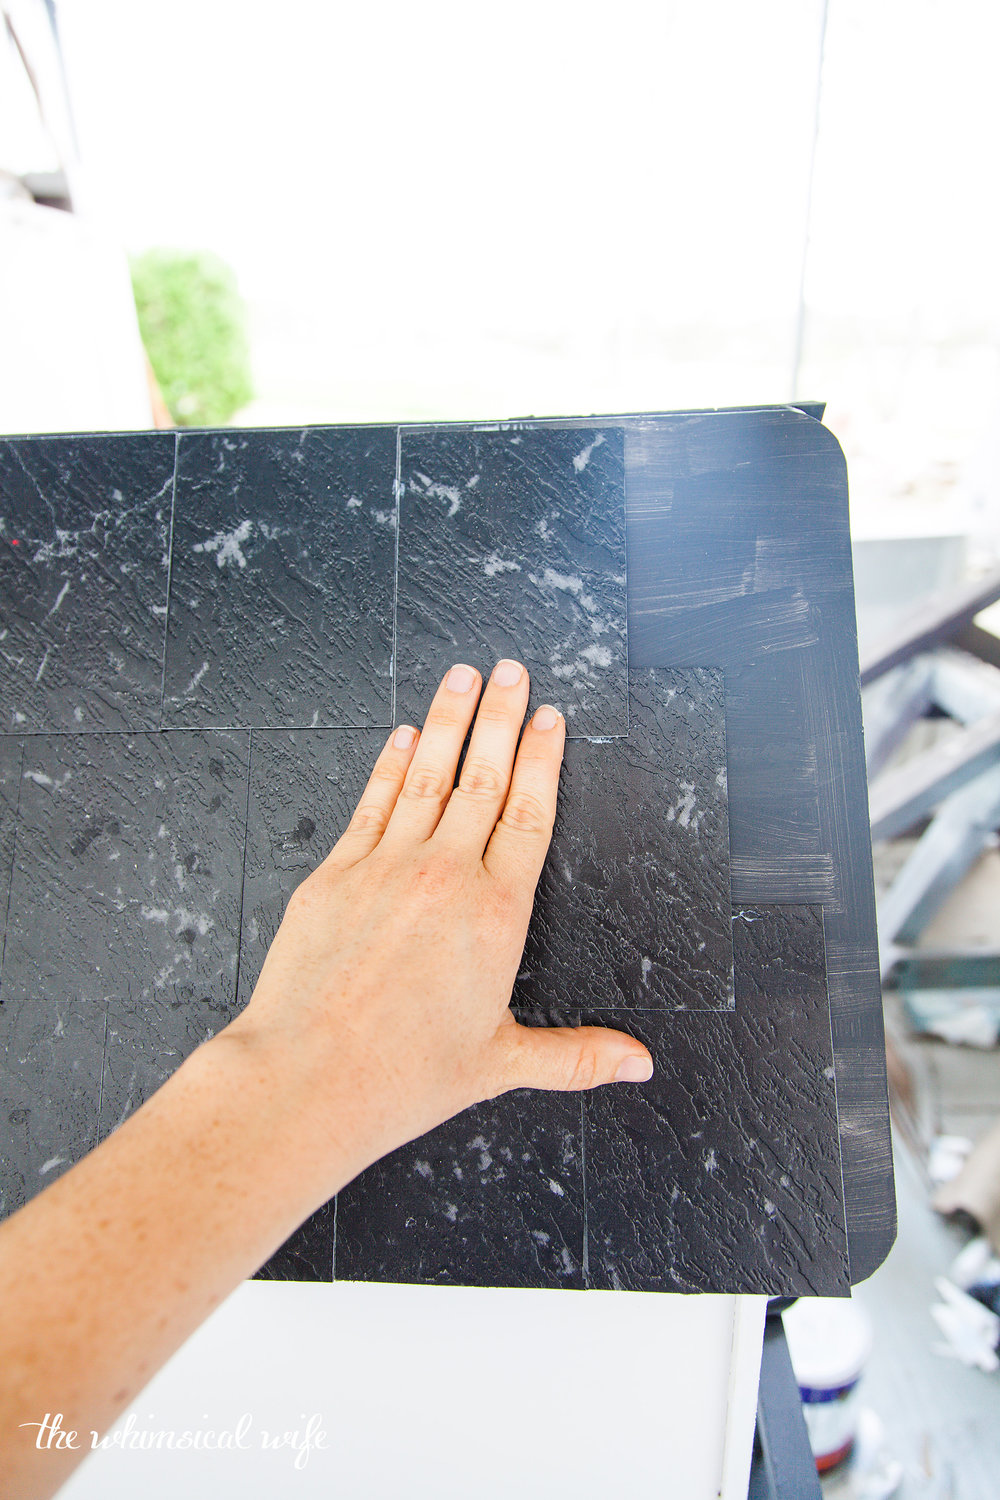
I then started on laying the faux wood flooring in all rooms of the house. I used a 400mm square vinyl floor tile that I was able to get from Bunnings. To lay the flooring I measured each room (twice) for dimensions and then translated that onto the vinyl tile. I measured and marked the rooms on the back of the tile and scored it using a Stanley knife and ruler. I then flipped it over and scored it along the front which then cut through the entire piece of vinyl.


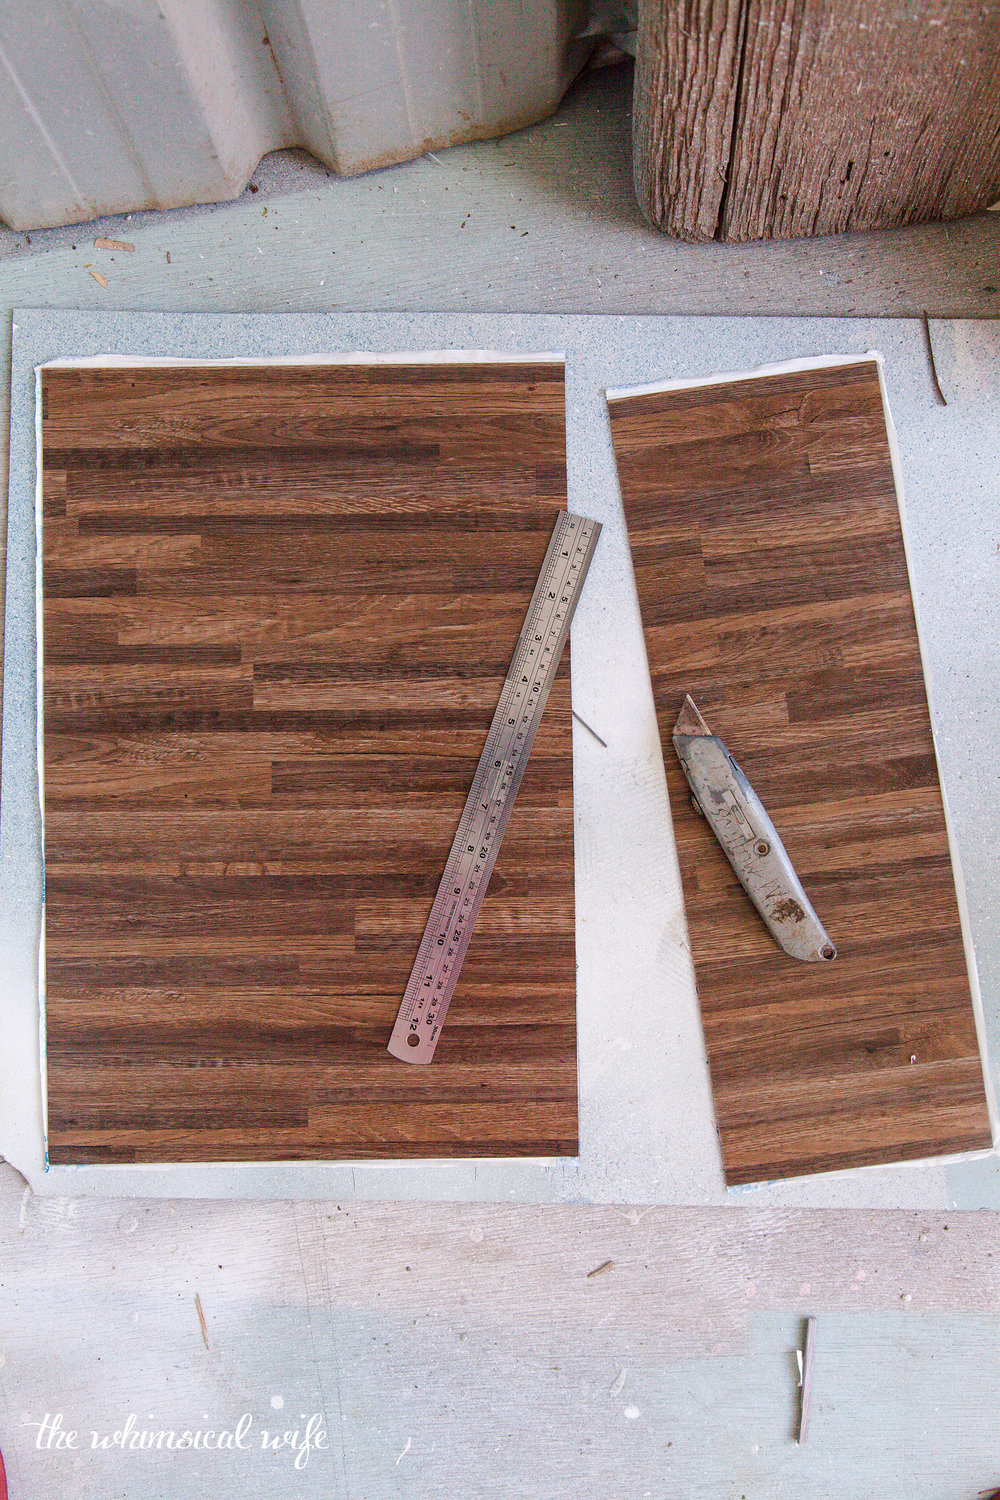

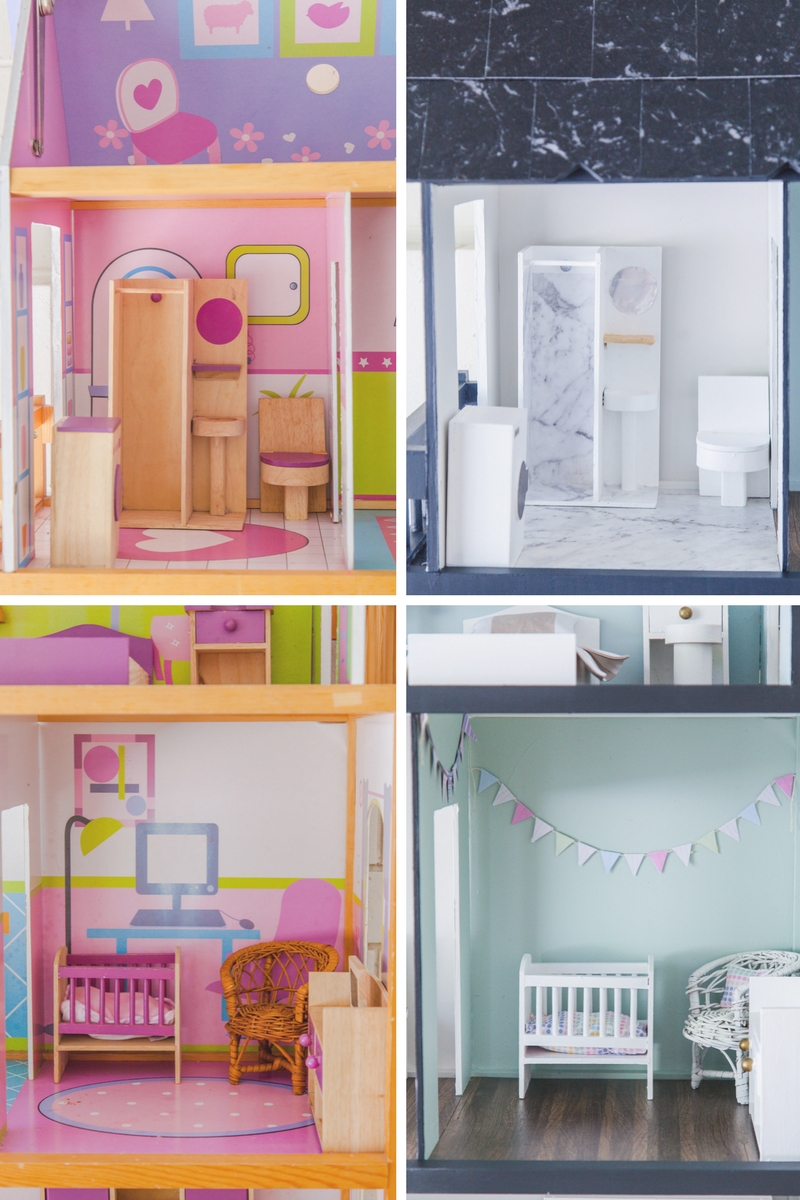
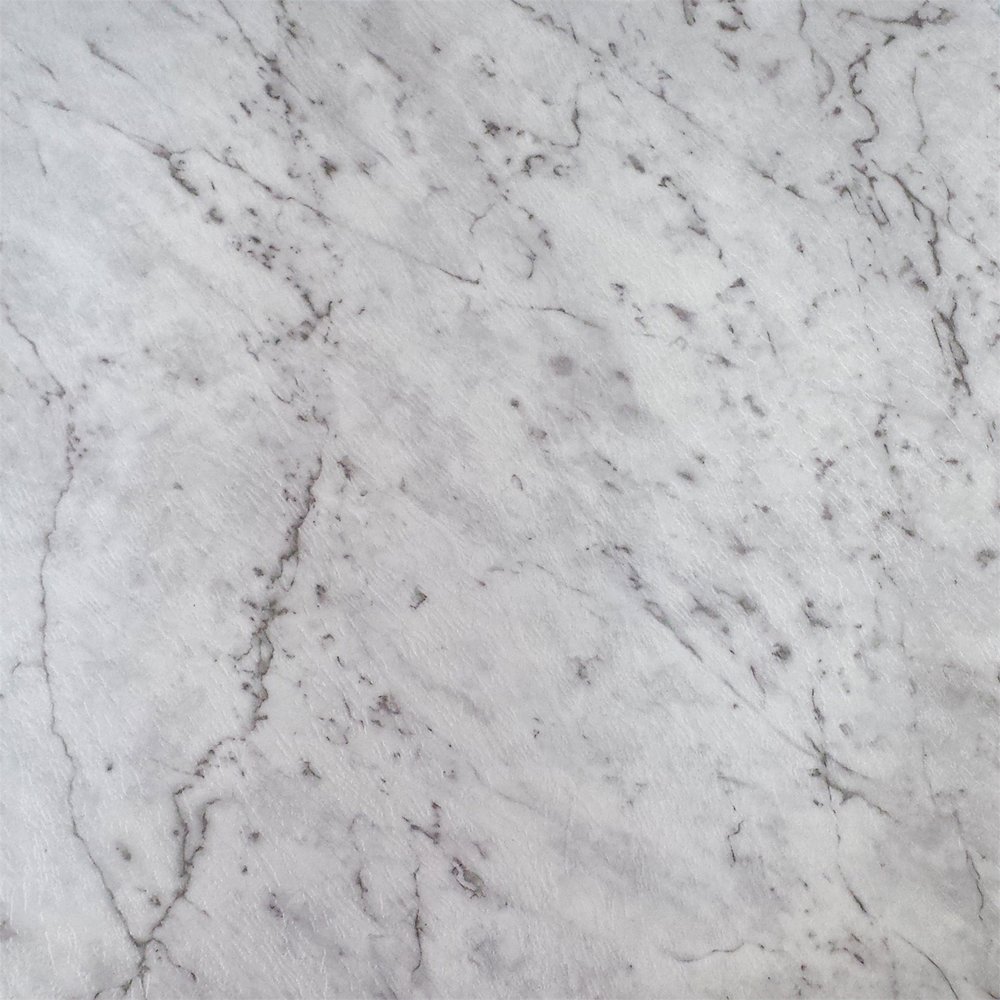
I removed the backing on the tile and fitted the tile into place and pressed firmly to stick it down. It is important to firmly wedge the joining pieces together before pressing into place. This will help the joins disappear and not be obvious. Thankfully I was able to put the joins between the door jams in the two upper stories and in the main living area there is only one join in the middle of the floor. I opted to put a white marble tile on the bathroom floor for something different.

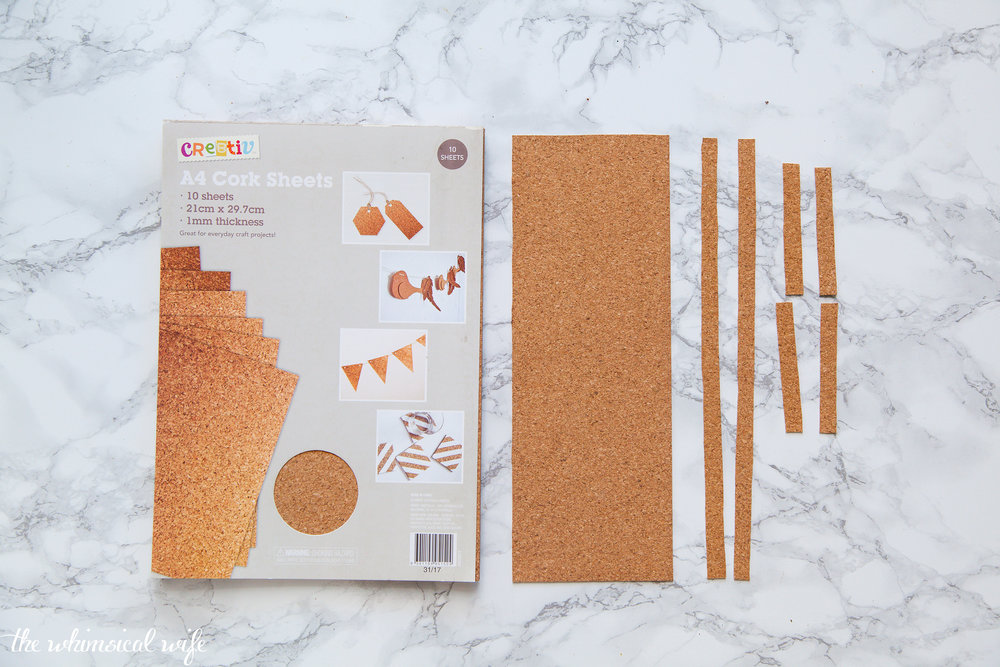
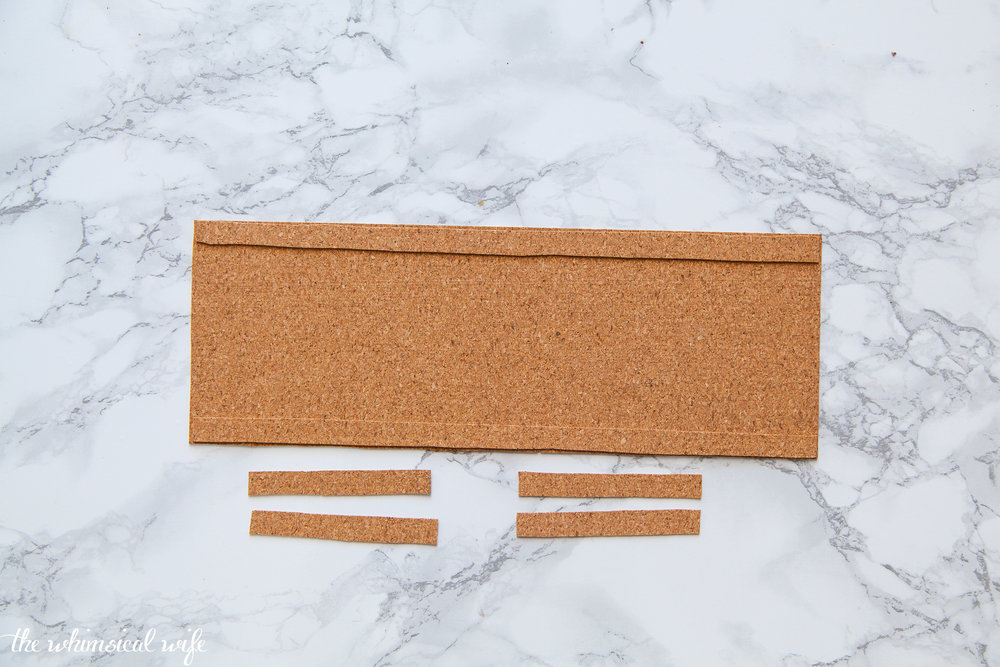
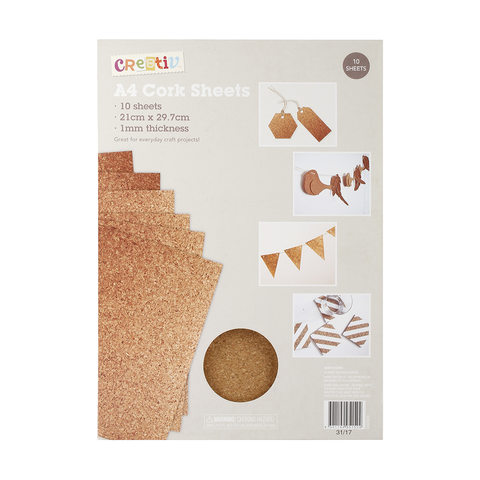
After the flooring was laid my next project was to create the wainscoting for the main living area. I found some A4 cork sheets from Kmart which I used to create the wainscoting out of. After measuring the area I needed to cover in wainscoting I cut out lengths of cork to be used as the base of the wainscoting. Small strips were cut out for batten pieces to create the wainscoting look.


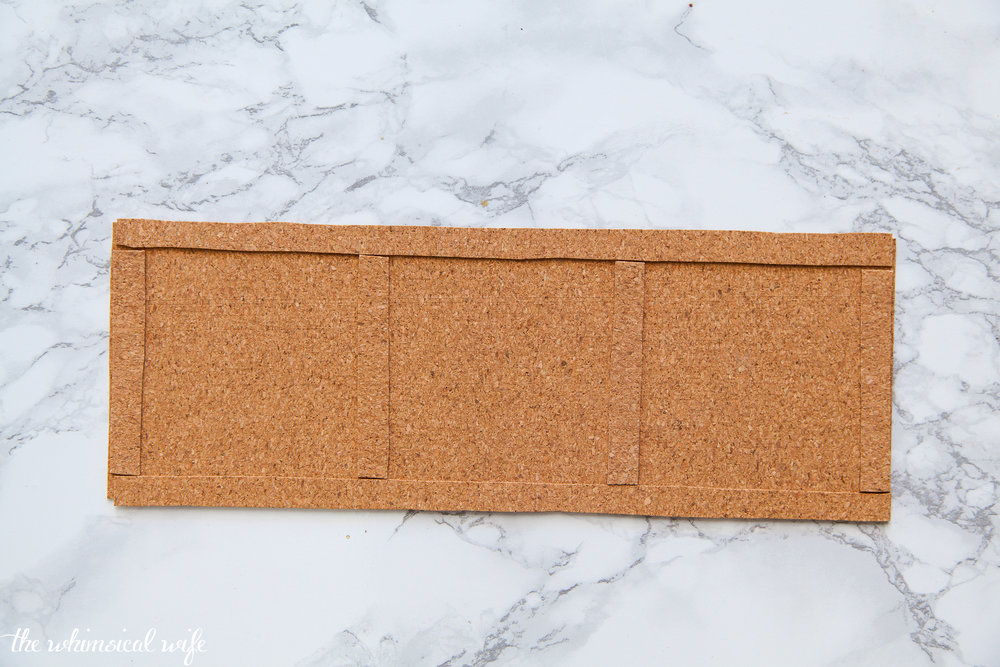

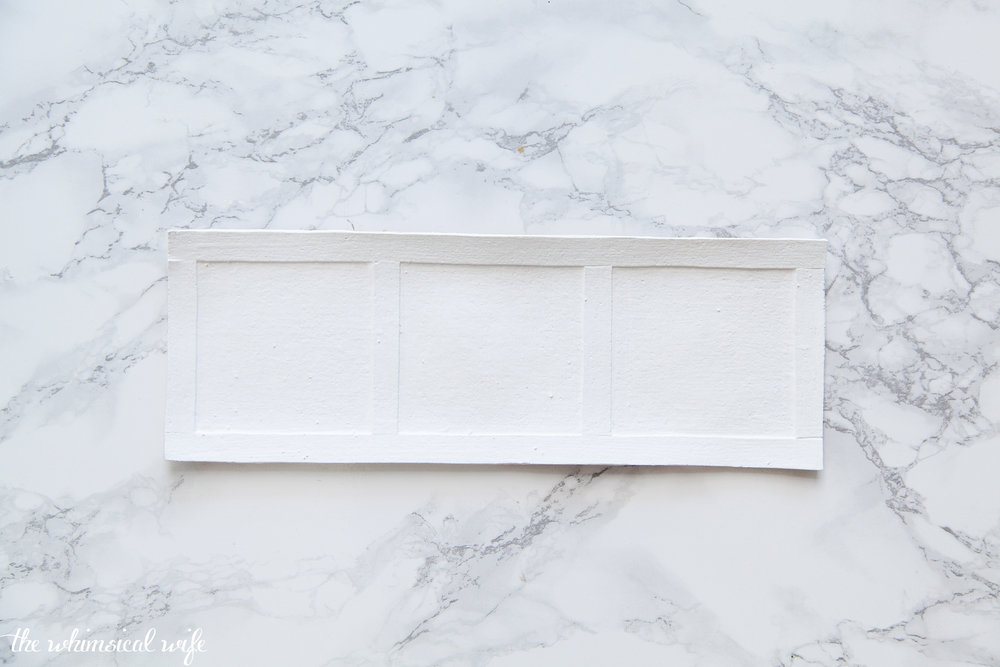

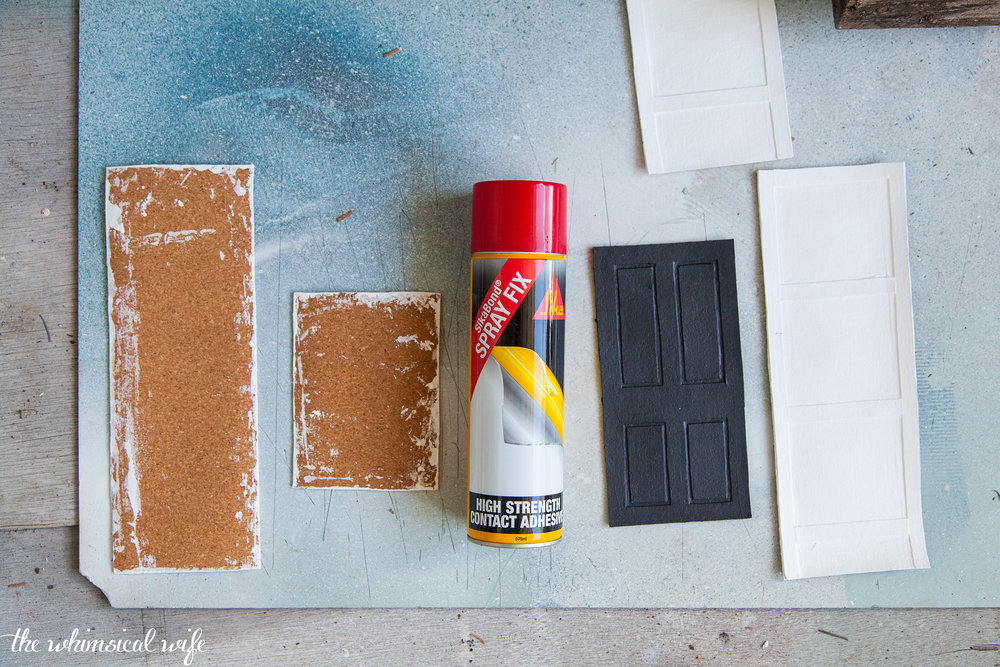
I glued all the battens to the base piece with wood glue and let it dry before applying the VIVID WHITE by DULUX to the wainscoting. It does curl slightly after applying a few coats of paint but when I stuck it to the dollhouse wall with Sika Bond Spray Fix Contact it stayed nice and flat on the wall. I also made a door out of the cork as you can see in the picture below. I painted it in DOMINO by DULUX to correspond with the dark trim around the dollhouse. I explain in my video how I made the door.

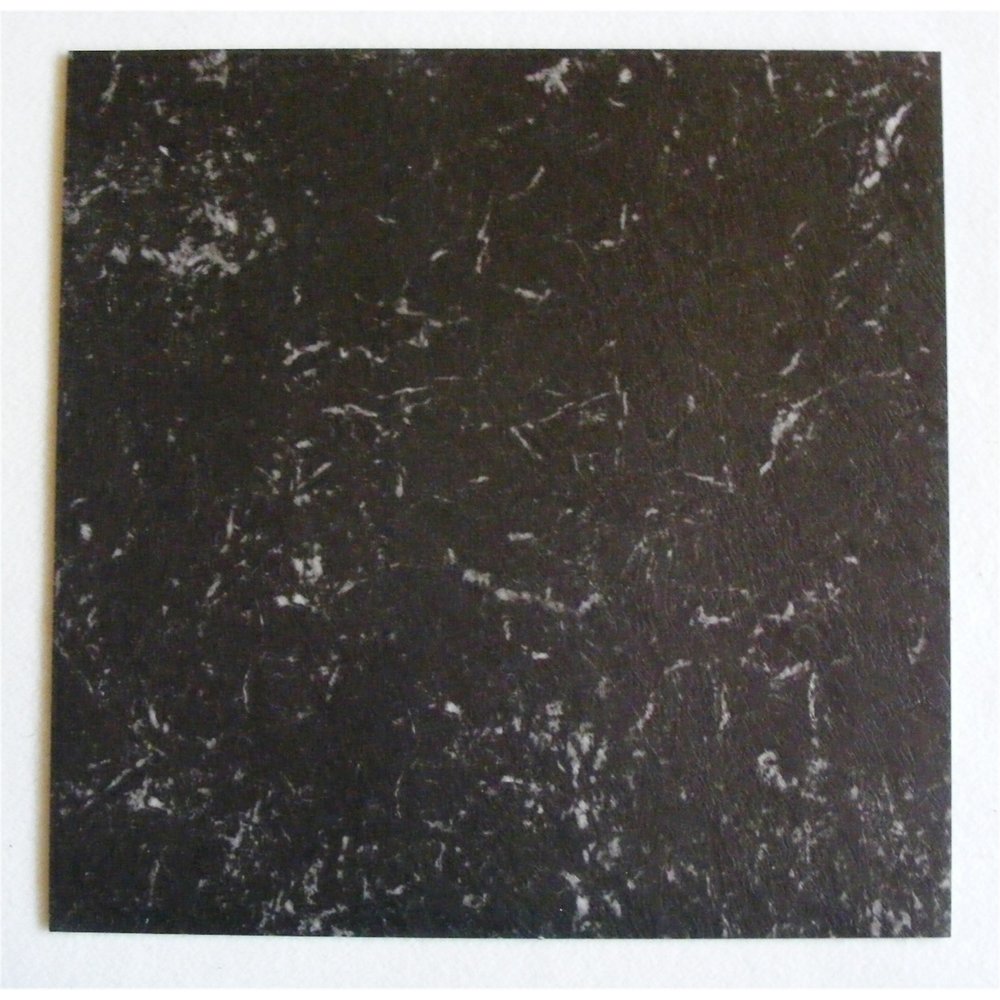
Once the wainscoting was fixed into place I then started to concentrate on the roof of the dollhouse. I cut out roof tiles for the roof using dark vinyl tiles and stuck them on using wood glue. I didn't rely on the sticky backing of the tile for it to stay in place as it probably wouldn't last that long so I used wood glue as well to stick it into place for extra measure. You can see more on the video at the top of the post on how I installed the roof tiles.

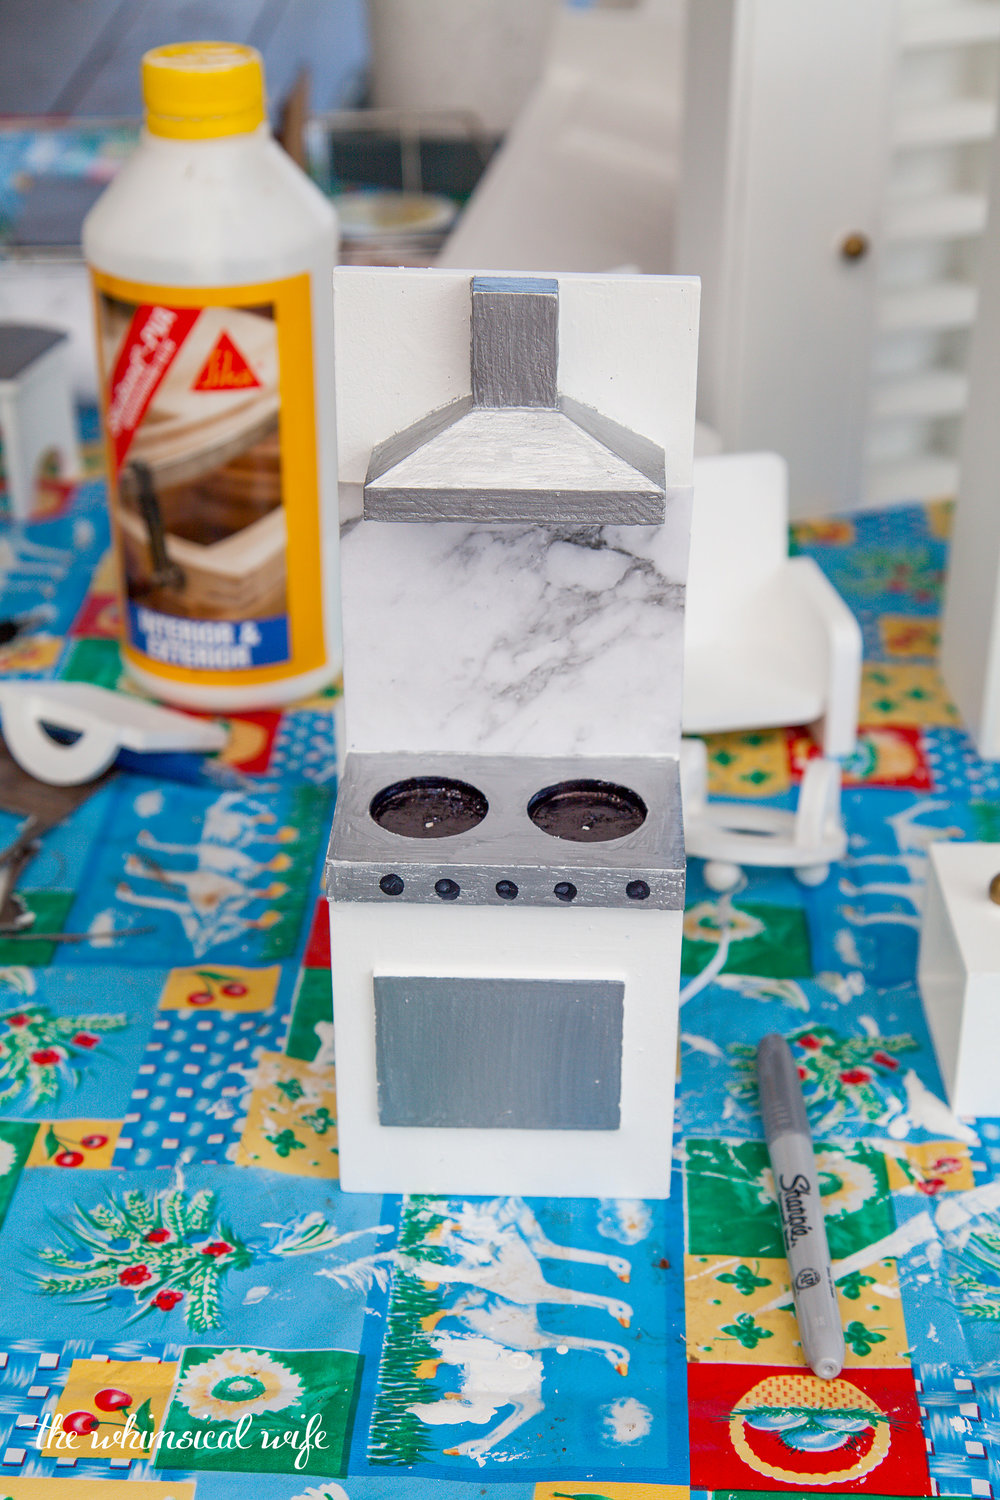
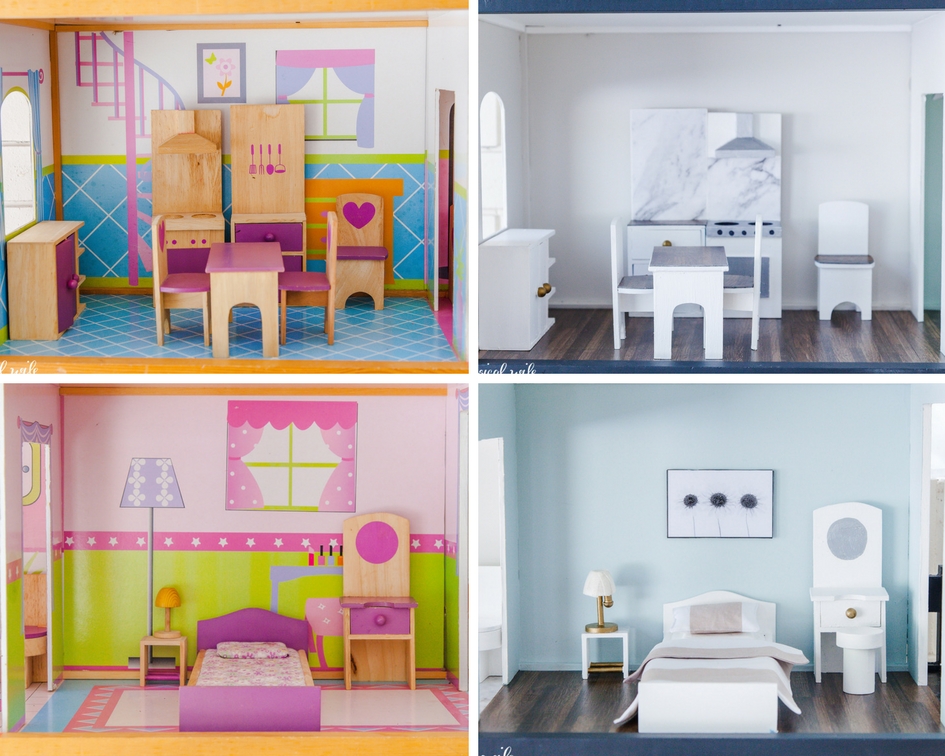
Once the dollhouse itself was finished it was time to move onto the furniture and transform them into something worthy of a modern farmhouse fixer-upper. Each piece was undercoated and then VIVID WHITE by DULUX was applied with a brush to each piece for a crisp white finish. This was really time consuming as I had to do about 2-3 coats of the white on each piece for a nice coverage. I felt like I was painting small pieces of furniture for DAYS.
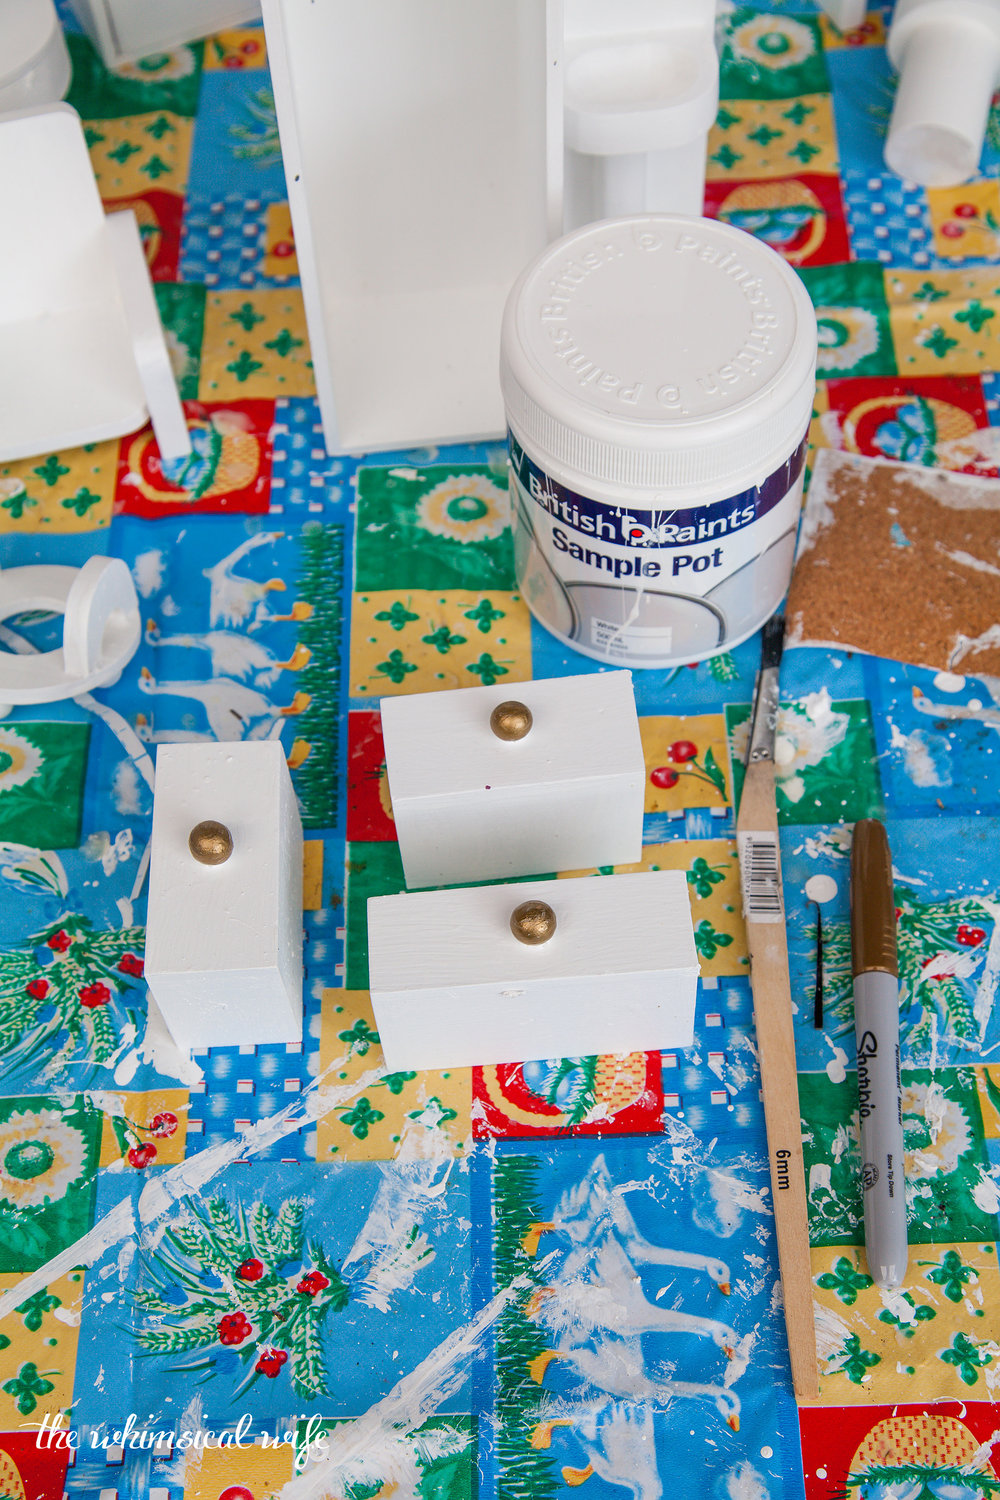

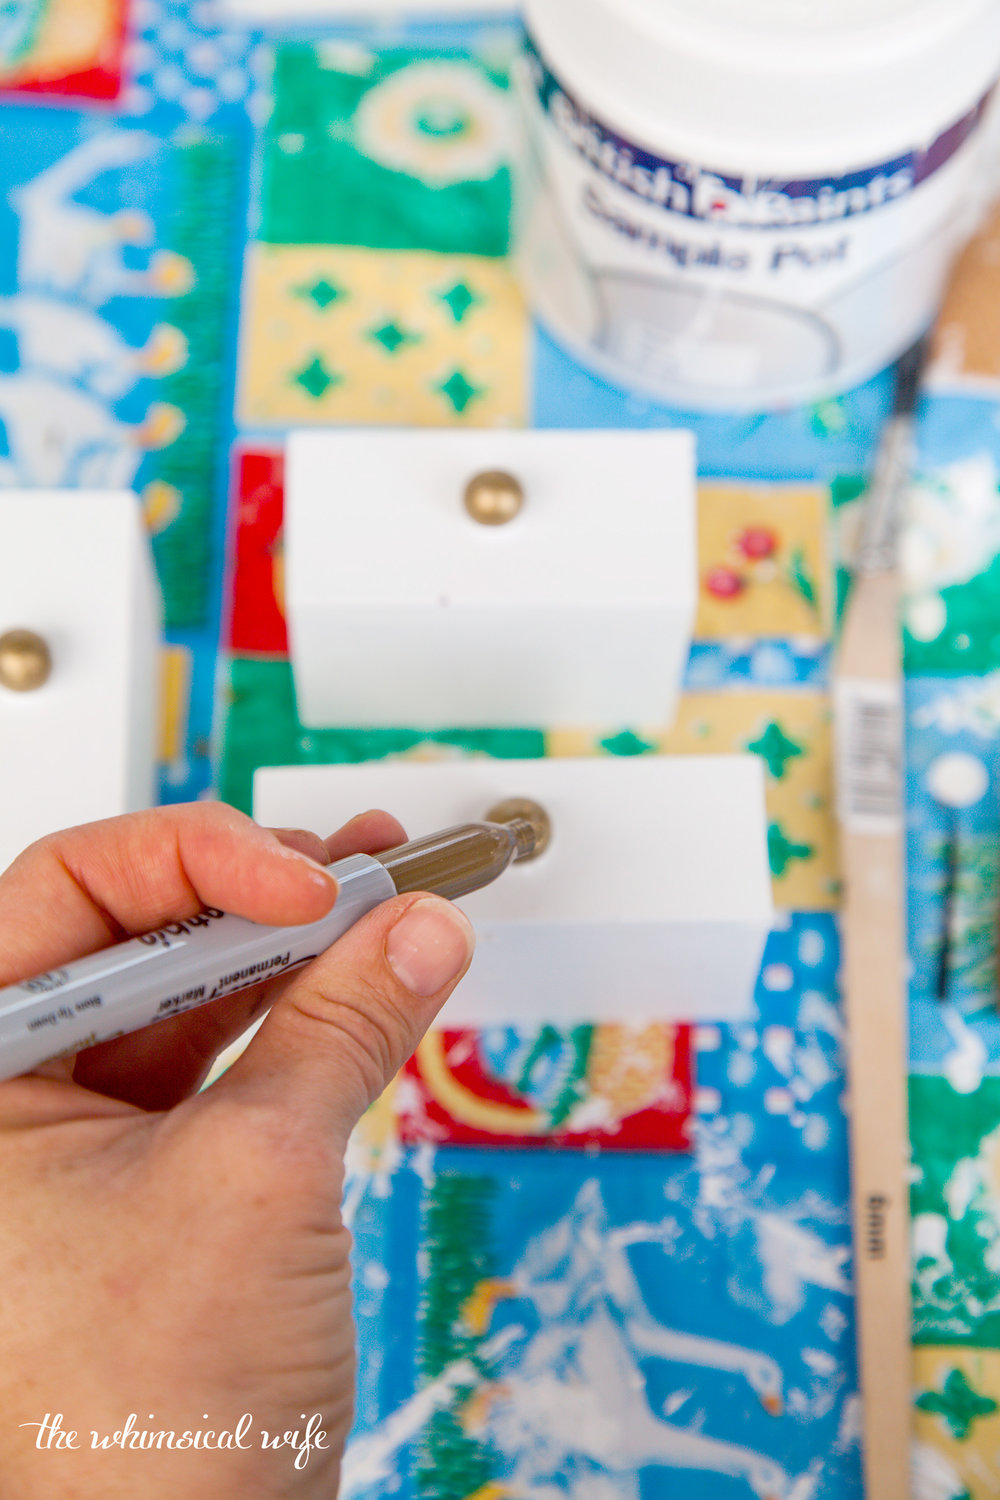

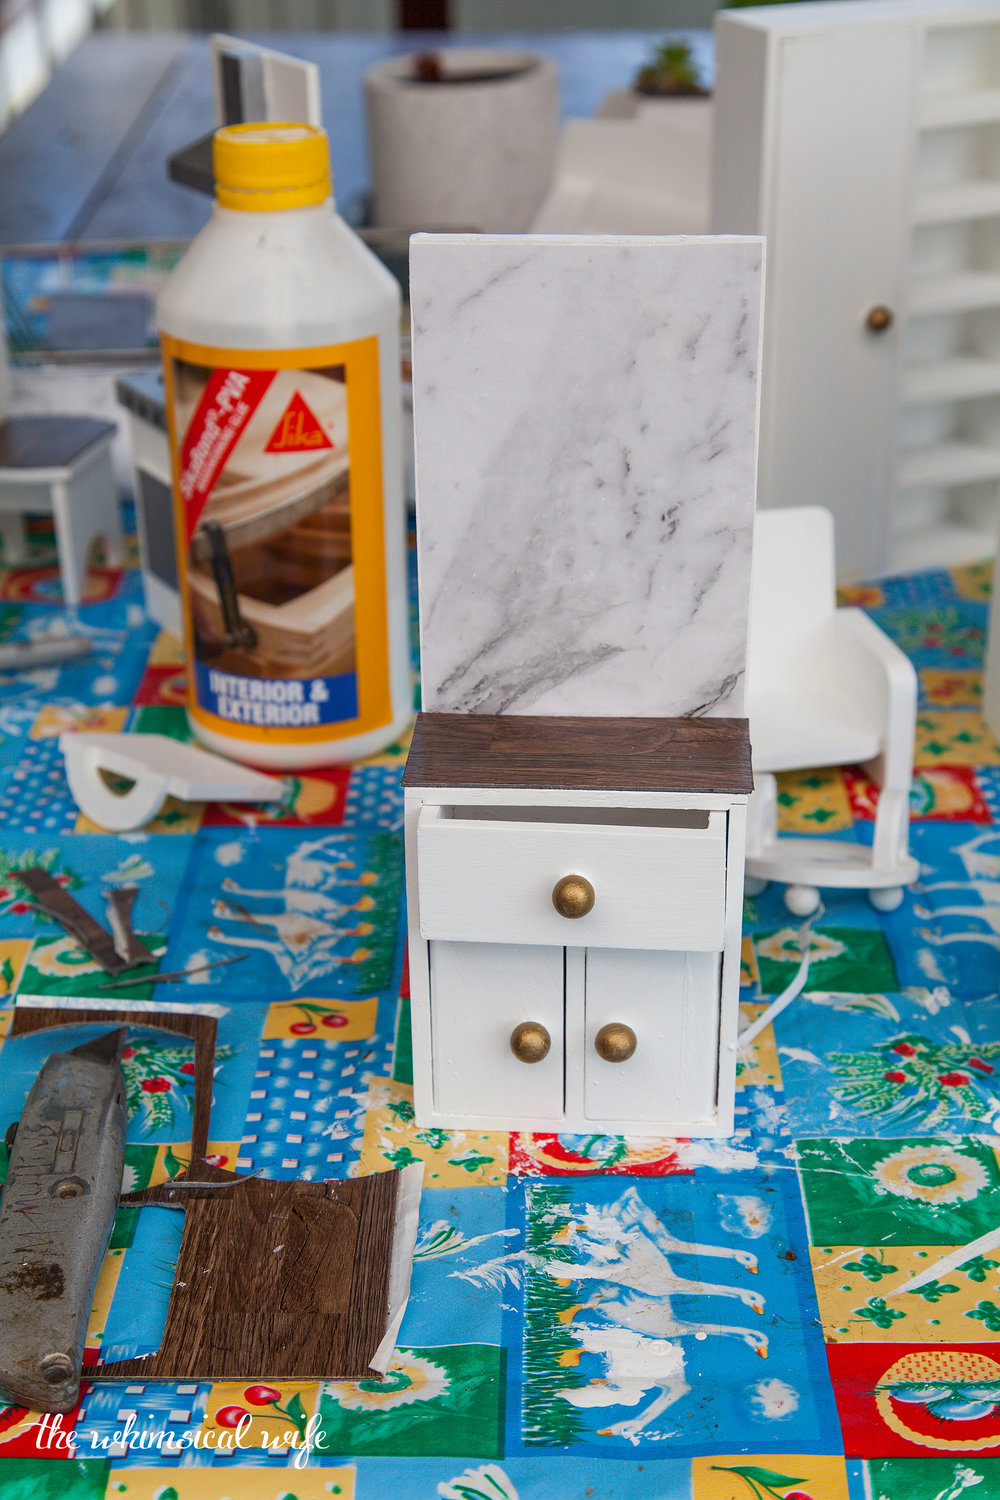
I added detail to each piece using sharpie pens. Gold on the knobs, black for details on the dryer and stove and silver for the range hood and oven etc. I also used offcuts of the faux wood vinyl and added to the table top, chairs and benchtops. I found some faux marble contact paper and stuck that onto the kitchen splashback, in the shower and on the bedside tables for the bedroom. You can see more detail on the video of what I did to transform each piece of furniture.


Once all the furniture was finished I then went on to make some soft furnishings for the furniture. Such as cushions for the couches, mattress covers and a small cushion for the nursery, and quilt covers and cushions for the main bedroom. I intended to make a rug and add some curtains to the house but my time was running out to deliver it so I had to make do with what I had completed. I was like a little girl again putting all the furniture into the house and setting it all up. The kids were napping so I had so much fun moving the furniture in and seeing the final result come together. I think my vision of what I wanted to create came together nicely and I would have loved to add some extra touches but I just ran out of time. That being said she still looks pretty special don't you think? So let's just go and see what it looks like before and after now shall we?


I hope you loved seeing the transformation of this Fixer Upper Style Dollhouse Makeover as much as I had doing it. It had it's ups and downs but looking at it now I am totally in love with it and wished it could have stayed in my home. I know the little girls it went too will love it to pieces. I missed having a dollhouse to tinker with so much that I actually purchased a wooden dollhouse off gumtree. So I can't wait to show you through the process of making over that one too. That being said it's on the bottom of the list of projects that I have to currently give a makeover. I seemed to become a furniture hoarder and have a few pieces of furniture under the house needing some love. So be prepared for some projects coming their way to the blog over the next few months.
Tell me what your favourite room is in the dollhouse makeover? Mine is the main living area with the wainscoting.
Product Details:


Digital discoveries
- Casino En Ligne
- Casino Non Aams
- Slots Not On Gamstop
- Slots Not On Gamstop
- Crypto Casino
- Sites De Paris Sportifs Autorisés En Belgique
- Site De Paris Sportif Belgique
- Meilleur Site De Casino En Ligne Belgique
- Migliori Siti Casino Online
- Casino Non Aams Sicuri
- Casino Online Non Aams
- Crazy Time Live Bonus
- Meilleur Site De Paris Sportif International
- Nouveau Casino En Ligne
- Ufc Paris Sportif
- 稼げるカジノ アプリ
- カジノ バカラ カジノ
- Meilleur Casino En Ligne 2026
- Site De Paris Sportifs
- Tout Nouveau Casino En Ligne
- Casino En Ligne Français
- Casino En Ligne France Légal
- Scommesse In Crypto
- Crypto Scommesse
- Casino Avec Bonus Sans Depot
- คาสิโนคริปโตได้เงินจริง
- Casino Bonus Sans Depot
- Miglior Casino Online Non Aams
- Casino En Ligne France Légal
- Siti Scommesse Non Aams
- Casino Online Non Aams 2026
- Nuovi Casino Italia
- Quel Est Le Meilleur Site De Casino En Ligne En France ?
- 무료슬롯 사이트
- 익명 카지노
- Meilleur Casino En Ligne France
- Nouveaux Casinos En Ligne
- Casino En Ligne
- Meilleur Casino En Ligne
- Nuovi Casino Italiani
- Casinò Non Aams
- Meilleur Casino En Ligne
- Casino En Ligne
- Casino En Ligne France
- Nouveaux Casino En Ligne
- Casino Francais En Ligne
- Migliori Casino Online Italia